You must have spent days or months understanding the project requirements and then actually implementing them through your coding skills. Now, it’s time for the launch but it is always great to have a checklist to not miss out on anything important. So, we are here to bring you a guide for launching your app or making it live on Google Play Store. It has been framed by some of the Best Android Developers who have many years of experience serving the industry so let’s go through the steps one by one and move toward a successful launch.
Prerequisites for a Successful App Launch 0n Google Play Store
There are some things that Android App Developers need to keep ready in their carts before following the steps to publish any application over Play Store. These things would help you present your application in front of prospects in a good manner.
A. Google Play Publisher Account: To publish any app, you need to have a publisher account on Google Play. This account would let you publish and handle all the information regarding your app in the future.
B. Signed APK: If your app has been completed and it’s time for launch then you need to generate a signed APK in Android Studio as Android requires it.
C. App icon: App icon is the logo of your app that users see on their app listing interface. It should be uploaded in 512 x 512 32-bit format which is saved as PNG as any other format is not supported.
D. Feature Graphic: The size has to be 1024 x 500 JPEG or 24-bit PNG with no alpha.
E. Keep both short and long descriptions ready for your app. It should explain your application and its functionalities in brief.
It is important for you to first meet all the prerequisites before proceeding further so that there is no sudden halt comes in the process because you lacking on anything.
Steps to Publish your Android App on Google Playstore:
After gathering all the important information, here are the steps you need to follow.
1. Create Google Developer Account:
To publish your app, you need to first create a Google Developer account on Playstore which would charge you a one-time cost of $25. You can pay the charges through your debit or credit card. The platform allows you to make the payment after you accept the Developer Distribution Agreement. You have to then provide some details such as the Developer’s name that you would like to get displayed on the live app page. Now, before the registration is processed, you have to wait for 2 days. More account information can also be added.
2. Create a Merchant Account:
If your app is paid or you are having any paid features in your app, then you will have to create a Merchant Account. For this, you have to first visit the Google Play Console, go to “Financial” under “Download Reports” and click on Set up your Merchant Account. You then have to enter all the information associated with your business. Your developer’s account gets automatically linked with your Merchant account once you have completed the profile. A merchant account lets you manage your payments and monthly payouts in one place. Also, you can visit your reports through Google Play Developer Console.
3. Create your App:
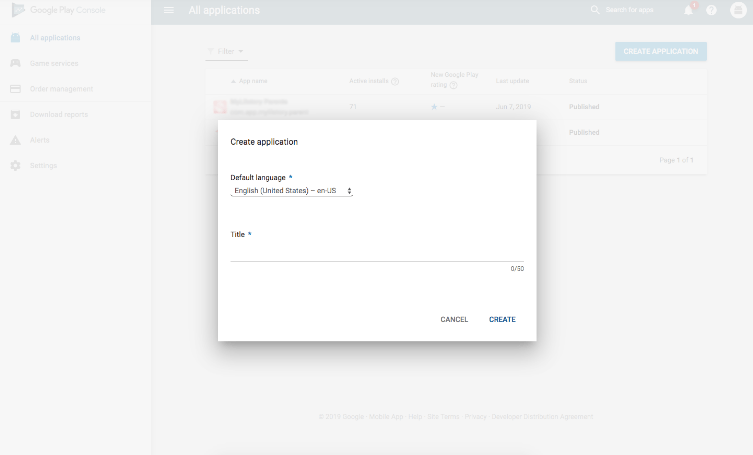
You have to create your app to set up your app’s existence over Playstore. For this,
a. You need to go to ‘All Applications’
b. Click on, ‘Create Application’
c. Choose the default language for your app
d. Enter your App’s title
e. And finally, click on ‘Create’
You can also change your app’s name once it gets published. Once you have created the app, you will be on the Playstore’s entry page.
4. Prepare Store Listing:
You need to now work on how you want your page to look when it goes live. It is the thing that matters the most because your app page would be your salesperson for online people. Do not forget to save the draft here. There are six categories to Store Listings namely, product details, graphic assets, languages and translations, categorization, contact details, and privacy policy.
5. Enter Product Details:
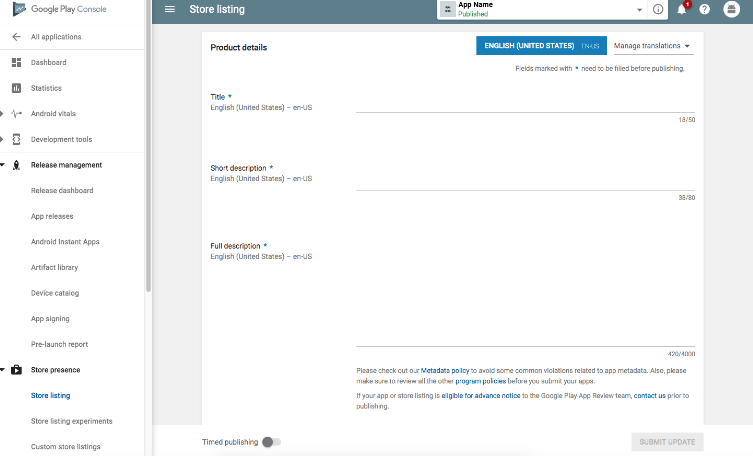
On the product detail page, you have to write things that describe our app perfectly. We will start with the title of the app.
a. Title: Your title would be your app’s name and it should not be more than 50 characters. There is one localized title accepted over one language.
b. Short Description: It is visible when the user lands on your app detail page having a maximum character limit of 80.
c. Full Description: When the user expands the short description, it expands into a full one. The character limit for this is a maximum of 4000 characters.
While writing the title and description of your application you need to keep in your mind that this is the content through which people would relate their requirements with your services. Be easy, and friendly, and keep keywords in your mind as you might have to include them for the App optimization process. You might have to take the help of marketing guys here so that you can simply win over the competition. You have to take care of such factors especially when you have a lot of competitors in the market.
6. Graphic Assets:
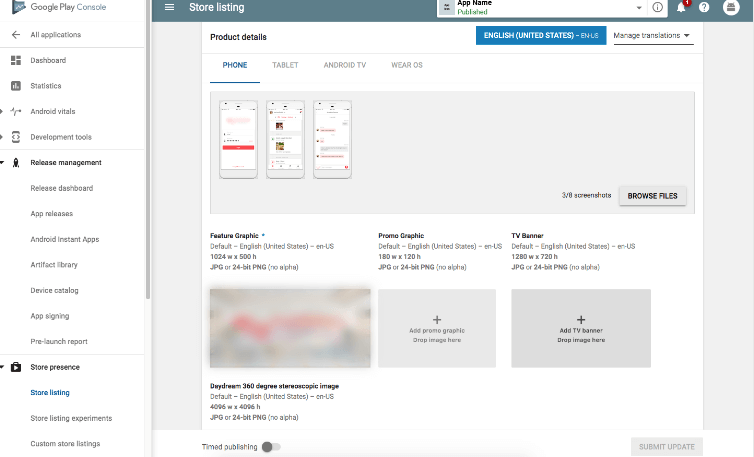
Your app’s graphic assets would be all the media content that you want to publish along with the app. They might be images, screenshots, promotional videos, etc. Feature graphics, images, and an icon of high resolution are the must-have things, the rest you are free to include other media things as well. There are different sets of requirements for the media content that you upload. For example, the app icon has to be 512 x 512 in a 32-bit PNG format.
7. Language and Translations:
Through this tab, you will be able to set up language and translation for your app. You can add up a translation that has to be relevant to the app and its functions.
8. Categorization:
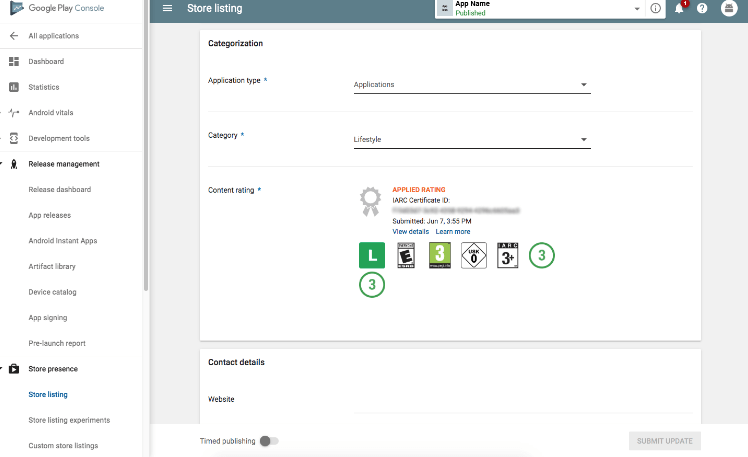
As the name suggests, here you will have to put your app in a category. First, select whether it is a game or an app. Then, choose a category for your app to fall into. Remember to choose the category that is most apt for you so that users can find your application while browsing through a particular category. Examples of categories can be Healthcare, Photography, Beauty, etc. You can add the content rating but it can also be skipped for now.
9. Contact details:
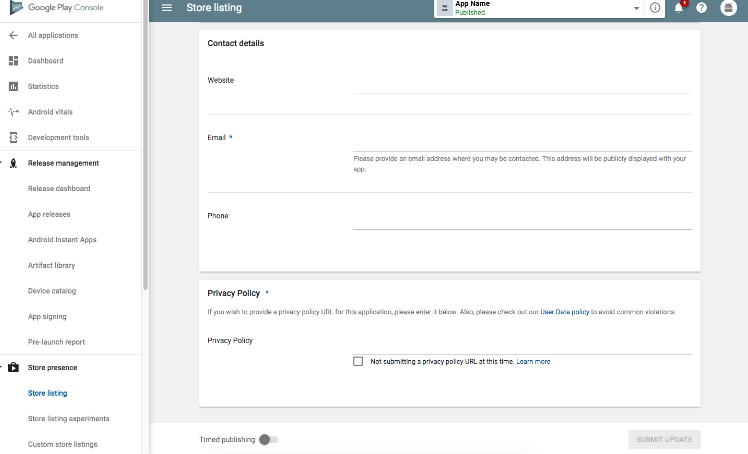
Providing contact details would help your customers reach you whenever they need support. Do not stick to one contact medium, rather let them reach you through your email, website, or maybe contact number. Getting contact details also sets up a sense of trust in the eyes of your customers if they feel anything unreliable about your application. They can simply contact you and clear out any concerns they might be having.
10. Privacy Policy:
Your privacy policies should explain the access permissions it requires from the user’s end. You need to keep your users updated on how that information is being used. Also, it is compulsory to attach a URL i.e. Link to your business privacy policy to your app to ensure that it is working perfectly fine. You need to Save the Draft after completing this step. You can also make certain changes to the provided information before publishing your application.
11. Upload APK:
Uploading APK or Android Package Kit is one of the most crucial steps for an app release. Many methods have been offered by Google to upload APK for the release but before you do so, an app release has to be created. For app release, you just have to select the app that you had created in the third step and locate Release Management and App Releases. You can select how you want your app to be released, whether in close testing form or for public use.
12. Provide Content Rating:
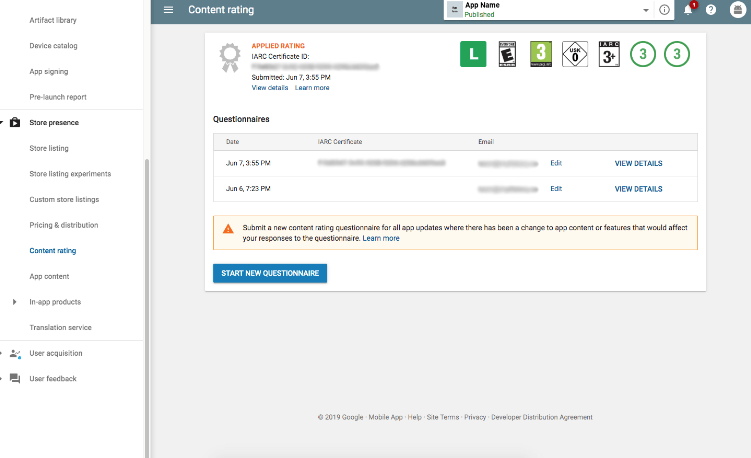
Your next step should be to assign an appropriate app rating by filling out a rating questionnaire. Remember that any misleading information might result in the suspension of the app.
13. Price and Distribution:
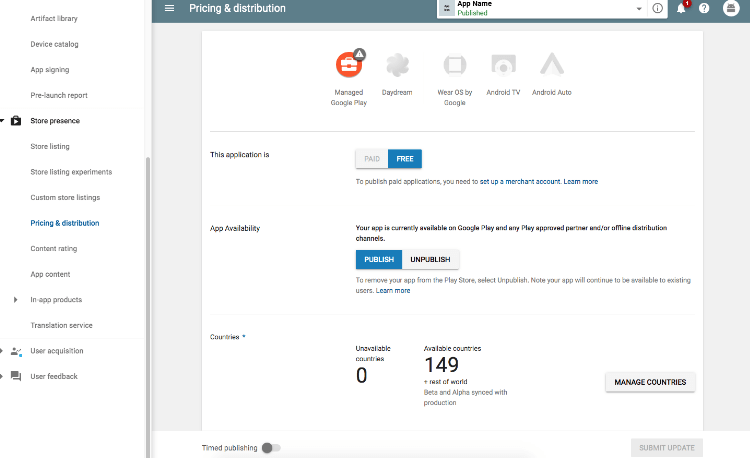
You can select whether you want to keep your app Free or Paid for the users. It has to be noted that a paid app can be turned into a free one but the reverse is not possible.
14. Publishing your App:
If you have completed all the information, go to Review which will take you to “Review and Rollout Release”. Verify all the information that you have provided and once you find it all correct, click on “Confirm Rollout”. It will take your app to the listings for public usage. It would be visible in the countries you have targeted.
Summary
These were the detailed steps for publishing an Android app on Google Play Store. If you would like to get further assistance for the final launch of your application, you can connect with us here. Any queries are highly welcomed in the comment section.
Also, if you are looking for branding solutions or online marketing for your brand then you should check out VerveBranding and Verve Online Marketing today and make your brand stand out.
(Visited 246 times, 2 visits today)












Discussion about this post