









Authentication is a crucial part of your application. Failing to handle your authentication flow with caution can create a lot of problems for your business. In this era of rising security risks on popular websites and apps, it is very important to add multifactor authentication to your application.
Multifactor authentication adds another security layer to your app, helping users to retain their accounts even if their password is compromised. Most of the time, it’s best to add multiple factors of authentication to strengthen the security of your app and protect your users.
Adding a multifactor authentication system to your app from the ground up can be very involved and challenging. Fortunately, Firebase provides a highly secure and intuitive way to implement multifactor authentication in your application. If you’ve previously used Firebase authentication in your application, you just have to extend your codebase to add new authentication factors. It’s that easy.
What you’ll learn in this article
In this article, we are going to discuss how to add multifactor authentication to your Flutter application using Firebase. This post is for beginners, and I describe each step of the process in detail.
If you haven’t used Firebase authentication in your Flutter app before, this guide may be the best resource to learn how to do so. In addition to learning about basic authentication flow, you’ll also find out how to add multifactor authentication using Firebase.
This guide will be very beginner-friendly and in depth. You should avoid skipping steps and make sure to read until the end.
You can find the final version of the code on my GitHub. Clone it and run it on your device to see the final result.
Add Firebase to your Flutter project
First, go to the Firebase console and create a new project for your application. Then click on the Flutter icon on the home page. This will guide you through the steps for adding Firebase to your Flutter app.
Complete these steps and go to the next section. If you’re confused and unable to follow the above steps, here’s a brief explanation of how to add Firebase to your Flutter app.
First, download and install the Firebase CLI to your device. I have described the installation process in detail in our blog article on how to use Firebase emulator with Flutter. Please follow this guide step by step.
After installing Firebase CLI in your application, create a new Flutter project. If you already have a Flutter project, navigate to the project directory using your terminal.
Install and activate the Flutterfire CLI on your device. This CLI handles all the heavy lifting in terms of adding and configuring Firebase projects in Flutter.
dart pub global activate flutterfire_cli
Now, in the root of your project, run the following command to register the Flutter app with the Firebase project you created previously.
flutterfire configure --project=<Add your project ID> -y
After the command has been successfully completed, a new file lib/firebase_options.dart is generated in your Flutter project. You must use this app to configure Firebase in your Flutter app.
Now add two Firebase dependencies, firebase_core and firebase_auth, in your Flutter application. Run the following command in your project root to install these dependencies.
dart pub add firebase_core firebase_auth
Next, import these dependencies in your main.dart file, and configure Firebase in your Flutter app.
import 'package:flutter/material.dart';
import 'package:firebase_auth/firebase_auth.dart';
import 'package:firebase_core/firebase_core.dart';
import './firebase_options.dart';

Future<void> main() async {
  WidgetsFlutterBinding.ensureInitialized();
  await Firebase.initializeApp(
    options: DefaultFirebaseOptions.currentPlatform,
  );
  runApp(
    const MultiAuth(),
  );
}
As you can see in the above snippet, I am using the DefaultFirebaseOptions.currentPlatform method from the firebase_options.dart file generated by flutterfire_cli.
Email password authentication using Firebase in Flutter
Email password authentication is the most basic form of authentication. Despite this, it’s the most widely used type of authentication, especially on website login forms.
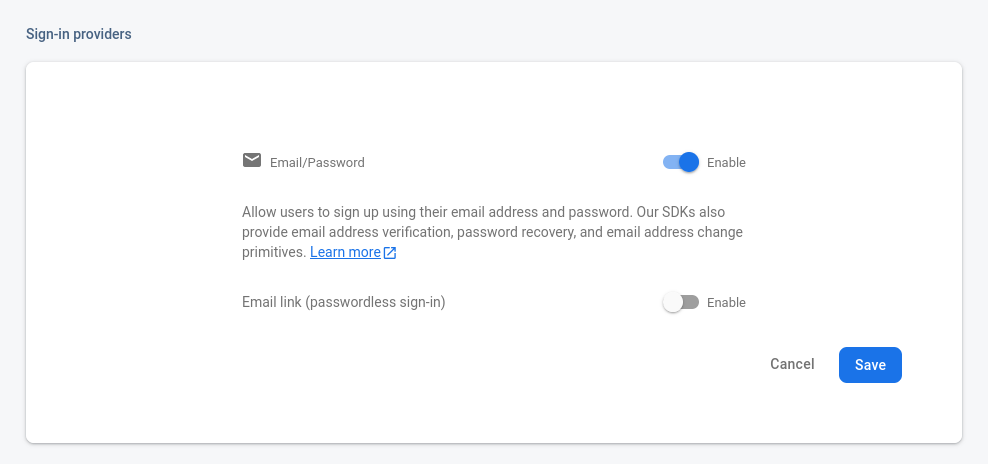
Before proceeding any further, go to your Firebase console and open the authentication page. Then click on the Email/Password button and enable email password authentication in your Firebase project.
To get the email and password from the user, we need to have two TextFields and two respective TextEditingControllers in our Flutter app.
late final TextEditingController _emailController;
late final TextEditingController _passwordController;

@override
void initState() {
  _emailController = TextEditingController();
  _passwordController = TextEditingController();
  super.initState();
}

@override
void dispose() {
  _emailController.dispose();
  _passwordController.dispose();
  super.dispose();
}
Make sure to dispose of these TextEditingControllers using the dispose method after you assign them to your application.
Now assign these controllers in their respective TextFields.
  @override
  Widget build(BuildContext context) {
    return Scaffold(
      body: Column(
        children: [
          TextField(
            controller: _emailController,
          ),
          TextField(
            controller: _passwordController,
          ),
        ],
      ),
    );
  }
To initiate the user registration process using email and password, add an ElevatedButton in your app. When the user presses this button, use the createUserWithEmailAndPassword method of the FirebaseAuth instance to register them in Firebase.
ElevatedButton(
  onPressed: () async {
    try {
      await FirebaseAuth.instance
        .createUserWithEmailAndPassword(
           email: _emailController.text.trim(),
           password: _passwordController.text.trim());
    } on FirebaseAuthException catch (e) {
      if (e.code == "weak-password") {
        print('The password provided is too weak.');
      } else if (e.code == "email-already-in-use") {
        print('An account already exists for that email.');
      }
    } catch (e) {
      print(e);
    }
  },
  child: const Text("Submit"),
),
In the above snippets, I wrap the FirebaseAuth.instance.createUserWithEmailAndPassword method inside the try/catch block. Now if there are some issues with the registration process, you can catch the error in the catch block. In addition to this, I have added another catch block to intercept FirebaseAuthExceptions to debug any authentication exception issues and give the user useful feedback.
User email verification using Firebase authentication
If everything goes correctly, your user can now be registered in your application successfully. You can listen to any user authentication state changes using the authStateChanges method of the FirebaseAuth instance. The authStateChanges method returns a stream you can subscribe to in order to listen to any changes in the user authentication state.
late final StreamSubscription _firebaseStreamEvents;

@override
void initState() {
  _firebaseStreamEvents =
    FirebaseAuth.instance.authStateChanges().listen((user) {
    print(user);
  });
  super.initState();
}

@override
void dispose() {
  _firebaseStreamEvents.cancel();
  super.dispose();
}
Once you subscribe to the stream in a widget, make sure to cancel the stream subscription using the dispose method.
When a user is successfully registered in the application, a new User is emitted from the authStateChanges stream. You can listen to this event and send a verification email to the recently registered user.
_firebaseStreamEvents =
  FirebaseAuth.instance.authStateChanges().listen((user) {
    print(user);
    if (user != null) {
      user.sendEmailVerification();
    }
  }
);
Now the registered user receives a verification email from the Firebase in their email address. During development, the verification email usually goes to the spam folder. Check your email spam folder if you haven’t gotten any email from Firebase after invoking the user.sendEmailVerification function.
Prerequisites for adding multifactor authentication in Firebase
A new event emits from the Firebase authStateChanges stream when a user verifies their email. You can listen to this event and redirect the user to the multifactor authentication page. On the multifactor authentication page, you collect the user’s phone number to add as the second authentication factor.
_firebaseStreamEvents =
  FirebaseAuth.instance.authStateChanges().listen((user) {
    if (user != null) {
      if (user.emailVerified) {
        Navigator.of(context).push(
          MaterialPageRoute(
            builder: (context) => const MultiAuthPage(),
          ),
        );
      } else {
        user.sendEmailVerification();
      }
    }
  }
);
Add multifactor authentication in Flutter using Firebase
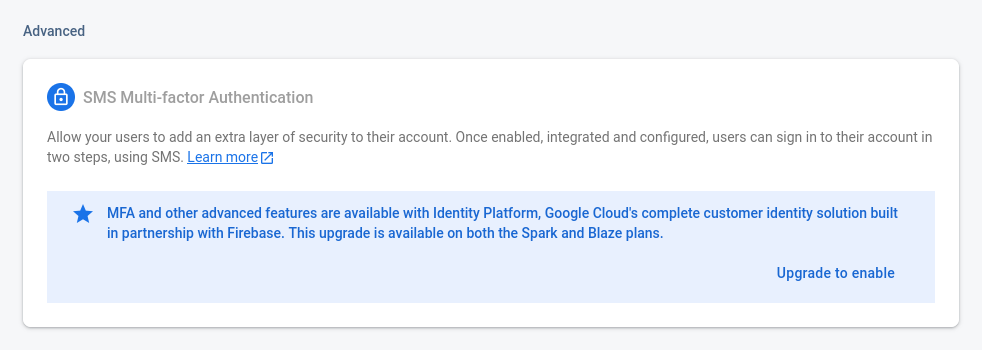
To add multifactor authentication in your Flutter app with Firebase, first, go to the Firebase console. Navigate to the Authentication section. Now you can see the SMS multifactor authentication tab. Click on the Upgrade to enable button.
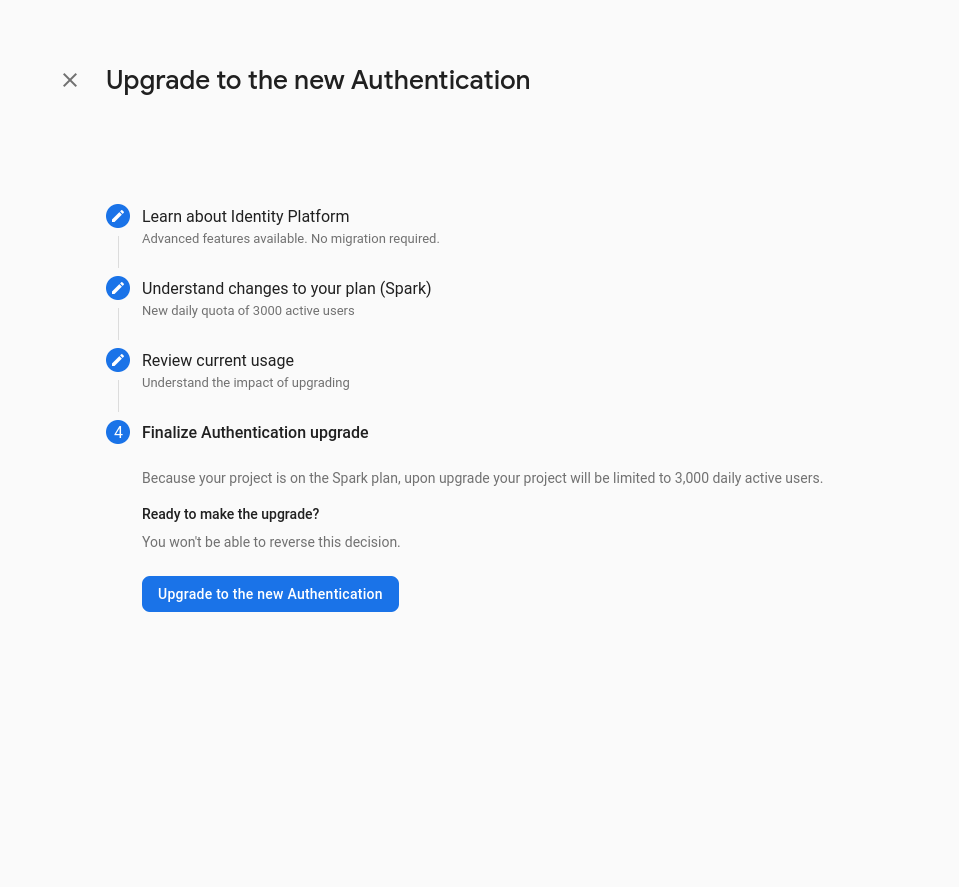
A guided pop-up will appear regarding Firebase multifactor authentication. Read it carefully and click on the Upgrade to the new authentication button.
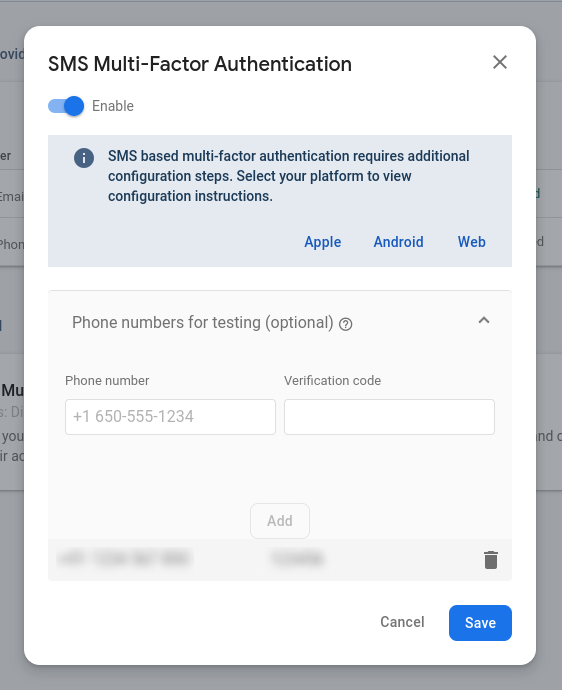
Now, inside the SMS multifactor authentication tab, you can enable the Firebase multifactor authentication process. You can also add some dummy phone numbers with verification codes for testing purposes.
In the Flutter application, I am using a TextField and a respective TextEditingController to get the phone number from the user. I am also adding an ElevatedButton to start the multifactor authentication flow.
late final TextEditingController _phoneNumberController;

@override
void initState() {
  _phoneNumberController = TextEditingController();
  super.initState();
}

@override
void dispose() {
  _phoneNumberController.dispose();
  super.dispose();
}

@override
Widget build(BuildContext context) {
  return Scaffold(
    body: Column(
      children: [
        TextField(
          controller: _phoneNumberController,
        ),
        ElevatedButton(
          onPressed: () async {},
          child: const Text("Submit"),
        ),
      ],
    ),
  );
}
To start a multifactor authentication process, first, acquire a MultiFactorSession from the FirebaseAuth instance.
onPressed: () async {
  MultiFactorSession session =
  await FirebaseAuth.instance.currentUser!.multiFactor.getSession();
},
Now, use this session inside the verifyPhoneNumber method of the FirebaseAuth instance, along with the user’s phone number.
final auth = FirebaseAuth.instance;
await auth.verifyPhoneNumber(
  multiFactorSession: session,
  phoneNumber: _phoneNumberController.text.trim(),
  verificationCompleted: (_) {},
  verificationFailed: (_) {},
  codeSent: (String varificationID, int? resendToken) async {
    String? smsCode = await getSmsCodeFromUser(context);
    if (smsCode != null) {
      final credential = PhoneAuthProvider.credential(
        verificationId: varificationID,
        smsCode: smsCode,
      );
      try {
        await user!.multiFactor.enroll(
PhoneMultiFactorGenerator.getAssertion(credential));
      } catch (e) {
          print(e);
        }
      }
    },
    codeAutoRetrievalTimeout: (_) {},
);
In the above code snippets, you can see that I am using the getSmsCodeFromUser(context) function to get the SMS code from the user. This function opens an AlertDialog to enter the SMS code and return the code input to use in our multifactor authentication process.
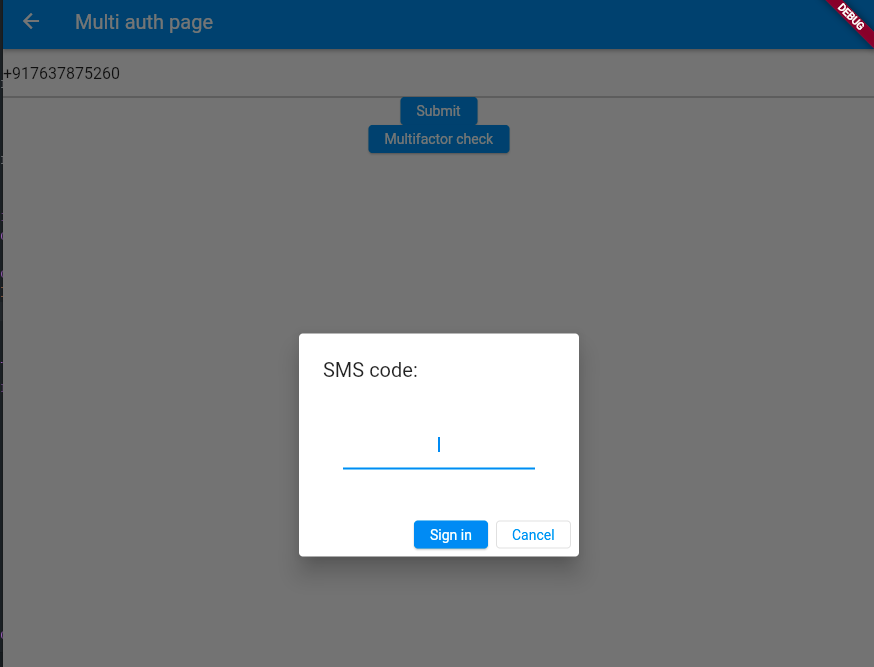
Future<String?> getSmsCodeFromUser(BuildContext context) async {
    String? smsCode;

    // Update the UI - wait for the user to enter the SMS code
    await showDialog<String>(
      context: context,
      barrierDismissible: false,
      builder: (context) {
        return AlertDialog(
          title: const Text('SMS code:'),
          actions: [
            ElevatedButton(
              onPressed: () {
                Navigator.of(context).pop();
              },
              child: const Text('Sign in'),
            ),
            OutlinedButton(
              onPressed: () {
                smsCode = null;
                Navigator.of(context).pop();
              },
              child: const Text('Cancel'),
            ),
          ],
          content: Container(
            padding: const EdgeInsets.all(20),
            child: TextField(
              onChanged: (value) {
                smsCode = value;
              },
              textAlign: TextAlign.center,
              autofocus: true,
            ),
          ),
        );
      },
    );

    return smsCode;
  }
This code snippet is taken from this Flutter GitHub repository example.
Sign in a user using multifactor authentication
At this point, we have registered a user using Firebase multifactor authentication in our Flutter application. Now let’s see how to sign in a user using multifactor authentication.
First, log in a user using the signInWithEmailAndPassword method of the FirebaseAuth instance. Then catch the FirebaseAuthMultiFactorException. Here, you can get a resolver from the catch method.
try {
  await _auth.signInWithEmailAndPassword(
      email: emailController.text,
      password: passwordController.text,
  );
} on FirebaseAuthMultiFactorException catch (e) {
  final resolver = e.resolver
}
Now, use this resolver to get the session for multifactor authentication.
final session = e.resolver.session;
Similar to the registration process, you can use the verifyPhoneNumber method of the FirebaseAuth instance and pass the session you get from the resolver in the previous step along with the user’s phone number.
await FirebaseAuth.instance.verifyPhoneNumber(
  multiFactorSession: session,
  multiFactorInfo: hint,
  verificationCompleted: (_) {},
  verificationFailed: (_) {},
  codeSent: (String verificationId, int? resendToken) async {
    final smsCode = await getSmsCodeFromUser(context);
    if (smsCode != null) {
      final credential = PhoneAuthProvider.credential(
        verificationId: verificationId,
        smsCode: smsCode,
      );
    try {
      await e.resolver.resolveSignIn(
        PhoneMultiFactorGenerator.getAssertion(credential)
      );
    } on FirebaseAuthException catch (e) {
      print(e.message);
    }
  }
 },
  codeAutoRetrievalTimeout: (_) {},
);
In the above code snippet, inside the codeSent argument, the getSmsCodeFromUser(context) function gets the SMS code from the user using an AlertDialogue. You can then obtain a PhoneAuthProvide credential using the SMS code and use it to sign in the user in the application.
Build your Flutter app with Codemagic
Codemagic is a CI/CD platform for Flutter applications. You can trigger a new Flutter build when you push your code to your GitHub repository. Then just download the generated artifacts from the Codemagic dashboard and run them on your devices. Let’s go over the steps for integrating Codemagic CI/CD in your Flutter application.
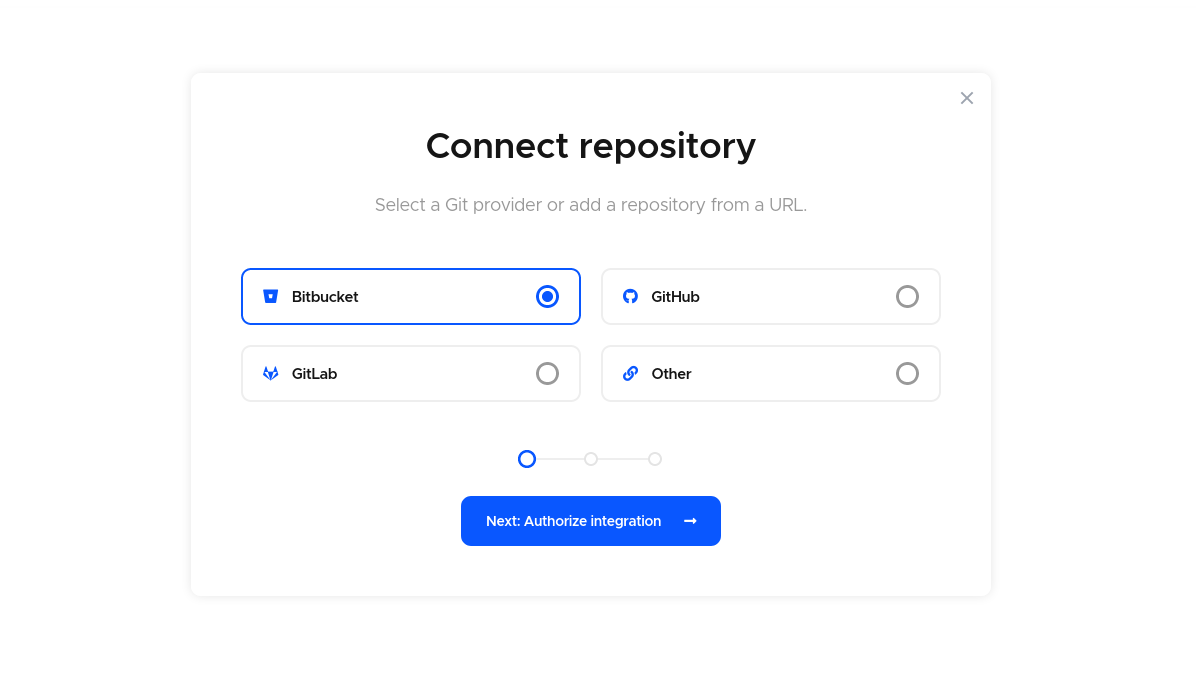
- Create a new Codemagic project and connect your GitHub repository.
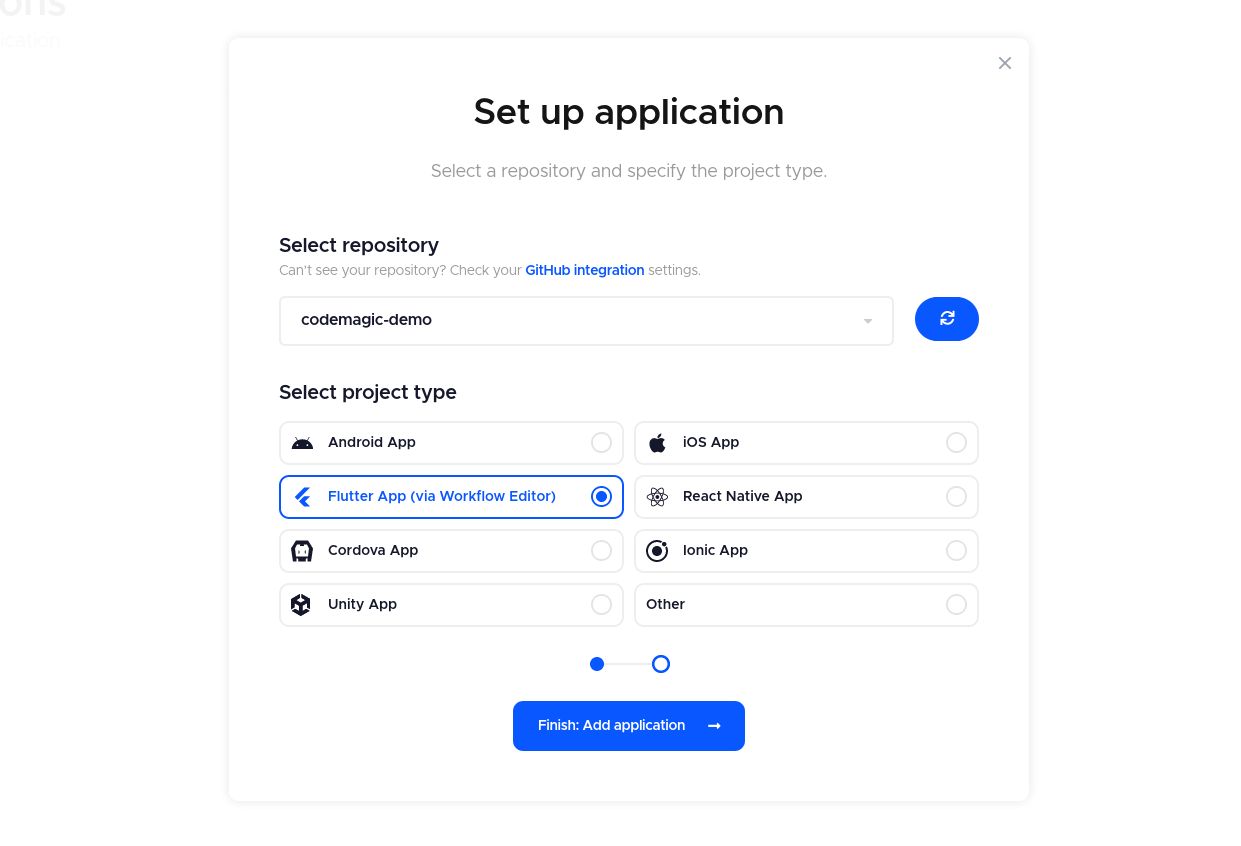
- Select Flutter as the project type.
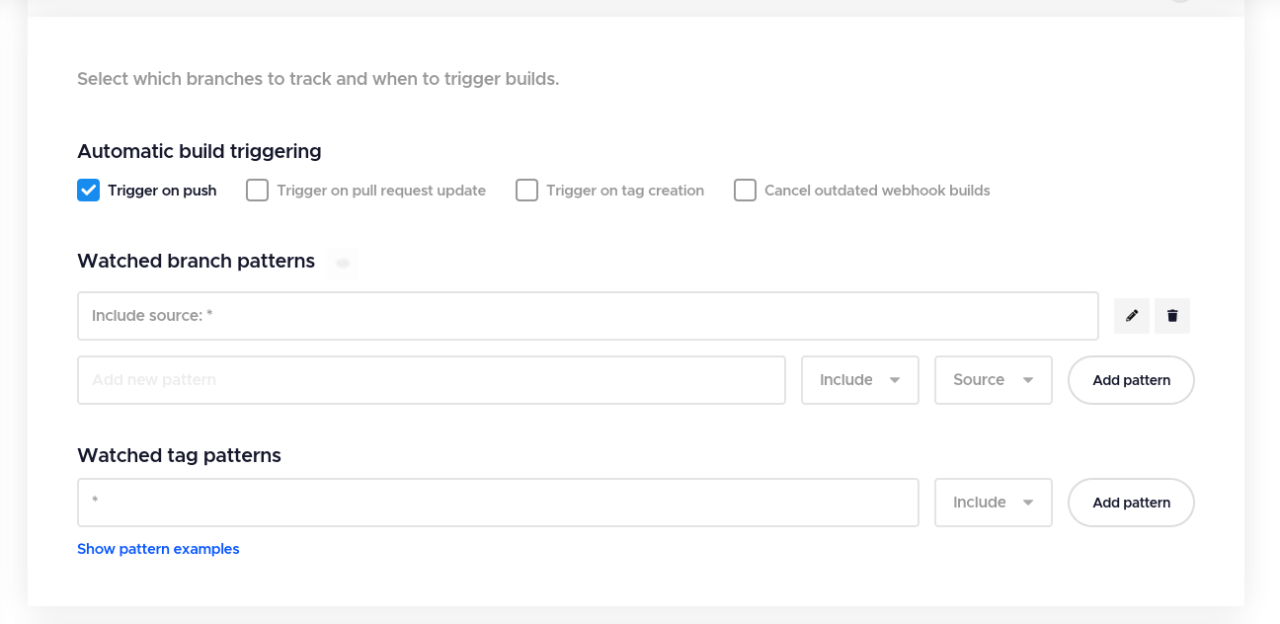
- Under Automatic build triggering, check Trigger on push.
- Open your terminal and run the
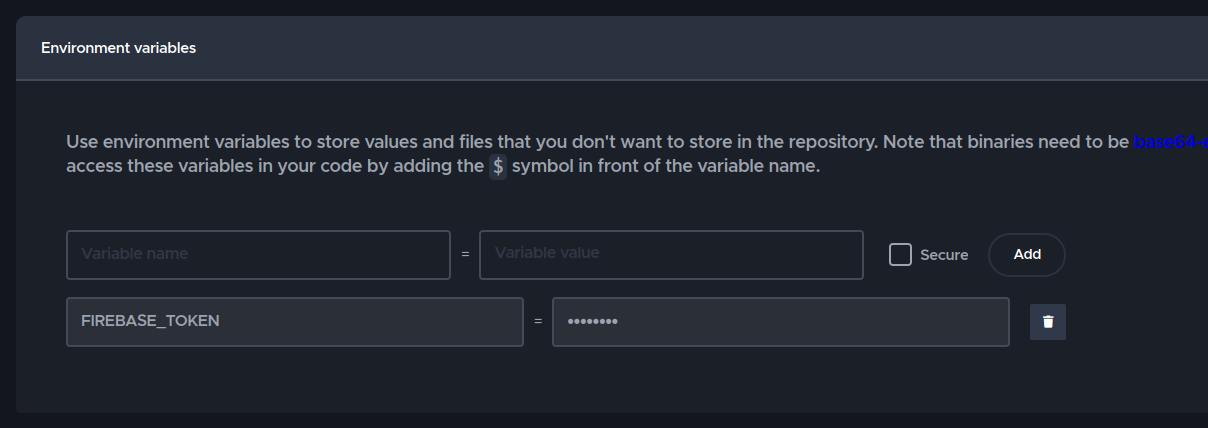
firebase login:cicommand. This command will open a browser tab for authentication. Log in with your Firebase account. After a successful login, you will receive an authentication token. Set this token asFIREBASE_TOKENinside the environment variable tab.
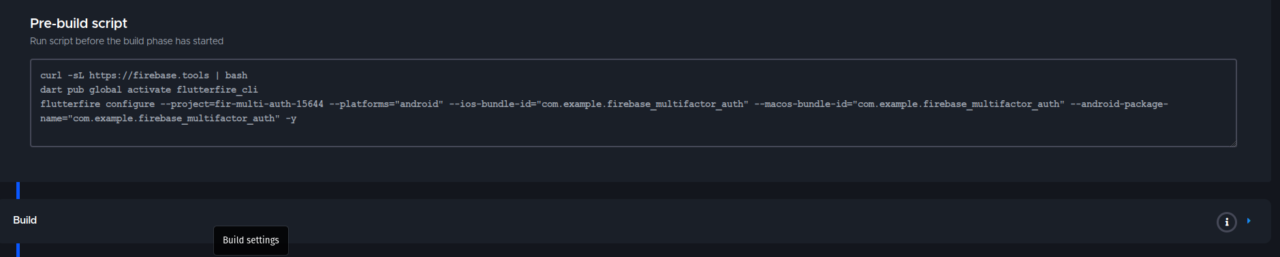
- Inside the pre-build script, install Firebase CLI and flutterfire_cli.
curl -sL https://firebase.tools | bash
dart pub global activate flutterfire_cli
- In the same pre-build script, run the
flutterfire configurecommand with the necessary flags. This command will generate all the files necessary to connect your app to Firebase.
flutterfire configure --project=fir-multi-auth-15644 --platforms="android" --ios-bundle-id="com.example.firebase_multifactor_auth" --macos-bundle-id="com.example.firebase_multifactor_auth" --android-package-name="com.example.firebase_multifactor_auth" -y
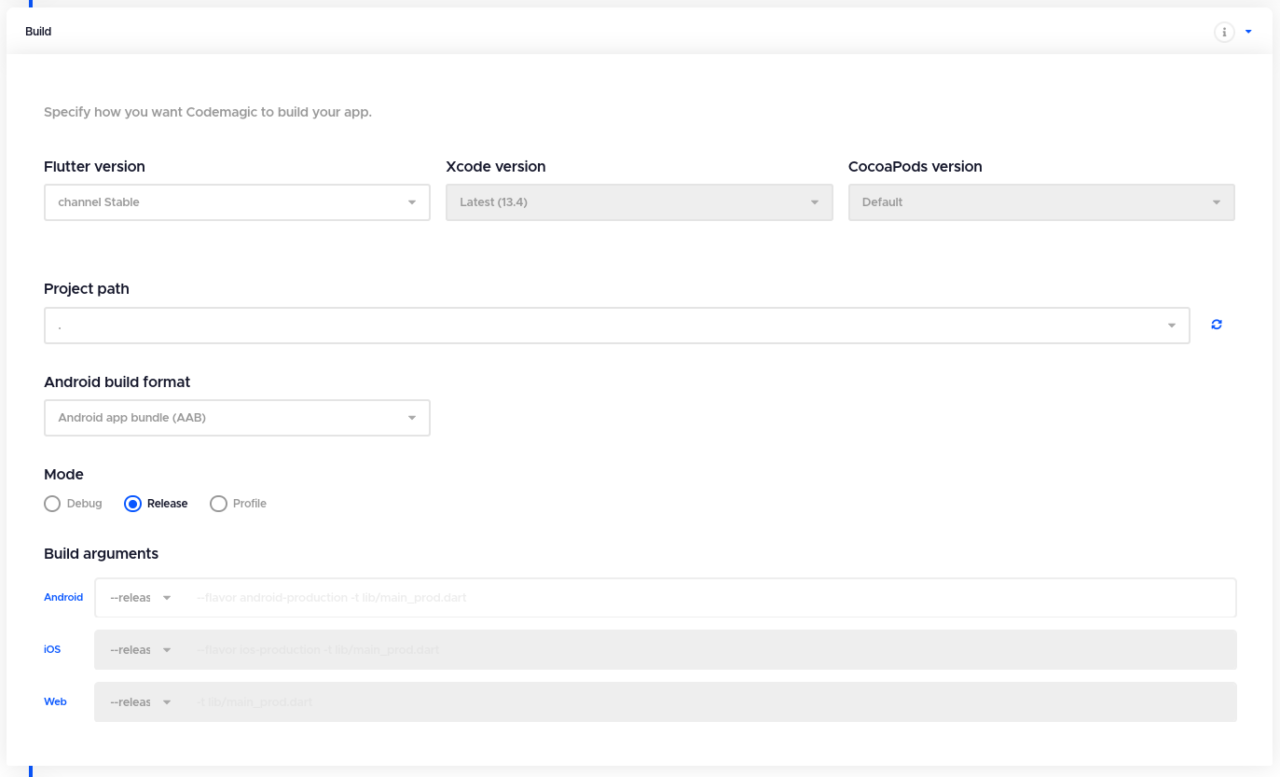
- In the Build tab, select your Flutter version, build format, and custom build arguments.
-
Click on the Start new build button to initiate the first build of your application.
-
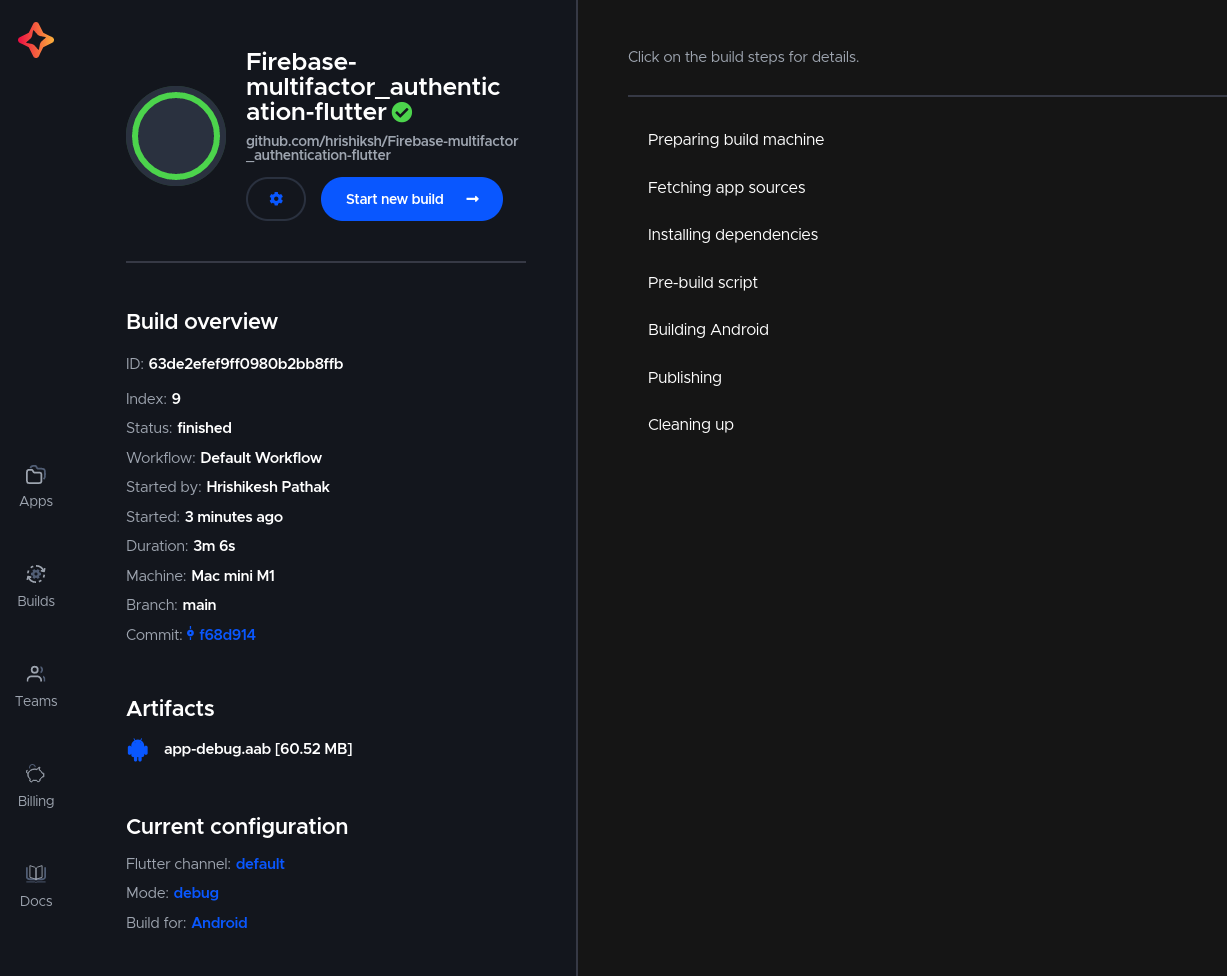
After the build completes, you can download the artifacts and run them on your devices.
Conclusion
In this article, I have shown you how to add multifactor authentication using Firebase to your Flutter application. This is a very simple process to implement. First, you create a simple email password login flow with an email verification process. Then you add the user’s phone number as a second authentication factor. Note that multifactor authentication is enabled only for email-verified users. If your user is not email verified, make sure they do this first before using multifactor authentication.
If you like this article, share it with your friends, and check out my personal blog. If you have any questions, you can ask me on Twitter. Have a good day.









Discussion about this post