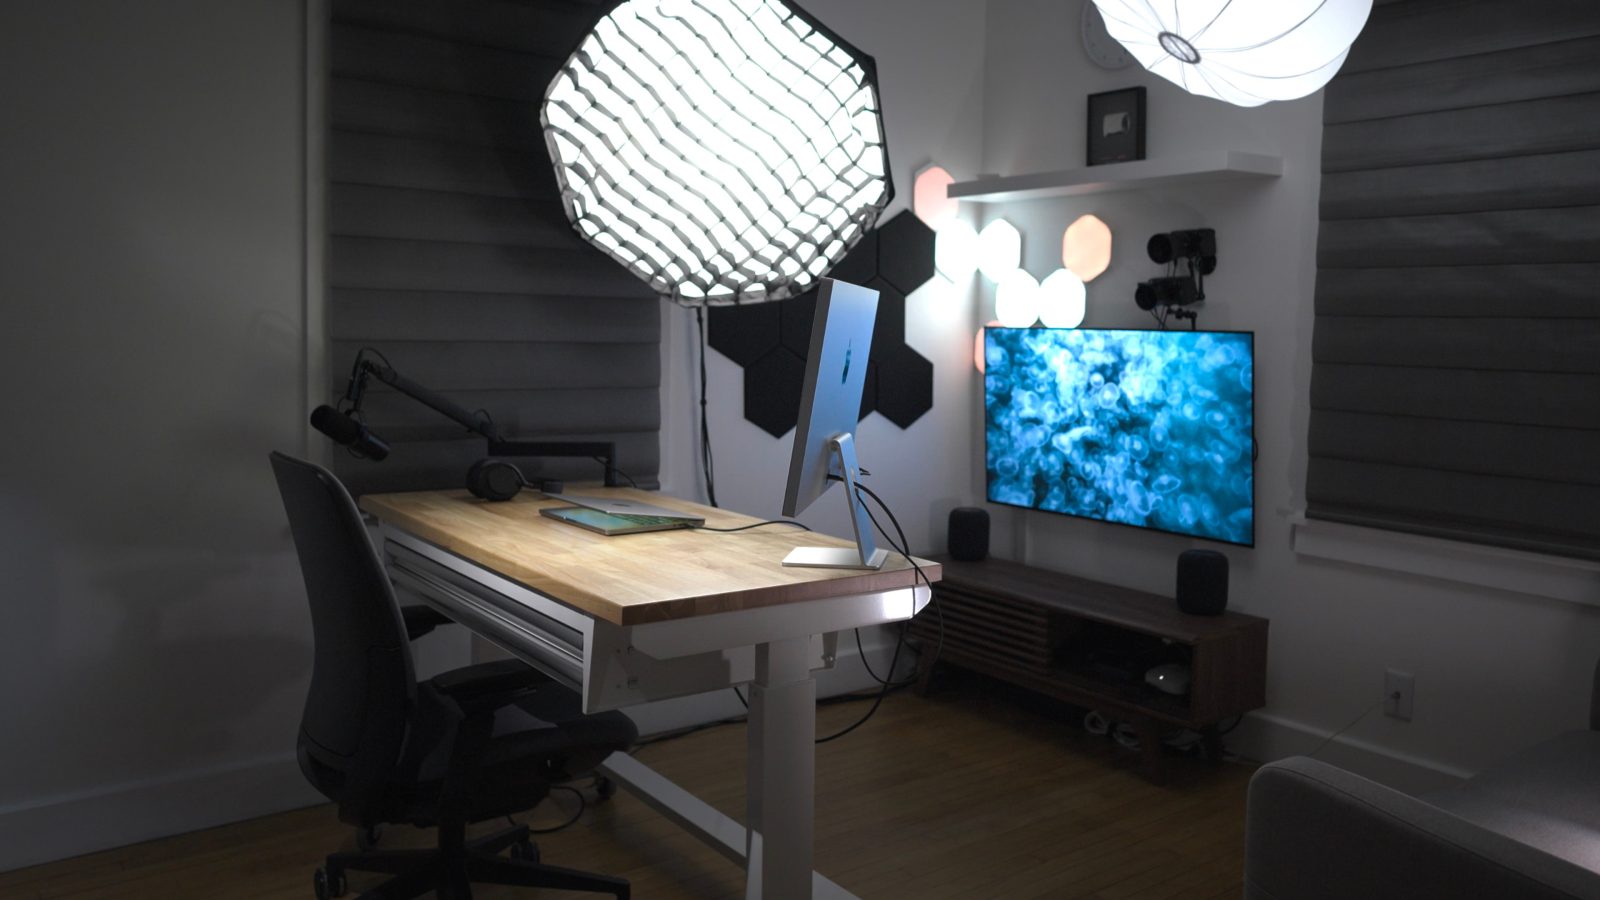
After years of waffling, I decided that it was time to update my workspace to be more friendly to on-camera work, reviews, tutorials, product photography, podcasting, etc. Instead of having a space that I sometimes use for work, sometimes for study and entertainment, and sometimes for editing, I decided to switch it up and wholly dedicate it to video and photo production.
This setup is primarily powered by a 14-inch MacBook Pro connected to a single Thunderbolt cable. It’s also made possible by a whole host of software, including MovieRecorder, a pricey but fantastic application from Softron. MovieRecorder allows me to simultaneously record high-quality HEVC-encoded video in a multi-cam setup from multiple cameras directly to my computer, bypassing SD Cards of CFexpress cards entirely.
As you’ll see in my hands-on video, I’ve done many other things to customize my setup for productivity, and I hope you find it enlightening and fun. Be sure to subscribe to 9to5Mac on YouTube for more videos like this.
My Desk Setup
At the center of my setup is the aforementioned 14-inch MacBook Pro featuring an M1 Max chip, and 32GB of RAM. This machine continues to impress me with how utterly capable it is. Because it’s an M1 Max chip, it has enough power and video encoding capability to make for a rock-solid centerpiece to my setup.
The 512GB of configured storage isn’t ideal, but since MovieRecorder can encode in HEVC, the storage limit is much less of an issue than if I were working with ProRes-encoded video. I plan to upgrade to a 16-inch MacBook Pro eventually, and I’ll configure more storage then, but my current machine has performed so well that I haven’t felt rushed.
Video: Jeff’s 2024 multi-cam home studio tour
Subscribe to 9to5mac on YouTube for more videos
I sold my Pro Display XDR, a staple of my setup since early 2020, and picked up a Studio Display. I miss the HDR capabilities of the Pro Display XDR, but the smaller size and added functionality of the Studio Display make it better for my small workspace.
My MacBook Pro and Studio Display rest on a Husky mobile workbench from Home Depot. This 52-inch workbench includes a wood desktop and two drawers underneath. The drawers are instrumental to my setup, however, I needed to remove the top drawer in order to fit everything inside. This also allows me to store items like the Rode Rodecaster Duo Integrated Production Studio, and quickly access the smart pads without even opening the drawer.
The Husky workbench features four high-quality casters, so I can quickly move it around and reconfigure my shooting space. The bench is also height adjustable, although it’s the manual variety featuring a hand-crank.
Another desktop staple is the Elgato Wave Mic Arm LP microphone arm with a Shure SM7dB attached. The Elgato Wave is a surprisingly well-built and capable arm that costs just $99, and it’s perfect for on-camera work due to its low-profile nature.
The Shure SM7dB sounds fantastic, and its non-boosted iteration, the regular SM7B, is the de facto standard for podcasting. I have reviews of the SM7dB and the Rodecaster Duo in the works. The Rode interface is an insanely capable all-in-one production studio that features powerful pre-amps, smart pads for sound effects and midi, and a ridiculous amount of connectivity options.
Sidenote: Earlier this year we launched a new podcast on YouTube called 9to5Mac Overtime which I record in this home studio. Overtime is a video-first podcast, but we also publish an audio version that you can listen to on Apple Podcasts. Here’s one of our recent episodes:
The Rodecaster Duo can even route audio from one or two Macs, and route audio from specific apps. And yes, you can even connect it directly to your iPhone 15 Pro via USB-C, and interface with the audio coming from it. The Rodecaster Duo is by far one of my favorite products in my setup, and I haven’t even started to scratch the surface of what I can do with it.
Although I use the boom arm for podcasting, I enjoy using the Rode Wireless Pro lapel microphone for reviews, unboxings, etc. The Rode Wireless Pro is an extremely capable microphone that sounds great. And because the wireless mics can connect directly to the Rodecaster Duo, it makes using one or both wireless transmitters even more seamless.
Sidenote: On my recent trip to Vegas for NAB, I put the Rode Wireless Pro to the test in the field, and I was amazed at the performance. This is easily one of the best lapel mics I’ve ever used, and it has absurdly good ambient noise rejection. You can watch the full video here:
Also inside my Husky Workbench is the Elgato Stream Deck + controller, which I use exclusively to control the Elgato Prompter that’s attached to my A-cam used for talking head shots. The knobs on the Elgato Stream Deck + are ideal for scrubbing back and forward through a script, changing the speed of the teleprompter, and even adjusting the display brightness.
For headphones, I use the super-flexible Shure AONIC 50 Gen 2 wireless headphones. Although I use AirPods Pro 2 primarily, when I need direct audio monitoring, the AONIC 50 is my go to. The AONIC 50 can be used wirelessly via Bluetooth, but also features high-resolution USB-C audio capability. More importantly, they can even be used with a traditional 3.5mm headphone jack, and that’s how I have these connected to my Rodecaster Duo for monitoring voiceovers. I have a review of these headphones in the works, so stay tuned.
A Single Thunderbolt cable
It took a while, but the USB-C Thunderbolt cable now lives up to the promises initially laid out during the 2016 MacBook Pro refresh launch. We were promised a single cable to provide power, connect to peripherals, and even drive displays. Accessory makers took a few years to get on board, but now we have a vast array of Thunderbolt-enabled products.
Connected to my MacBook Pro is a single 3-meter Thunderbolt Cable from Apple. This cable is costly, but it’s exceptionally well built and long enough that I can quickly move my MacBook Pro around on my desk, or even move it off the desktop, and work from my couch while maintaining connectivity. A second 3-meter Thunderbolt cable connects one of my hub interfaces to another Thunderbolt-enabled interface, which makes the whole setup work.
With just a single Thunderbolt connection to my MacBook Pro, I’m able to connect to the following devices:
These connections are made possible by several additional hardware devices in between, including:
(Full disclosure: I am a CalDigit ambassador and sometimes make paid content for CalDigit independently of 9to5Mac.)
Inside the OWC Mercury Helios 3S external PCIe enclosure is the Blackmagic Design DeckLink Quad HDMI Recorder. The DeckLink Quad, as its name alludes to, features four HDMI inputs on a single interface, allowing me to connect up to four Sony FX30 cameras simultaneously. Unfortunately, the card’s stock fan is super loud, so I replaced the stock heat sync, which greatly helped.
Sony FX30
I chose the Sony FX30 as my main camera for various reasons. The biggest reason is that they are relatively inexpensive, considering their impressive capabilities.
The FX30 is the Super35 version of the popular full-frame FX3. It’s not as good as the FX3 in low-light scenarios, but I have plenty of light in my controlled environment. The FX30 is a wildly-capable camera for its asking price, and it’s hands-down one of the best values in cameras I’ve ever seen.
Two FX30s are “permanently” mounted in such a way that avoids using typical stands, and thus saves precious floor space. I mounted an FX30 on an Impact Wall-Mounted Boom Arm for my overhead camera. These boom arms are permanently installed and can quickly raise and pivot. The overhead camera resides directly over my Husky mobile workbench and works great for product showcases and detailed unboxing videos.
Attached to the overhead FX30 is a Sony E PZ 18-105mm f/4 G OSS lens. At f4, this power zoom lens isn’t the fastest, but its range and power zooming capabilities are hard to beat. This lens lets me quickly zoom out to capture a wide shot, say, a giant product unboxing, while also letting me zoom in to capture detail.
Two additional cameras reside directly in front of my workbench. The first camera, mounted to the wall above the television, is dedicated to on-camera talking headshots. This FX30 is paired with a Sony FE 35mm f/1.4 GM lens, which provides a roughly 50mm angle of view after the crop factor is taken into account.
Attached to the front of the 35mm lens is the Elgato Prompter, an excellent teleprompter that Elgato recently launched. I’ve long tried to use iPad and iPhone-based teleprompter solutions, but I much prefer to use a dedicated solution. It’s just a much simpler and cleaner solution and for the most part it just works.
Beneath the talking head camera, mounted on a tripod, is another FX30. I use this camera for detailed product shots on the desktop. A simple Sony FE 50mm f/1.8 lens is attached to this camera.
The final FX30 is my so-called “floating” camera. Sometimes, I use it handheld; sometimes, I attach it to a gimbal; other times, I mount it to a tripod. I use this camera to capture everything else the mounted cameras can not, and generally don’t have it rigged to my multi-cam setup, although I can with a simple HDMI connection.
Setup routing hardware
The Thunderbolt cable connected to my MacBook Pro goes directly to the upstream port of the OWC Thunderbolt Hub, which is mounted on the back of my Husky mobile workbench. The 8TB SSD (also mounted on the bench), Pro Display XDR are all connected to this hub.
Additionally, I have the CalDigit SOHO Dock connected the OWC Thunderbolt Hub, which provides me with a few more necessary ports. The SOHO Dock is also mounted to the back of my workbench, and it have it connected to the Rodecaster Duo, which is connected to the Shure SM7dB, and the Rode Wireless Pro TX. One of the awesome things about the Rodecaster Duo is that it allows for a direct connection to one or two of the Rode Wireless Pro transmitters, which makes it super easy to capture audio for talking head shots or for sound design.
This setup makes it so that I can maintain connections to critical components like the microphones, external drive, and external display while being disconnected from the other elements of my studio setup that connect my cameras.
The second 3-meter Thunderbolt 3 cable in my setup goes from a port on the OWC Thunderbolt Hub to the uplink port on the CalDigit Thunderbolt 4 Element Hub. I had some issues with handshaking when waking up my MacBook, and I found that introducing the CalDigit hub into the mix eliminated the handshaking issues and made it so that I could more easily power-cycle the hub to get everything back online if needed.
The Sonnet Echo 20 Thunderbolt 4 Superdock and the OWC Mercury Helios 3S each connect to a separate port on the CalDigit Thunderbolt 4 Element Hub, completing the routing.
The Sonnet Echo 20 Thunderbolt 4 Superdock is a fantastic piece of hardware for the sheer amount of ports it allows you to access from a single interface. It features a 2.5Gb Ethernet port, which I have connected to my AT&T fiber connection. This provides my MacBook Pro with blazing-fast upload and download speeds, which is especially useful when uploading large videos to YouTube and for live streaming to YouTube with OBS.
The second, more important reason I use the Sonnet Echo 20 Thunderbolt 4 Superdock, is that it features terrific power delivery properties that just works. Sonnet’s dock features multiple USB ports that provide consistent power to attached devices via USB-C. In addition to connecting all of my FX30s to my MacBook Pro so that I can control them remotely, the Sonnet Dock also keeps all connected cameras charged, eliminating the need to switch batteries or, worse yet, utilize dangerous dummy batteries.
Finally, there’s the OWC Mercury Helios 3S. I installed the Blackmagic Design DeckLink Quad HDMI Recorder inside this PCIe Thunderbolt enclosure. The FX30s connect to the DeckLink Quad via HDMI cables, and while I’m pretty bad at cable management, I’ve tried my best to make it look somewhat presentable.
MovieRecorder – a pricey but awesome multi-cam solution
So now that we’ve gotten most of the hardware details out of the way, the software issue remains. How might one interface and capture video from such a complex setup? Is it overly tricky? Thankfully, several apps can do the job, but one stands out above the others.
Before I learned about MovieRecorder, I used Blackmagic Media Express to interface with my cameras via the DeckLink hardware. Unfortunately, Media Express can only interface with a single camera at a time, which means running multiple instances of the app. It works, but it gets messy.
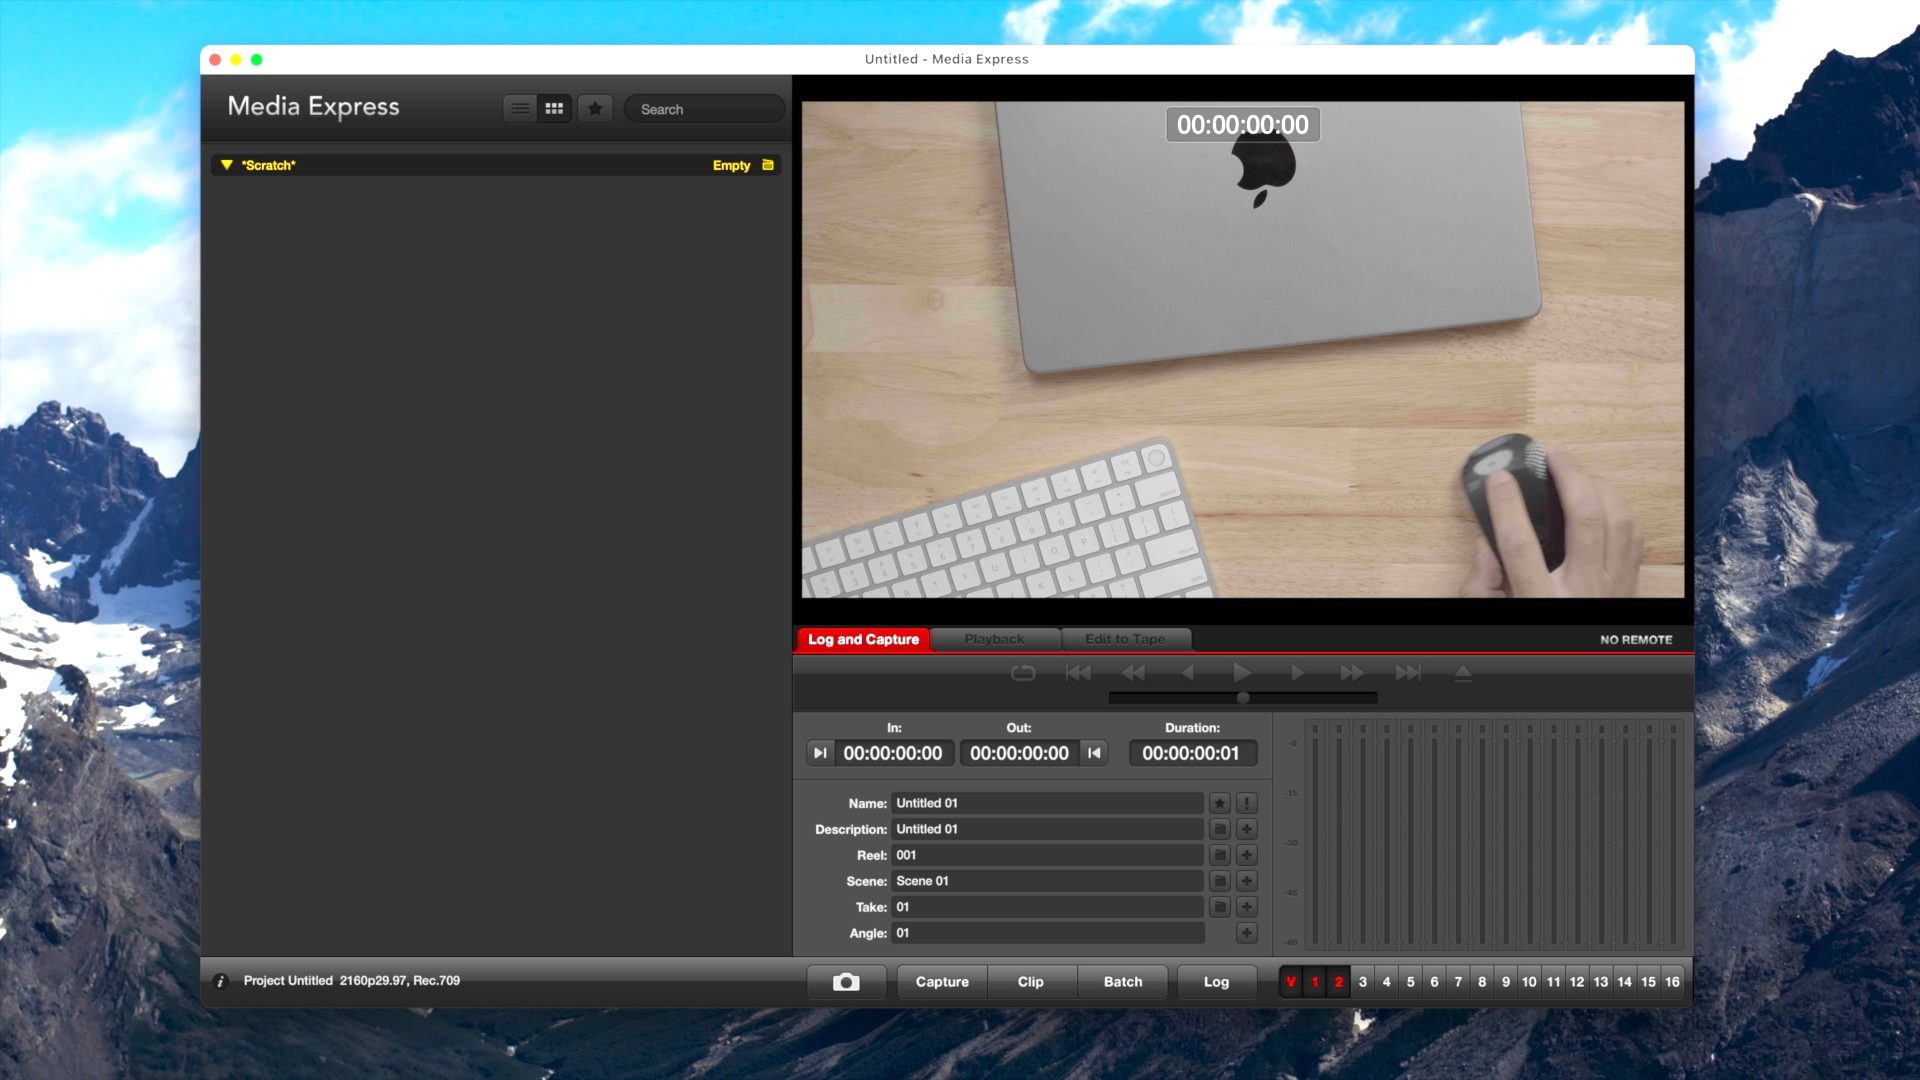
The bigger problem with using Blackmagic Media Express is its limited amount of available codec options. ProRes 422 Proxy is the most lightweight option, and those files can still get huge. On a 512GB MacBook Pro, this quickly poses a problem unless you rely on an external drive. It’s not the worst problem in the world, but even with a cavernous external drive, ProRes files quickly eat up storage.
MovieRecorder solves the issues with Blackmagic Media Express I mentioned and is better suited for multi-cam environments. As long as your computer is capable, it can simultaneously capture video from multiple cameras. Softron gave me a trial license throughout my testing, letting me capture four inputs. Many other license options are available, even one that can capture up to eight inputs, but it gets pricey.


Granted, this software is aimed at larger production companies with vast budgets. Softron’s S|40 Bundle featuring 4 Movie Recorder licenses on a single serial will set you back a cool €5950,00, north of $7500 USD. Again, for a solo creator like myself, that’s probably not going to be realistic, but there are lesser versions of Softron’s apps that are a bit more palatable price-wise. For instance, MovieRecorder Express, a pared-down version of the main app, can be had with four licenses for €2195 or about $2800 USD. It’s still not cheap but much more realistic for a solo creator like myself.
The great thing about MovieRecorder is how simple and easy it makes things. Video devices from Blackmagic, AJA, and NDI sources are automatically discovered and surfaced. It’s just a matter of clicking the checkbox next to the local sources, which are immediately displayed in the viewer.


You can rename sources – for instance, I have Talking Head, Desk, Overhead, and Extra as source names. You can also configure details for each source, like resolution and frame rate, audio source, and even timecode settings.
Destination settings let you configure codec, including super-efficient 10-bit HEVC, save location, custom naming, metadata, and more. You can even set up AppleScripts to trigger at the start or end of the recording. I feel like I’m just scratching the surface of what’s possible with MovieRecorder, and I could probably make the process even more efficient than it already is.
Each viewer can be individually interfaced with. There are transport controls for starting, pausing, and stopping a recording, renaming a source, switching out a source, or altering configured destinations. You can also maximize a given source to get a larger view of its contents.
For multi-cam setups, MovieRecorder includes handy gang controls. These controls allow you to simultaneously start or stop capturing footage from all enabled sources. This is super-handy for multi-cam setups because it captures video from every source with a single click.
OBS
Because I can’t afford a full MovieRecorder license, I use OBS for all of my capturing and live streaming functions. The greatest thing about OBS? It’s free!
OBS works well, is highly customizable, and it has some features that I prefer when compared to other software. The main issue I encountered with OBS is that it doesn’t allow you to record from multiple sources at once without a plugin, and the plugin doesn’t work very well in my experience.
There are other issues with OBS, and it has a much higher learning curve than MovieRecorder, but it’s probably the best solution for those on a budget. It’s also great because it can record high quality HEVC video.
I use the smart pads on the RodeCaster Duo to control OBS via MIDI commands interpreted by the amazing BetterTouchTool utility for Mac. With a quick press of one of the pads I can easily cycle through all camera angles, start and stop recording, and more. I’ll have a lot more on how I use OBS in an upcoming post and video.
Control
Being able to quickly and efficiently control this setup was imperative to me. My goal was to have as little friction as possible. Here are some of the ways that this setup removes friction.
Camera charging and battery management
The FX30 features a good system of battery management and features USB PD that lets you keep the cameras charged via a USB-C cable. Each USB-C cable connects directly to a port on the Sonnet Echo 20 Thunderbolt 4 Superdock, which has great power delivery capability. Thus, all three of my main FX30s are always ready to go when its time to start filming.
Camera power
I use a several smart switches, such as the Eve Energy, to power on and power off my cameras. For example, the Sonnet Echo 20 Thunderbolt 4 Superdock is connected to one of these smart switches, and I created a simple shortcut to control the timing of the power in order to manage the connected FX30s. To turn on the cameras, the shortcut looks like this.


To power off the cameras (actually putting them to sleep using the FX30’s battery management settings), the shortcut is a bit more complex to accommodate for the FX30s power management timing:
The goal of this shortcut was to put all connected cameras to sleep at the same time, and also make it so that the cameras would begin charging once they were sleep. The FX30 will not charge while awake, even if you have a USB-C cable connected. If you don’t get the timing right, sending power to the FX30 via the USB-C cable will wake the devices and thus prevent them from charging. It took a lot of guess and checking to figure out the exact timing, but it works.
After the shortcuts were configured, I then mapped them to a smart pad on the Rodecaster Duo. With a simple press of a smart pad, I can power on or power off all of my FX30s in one fell swoop.
Remote controlling cameras
Sony’s excellent Imaging Edge Desktop suite features a remote tether option that lets you control various aspects of the cameras via USB-C. This is yet another benefit of having each camera connected to my MacBook Pro via the setup routing explained earlier.


I have a dedicated desktop page that I can swipe to featuring three instances of Sony Remote for controlling all three cameras if needed. I don’t use remote control often, but in certain situations it can be handy when you need to change exposure values or change focus area.
Teleprompter
The Elgato Prompter connects to my setup via USB and it also directly integrates with the Stream Deck + for direct control. With it, I can easily scroll forward or backward through my script, quickly jump between paragraphs, change font and brightness, or start or stop scrolling via the knob controls on the Stream Deck +.
It’s not perfect, but having a dedicated teleprompter that’s this easy to control has been a game-changer for my workflow, and saves tons of time. Stay tuned for the full breakdown and review.
Conclusion
This is my home studio setup in a nutshell. Of course, there are many other aspects to my setup, such as lighting, that I haven’t touched on. Perhaps I’ll save that for another post and video.
The whole point of this setup was to streamline my workflow, and reduce friction as much as possible, and I think it largely achieves this. There’s no juggling SD Cards, batteries, etc. It’s basically just a matter of pressing a couple of buttons and you’re ready to record. I’m still tinkering and making refinements, but for the most part, I’m very happy with it.
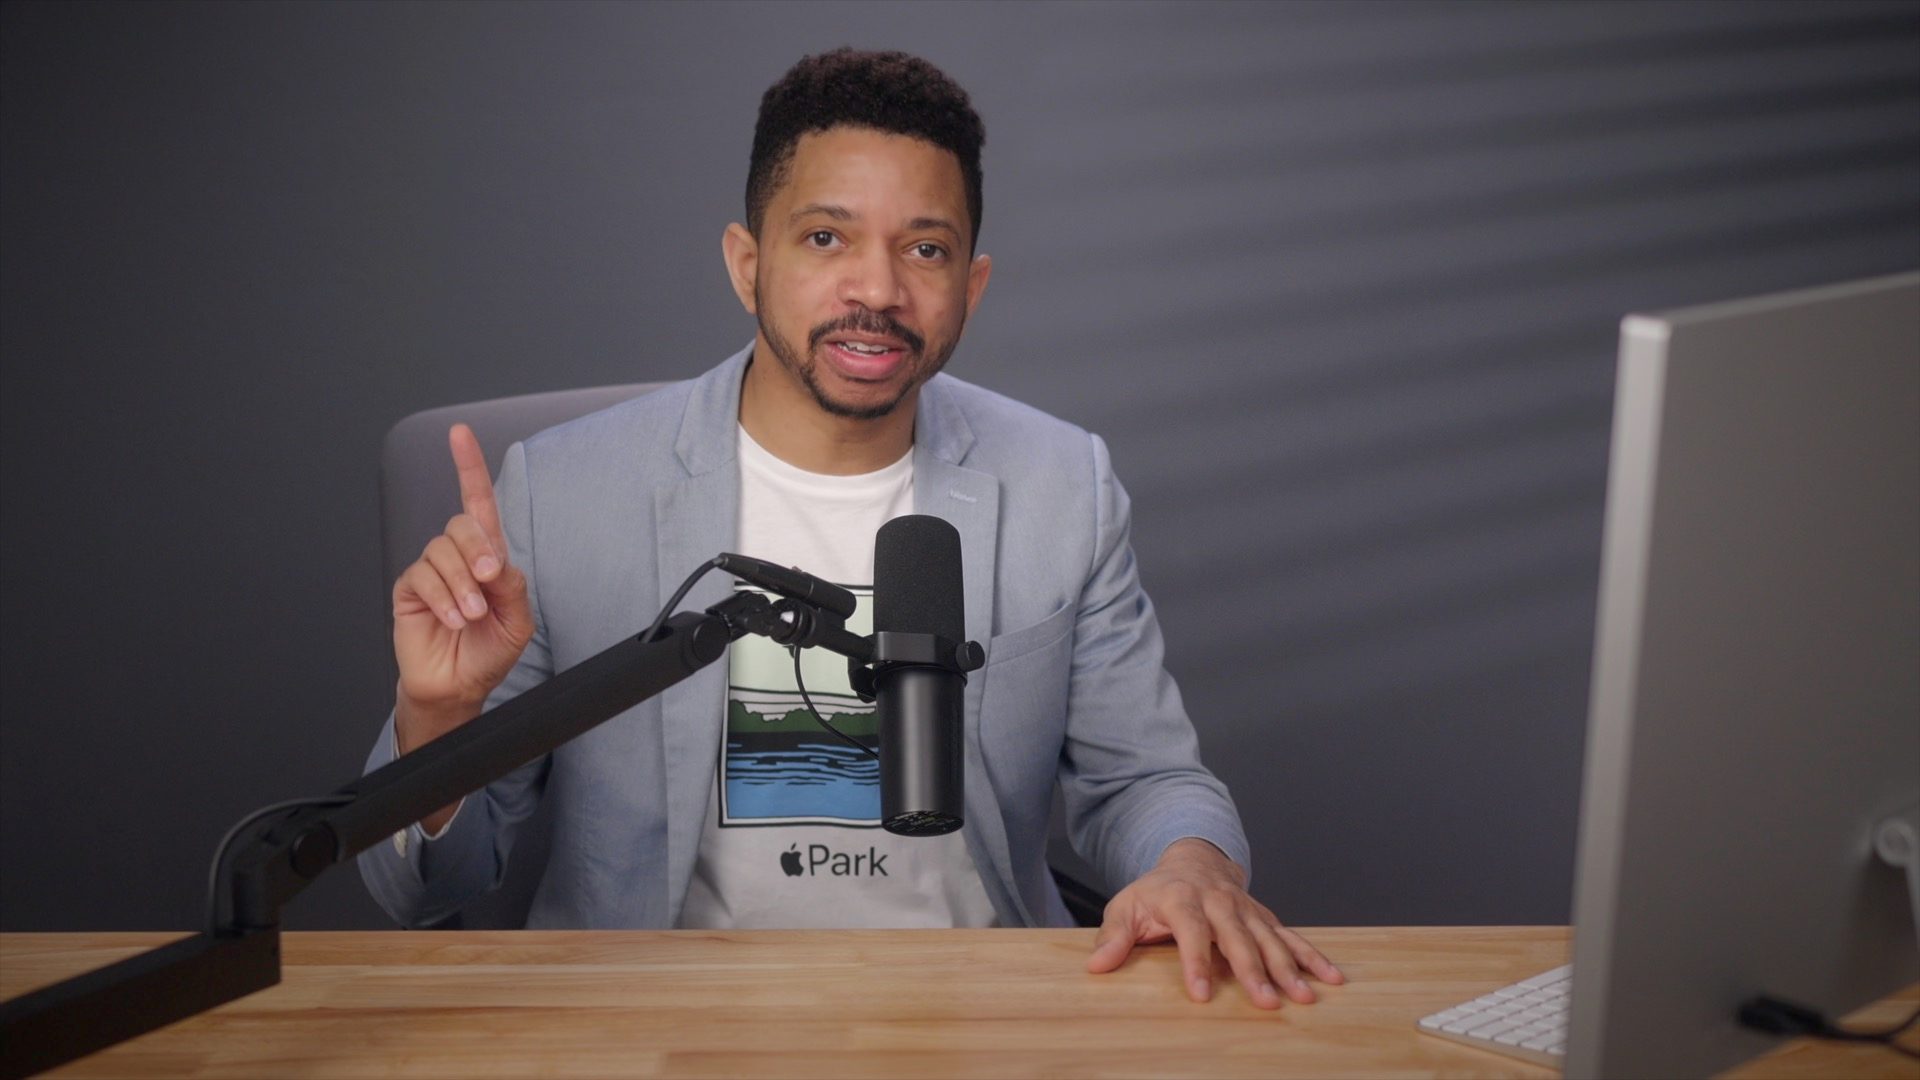
As most of you know, I’m not usually one to appear on camera, and prefer to stay behind the scenes so to speak, but this setup has made me a lot more comfortable sitting in front of the camera.
But the biggest takeaway, in my opinion, is just how flexible and capable the MacBook Pro is. With Thunderbolt connectivity, there is just so much you can do, and it all works via a single cable connection to my Mac. When I’m finished, I can just eject my SSD, disconnect the cable, and take my Mac with me for working on the go. Throughout all of this the MacBook Pro has performed pretty much flawlessly.
What do you think about my setup? Do you have any suggested changes or observations? Sound off down below in the comments with your thoughts.
FTC: We use income earning auto affiliate links. More.








Discussion about this post