Written by Neevash Ramdial
Picture this, you’re running UI tests on your Flutter application when it dawns on you,
“Wouldn’t it be cool if I can capture the state of my UI at various stages during the testing process?”.
Click to tweet
If that person is you or you’re intrigued, you’ve found the right place. In this article, we are going to look at configuring and capturing screenshots on Codemagic while running Flutter Driver tests.
Prerequisites
For those would like to follow along with this article, there are two things you need to have:
0: Project Configuration 
For simplicity, I am going to use the default “counter” Flutter project. Since the focus of this article is taking screenshots on Codemagic, I am not going to cover writing integration tests. If you’d like to learn more about writing integration tests, please see this article.
To create a new Flutter project run:
The command above would generate the following project files:
1: Dependencies 
Before we can move into the code, we first need to add a dependency to the project. This package will allow us to capture screenshots while testing.
Navigate to pub.dev and search for screenshots. Once you’ve found the package, add it to your project.
Add “screenshots” to pubspec.yaml :
dependencies:
  screenshots: ^2.1.1
Once added, run flutter packages get to update the project packages.
2: Screenshot Configuration 
With our package installed, a configuration file for capturing screenshots needs to be created.
Let’s start by creating the file screenshots.yaml in the project root directory.
tests:
  - test_driver/app.dart
staging: /Users/builder/exported_artefacts
devices:
  ios:
    iPhone XS Max:
      frame: false
      orientation: Portrait
At first glance, you might be a little confused but fear not:
- tests - List of the test to execute
- staging - Temporary location for storing captured screenshots
- devices - Controls the list of frames and platforms to capture screenshots. Devices can be broken up into separate configuration files however we will not be looking at those in this article.
- archive- Saves screenshots for local use.
Note: In the example above, we use the absolute path of the export folder, you can use Codemagic’s environment variable if you desire.
3: The Code 
Integrating screenshots is a very easy process. To get started, we need to create the directory test_driver folder in our project root.
In our driver folder, two files need to be created, app.dart and app_test.dart. Two files are necessary since unlike other tests, Flutter integration tests are executed in different processes.
Our app.dart file contains an instrumented version of our app. In this file, we enable Flutter driver then start the execution of the tests.
To get started, paste the following code in app.dart:
import 'package:codemagic/main.dart' as app;
import 'package:flutter_driver/driver_extension.dart';
main() {
  enableFlutterDriverExtension();
  app.main();
}
Next, we need to modify our app and add a key to our Text widget. This is necessary for us to “find” and examine our widget from our test script.
Make the following modifications to the existing text widget:
From:
Text(
  '$_counter',
   style: Theme.of(context).textTheme.headline4,
),
To:
Text(
  '$_counter',
   key: ValueKey('count-value'),
   style: Theme.of(context).textTheme.headline4,
),
Great! We’re almost finished, now it’s time to write our test.
void main() {
  FlutterDriver driver;
final buttonFinder = find.byType('FloatingActionButton');
final textFinder = find.byValueKey('count-value');

group('Full body test', () {

    setUpAll(
      () async {
        driver = await FlutterDriver.connect();
      },
    );
test(
      'Increment counter',
      () async {
        await driver.tap(buttonFinder);
        expect(await driver.getText(textFinder), "1");
      }),
    );
tearDownAll(() {
      if (driver != null) {
        driver.close();
      }
    });
  });
}
The snippet about is a snippet driver file for incrementing the app counter. Let’s breakdown the functions in our file.
We create two finders for locating and referencing the widgets we will be interacting with this test. Notice for the textFinder method, byValueKey is used to locate our text instance. This is necessary since our sample app contains more than one Text widget. The button finder, on the other hand, uses byType since there is only a single FloatingActionButton in our app.
Next, we have the methods setUpAll and tearDownAll. Both methods are respectively executed before and after the test us run. These methods are used to connect our driver and execute any setup code that may be necessary for running the test.
Finally, the test function. As the name implies, this is where you write your test code, typically a test would consist of some instructions for manipulating the app’s UI followed by expectations of the new UI state. In our example, the driver simulates a tap on our FloatingActionButton then uses the expect keyword to validate our new UI state.
To run this test, execute the following command:
flutter drive -t test_driver/app.dart
If all goes to plan, you will be greeted with the message “All test passed”.
4: 
Time for the final piece of the puzzle, capturing the screenshot.
Open app_test.dart and add the following import:
import 'package:screenshots/screenshots.dart';
Next, create an instance of a Config(). Screenshots uses this config to save and manage screenshots. We can use the default config for now.
In the last step, we need to call the screenshot function in our code to capture our screenshot. The method requires three arguments, the current Flutter Driver instance, the config, and a name.
await screenshot(driver, config, 'testing');
Note: For local testing, change the staging and archive screenshot path to a place on your local machine. Since I am on Mac, I use
~/since it is easy to find
Fantastic! You’ve just enabled screenshots for Flutter driver tests. Go ahead and run the test. Once completed, you will notice a new directory on your computer containing the screenshots.

5: Next Steps
With the project setup and code finished, go ahead and push your project to Git .
Go to https://codemagic.io/apps, select your application and hit the settings “cog” icon to change its configuration.
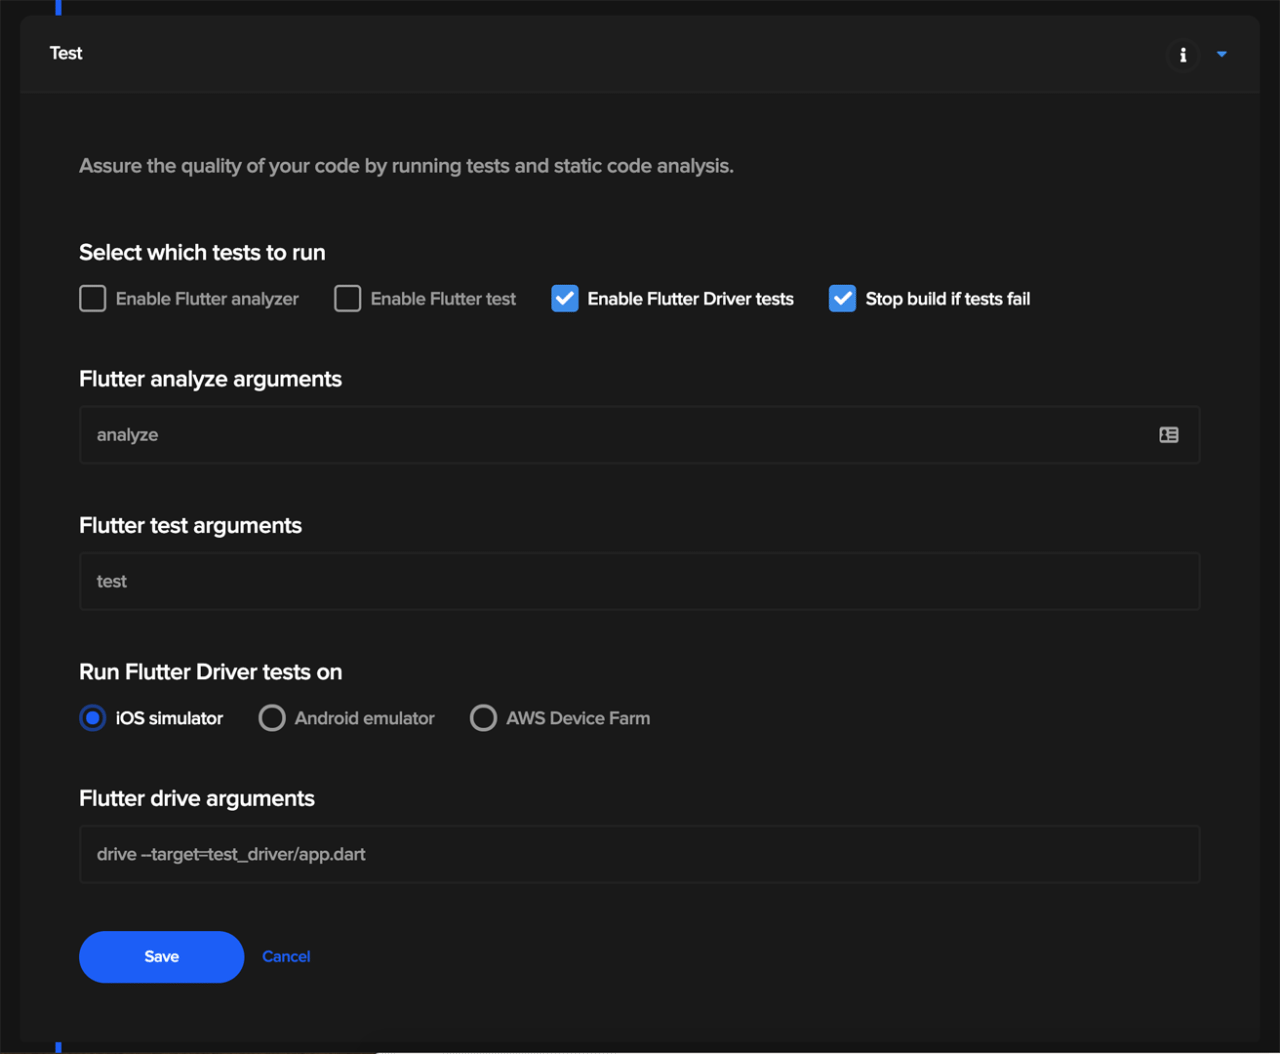
Expand the test section of the Codemagic project settings and enable “Enable Flutter Driver tests”.
Finally, modify the “Flutter drive arguments” section to target app.dart instead of main.dart. If you are also building your project, please select channel “dev” since this was used during testing.

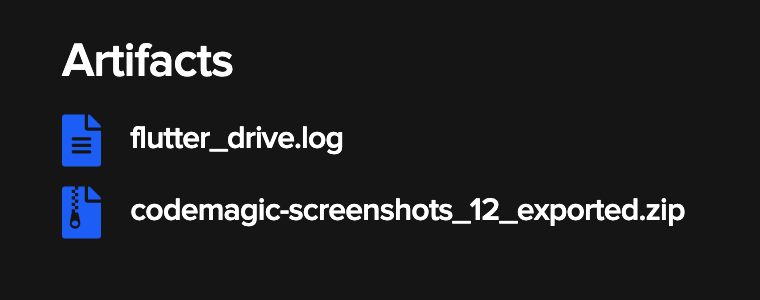
Drumroll please…. Hit the “start new build” button on the top of the page to build your project. After a few minutes, you will notice a new zip file on the left pane.

Voila! Downloading and extracting the folder will contain our screenshot.
In Closing
Congratulations! You’ve successfully added screenshots to your automated test. Feel free to experiment and expand on what you’ve learned in this tutorial.
If you enjoyed this article, checkout some of the other articles below:
Nash writes code for computers and articles for humans. Born and raised in Trinidad, he fell in love with coding at the age of fourteen and has worked in both web and mobile development ever since. Nash is the Lead Editor of Flutter Community on Medium; co-host of the weekly, international web conference “HumpDayQandA” and an Administrator of the Flutter Study Group (FSG).
Make sure you follow Nash on Twitter @Nash0x7e2


Discussion about this post