This article is written by Maksim Lin
Welcome to the latest edition of #FlutterFunFriday. This is the another instalment in a new series of posts where we’ll be spending some time to have a bit of fun with Flutter on a Friday. So grab a beverage of your choice, fire up your favourite IDE and lets have some fun!
2.5D
Those of you who have used the Flutter-based Flame game engine to build a game or have looked into it would already know that, like Flutter itself, Flame is limited to 2D. So while true 3D is not supported, all is not lost as you can still get a 3D-like, “2.5D” experience for your game idea by using a technique called “Sprite Stacking”. For those that may be new to Flame game development, you can get up to speed with the basics from a previous article.
Stack’em high!
So what is “Sprite Stacking”? It’s a technique to give you a pseudo 3D effect by taking advantage of the fact that if you draw an object as a set of 2D layers or “slices” stacked on top on each other, with a single pixel vertical offset, you will get the visual appearance of a “3D-ish” object, hence the name of sprite stacking.
As they say, a picture is worth a 1k words, so the animation below showing how a simple tree object can be made to have a 3D appearance, when made up of a series of 2D “slices”, should help illustrate the concept more clearly:
Using stacked sprites in Flame
Now we know how stacked sprites work in general, how can we make use of them in our Flame games? First off, we need a stacked sprite asset! To start with I headed over to Itch.io, where I found the excellent car sprites pack from Edu. While the pack is free, please consider making a donation to the creator, as I did, to thank them for making these cool sprites freely available!
Now that we have some assets to work with, lets have a look at one of the car images (enlarged significantly):

Looking at this image (in games called a “sprite sheet”) we can see that it’s been split up into 9 separate “cells” or sub-images, each making up a vertical “slice” of the car. Given this asset, what we need to do is, as per the technique I outlined above, to read in each of those sections of the image and then draw each of the slices, one on top of the other, but offsetting each slice by 1 pixel in the vertical direction. Doing all of this from scratch would be quite a bit of code, but luckily for us, Flame comes with a handy class SpriteBatch meant for the very job of dealing with sprite sheets, so the code required is just:
Future<void> getBatch(String name) async {
	late SpriteBatch _batch;
	final sheetImg = await game.images.load('$name.png');
   _batch = await SpriteBatch.load('$name.png');

   const double spriteWidth = 16; //hardcode width of sprite sheet cells
   const double spriteHeight = 16; //hardcode height of sprite sheet cells
   final sliceCount = sheetImg.width ~/ spriteWidth;

   for (int i = 0; i < sliceCount; i++) {
      _batch.add(
        source: Rect.fromLTWH(spriteWidth * i, 0, spriteWidth, spriteHeight),
        offset: Vector2(0, -i.toDouble()),
        anchor: Vector2.all(spriteWidth / 2),
        rotation: 0,
      );
   }
}
We can see that apart from the first few lines of code that load the image and set the size (in pixels) of the images slices, the main action happens in the for loop, where we add one by one each slice to the SpriteBatch applying an offset of 1 pixel of y per slice and setting the anchor to be in the middle of each slice. It also allows us to specify the rotation property, which we’ll make use of in a moment.
If we now wrap the above code with some required Flame boilerplate in a onLoad() method inside a PositionComponent subclass, set its position, scale and the background colour:
class FlamingSprites extends FlameGame with HasDraggableComponents {
  late final StackedSpriteComponent _carOne;

  @override
  Color backgroundColor() => Colors.blueGrey;

  @override
  FutureOr<void> onLoad() async {
    await super.onLoad();
    _carOne = StackedPreview(this, "BlueCar", false)..scale = Vector2.all(9);
    _carOne.position = Vector2.all(300);

    add(_carOne);
  }
...
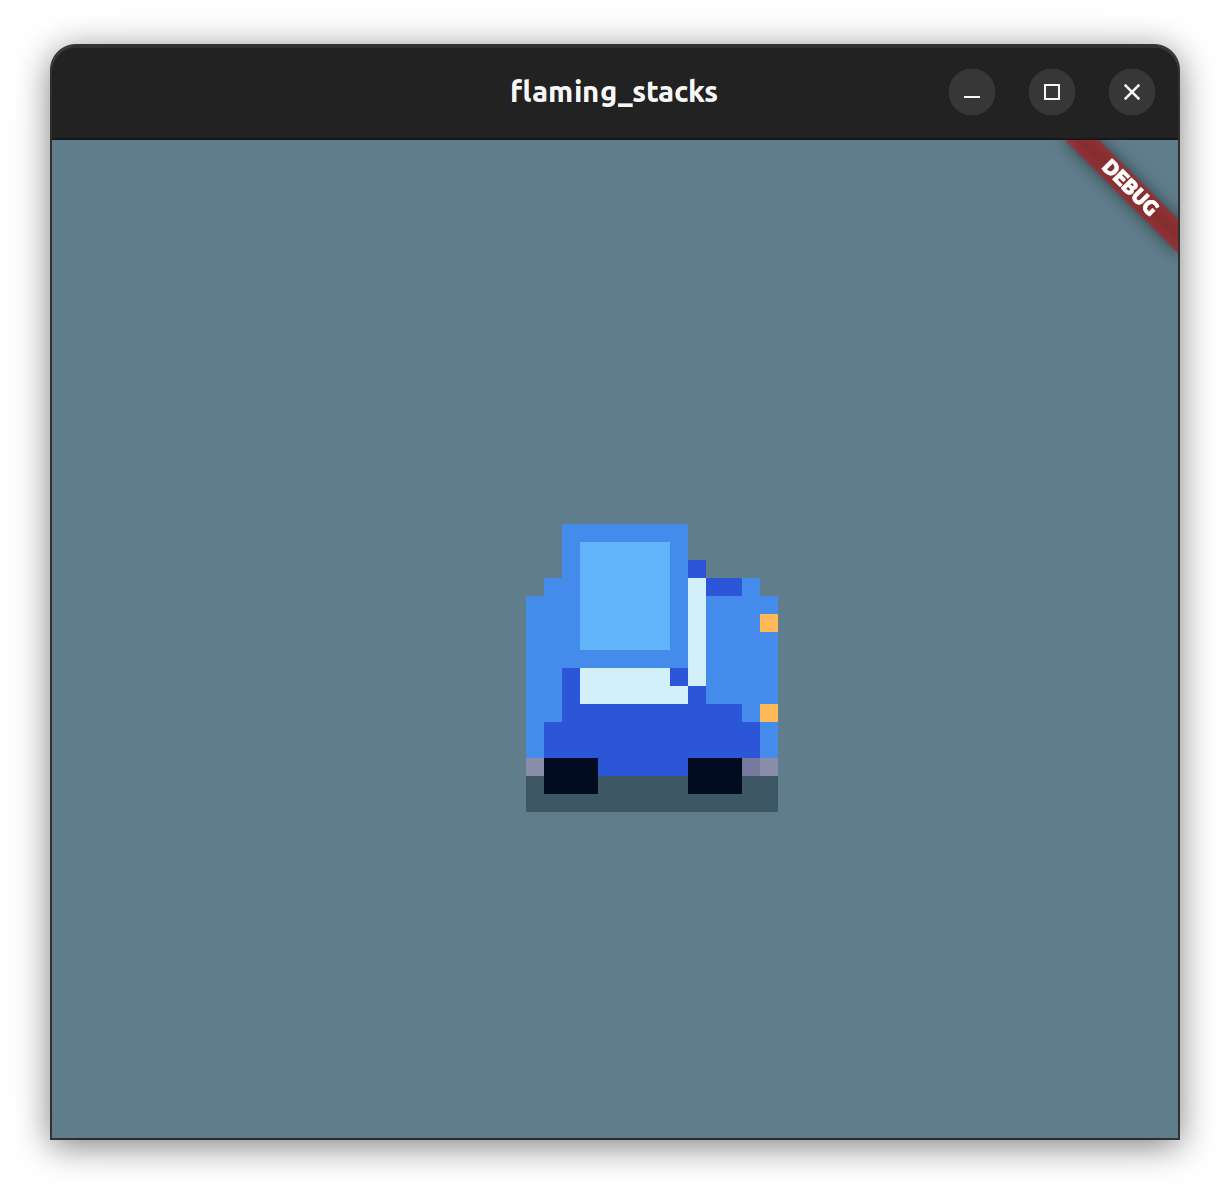
we should get something like this when we run our game:
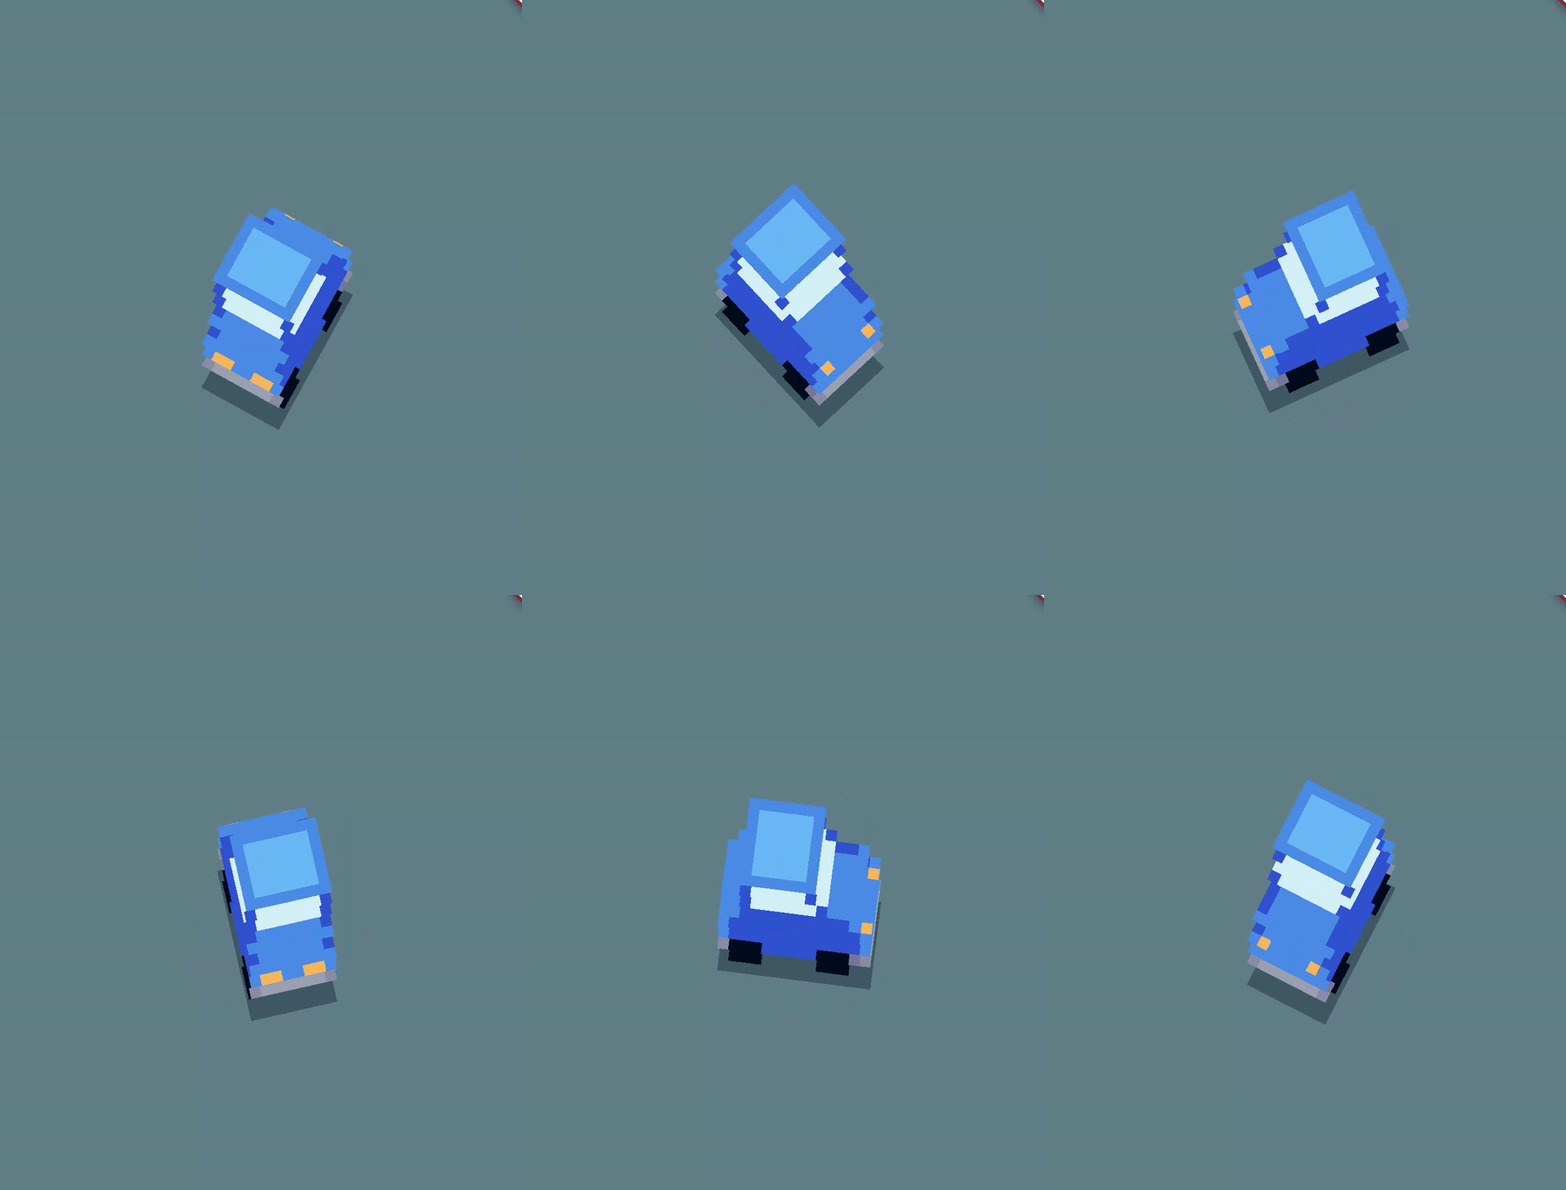
If we now pass in a value instead of just 0 for the rotation (and make it in radians):
rotation: _stackAngle * radians2Degrees,
which we update as time passes in our games update method:
 @override
  void update(double dt) {
    super.update(dt);
    angle += 0.0005; //spin car around slowly
  }
we get:
In an actual game, we would probably want to be able to control the orientation of the stacked sprite based on game play, then to do so all that is required is to instead of updating the angle based on lapsed time, do so by calculating it, for example taken from the relative angle to a point on the screen where a user touches or clicks with a mouse (see the example code that accompanies this article for example code on how to do just that).
Making stacked sprite models
While that covers the coding aspects of using a stacked sprite in our Flame games, we’ve so far just used pre-made sprites, but what about if you are keen to make your own? While you could try making the sprite sheets “by hand” using a sprite editor like Piskel* a much easier way is to use the excellent open source tool Goxel which has downloadable versions for Linux, Android, Windows, MacOS, iOS, as well as web-based version! 🎉🎉 Goxel lets you design your 3D models in a much easier fashion and then quickly export them to the required sprite sheet PNGs.
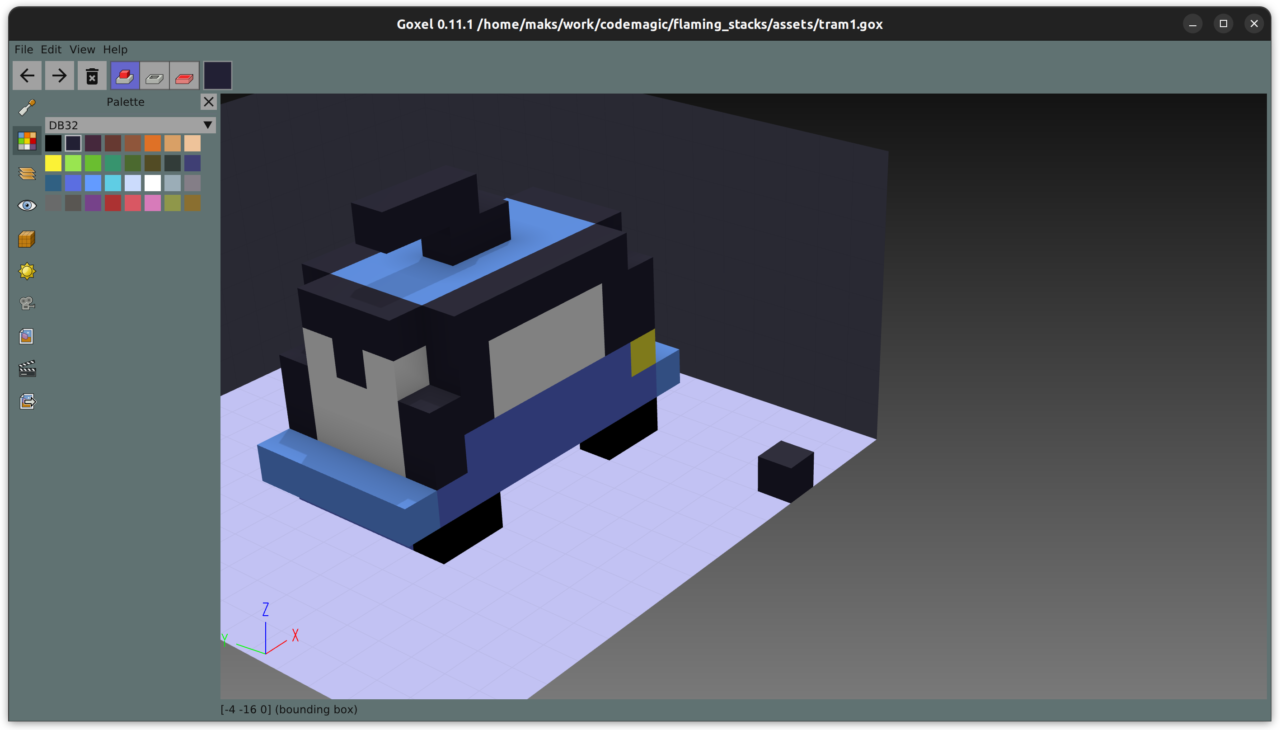
Note: If you are using a HiDPI monitor or laptop screen (as I was on Ubuntu 22.04) you will likely want to get the this dev build of Goxel which has fixes for UI scaling issues, which should then be available in a future 0.11.1 version of Goxel when its released.
Another good free, but not open source, Voxel editor I came across is MagicaVoxel, using it is described in this article and it can also be made to run on Linux using Wine..
If you do go down the path of making your own sprite sheets with Magica Voxel instead, one thing you will quickly discover is that when it exports to a PNG sprite sheet, it does so as a vertical not horizontal array of slices and it puts the bottom most slice at the bottom of the sheet. This of course won’t work with the code I showed above, but it’s not too difficult to modify it to work with sprite sheets in this format, with the code required being:
final sliceCount = sheetImg.height ~/ spriteHeight;

    for (int i = 0; i < sliceCount; i++) {
      _batch.add(
        source: Rect.fromLTWH(0, spriteHeight * (sliceCount - i), spriteWidth, spriteHeight),
        offset: Vector2(0, -i.toDouble()),
        anchor: Vector2.all(spriteHeight / 2),
        rotation: _stackAngle * radians2Degrees,
      );
    }
Use the source $first_name…
If you want to see a full working example (with a more polished version) of the code for this article you can find it in the accompanying Github repo
Learning more
To learn about the basic principles involved in use sprite stacking I can recommend this video from @Noonzhttps://www.youtube.com/watch?v=1xFVVvoT6eg) whose idea on illustrating sprite stacking by drawing a basic tree in a drawing app I shamelessly reused for my animated diagram above.
If you would like to get a more in depth tutorial on how stacked sprites work and how to use them, I found this video by @HeartBeast on using sprite stacking with the GameMaker Studio 2 tool to be very informative
Likewise for a more detailed written guide on using more advanced techniques with sprite stacking see this article.
But wait there’s more!
While we’ve looked at how to make use of individual stacked sprites, this technique would usually be used for multiple if not all visual elements in a game world and the approach I’ve shown here using Flame’s SpriteBatch won’t work for multiple stacked sprites if we want to make sure that Z-ordering is handled correctly. Luckily @Wolfenrain has already done that hard work for us with his cool Sashimi package which can handle whole game sprite stacking and we’ll look at how to use that in part of this journey into flaming sprites, so join me for that in a future edition of #FlutterFunFridays.
Until next time, have fun stacking those sprites!














Discussion about this post