Flutter is booming in the field of cross-platform mobile application development. Whilst developers can create solid apps with Flutter, they also have to ensure that the existing functionality is not broken by the latest code changes. In order to get that confidence, developers can write a layer of automated tests. It is also important to run the automated tests on a regular basis or on every code change to get continuous feedback, this is where continuous integration comes into the picture. Since it was announced at Flutter Live in 2018, Codemagic has become the official CI/CD solution for Flutter apps, so we can easily integrate Flutter’s automated tests on Codemagic without any configuration.
In this post, we will explore how to integrate Flutter tests on Codemagic.
About testing Flutter apps
Flutter has a richer set of testing features than any other cross-platform mobile app development framework. Flutter provides a solid testing framework which allows developers to write tests at unit, functional and UI level. Widget testing is one cool feature that Flutter provides to run UI tests as fast as unit tests. Flutter also has UI tests, known as integration tests, that run on the simulator or on real devices.
Flutter has cool documentation on how to test Flutter apps at different levels with example code. We will briefly cover all layers of Flutter tests using the Codemagic-Demo app.
Enabling testing in Flutter apps
In order to test Flutter apps, we need to understand the different levels of testing and add the Dart packages to enable Flutter testing. There are packages like flutter_test and flutter_driver to support the testing of Flutter apps. The first step is to add those dependencies in the Flutter app. Flutter uses the pub package manager to manage all the Dart dependencies. The dependencies are usually stored in the pubspec.yaml. We can add our testing dependencies there.
dev_dependencies:
  flutter_test:
    sdk: flutter
  test: ^1.5.1
At the moment, we can use a stable test version above 1.5.1 to get the unit tests working. There was a breaking change in the API as mentioned here. Once we have all the testing dependencies in place, we can just update the Flutter dependencies using the following command:
We have now added the testing dependencies to our Flutter project. The versions of all the dependencies are locked in the pubspec.lock file. We can now import all the testing packages in our tests. We also need to create the test directory for storing all our unit and widget tests. If we want to enable integration testing, then we need to create the test_driver directory to store all the code for our instrumented app and integration tests.
Unit testing
The purpose of unit tests is to verify that a single unit or method works well with different conditions or parameters. Flutter unit tests can be added with the package package:test and by adding the tests into the test directory at the root of the project. We can add a simple unit test by creating a file test/unit_test.dart with the following code:
import 'package:test/test.dart';

void main() {
  test('Test Addition', () {
    var answer = 42;
    expect(answer, 40+2);
  });
}
This test will verify if the addition works with different inputs and we can expect correct values. This is a very basic unit test, but in reality, we can add unit tests for the modules we write in apps. We can run the unit tests locally using the flutter test command. This command will run all the tests inside the test directory. If you want to run an individual unit test, we can run it by passing the relative path, like this:
flutter test test/unit_test.dart
Widget testing
The widget testing feature of Flutter allows developers to verify the functionality of the widgets used in the app. We can launch a widget as part of the test and perform actions as real users do on the widget. An amazing thing about widget testing is that widget tests run as fast as unit tests whilst going through the UI. There are barely any other test frameworks which have this kind of feature. The widget tests for Flutter come up in the package:flutter_test package and have fluent API documentation available here.
We can add a widget test for our Codemagic-Demo app by creating a test/smoke_test.dart file with the following content:
import 'package:flutter/material.dart';
import 'package:flutter_test/flutter_test.dart';

import 'package:flutter_demo/main.dart';

void main() {
  testWidgets('smoke test', (WidgetTester tester) async {
    final app = MyApp();
    await tester.pumpWidget(app);
    expect(find.text("0"), findsOneWidget);
    await tester.tap(find.byIcon(Icons.add));
    await tester.pump();
    expect(find.text("1"), findsOneWidget);
  });
}
This test launches the Flutter demo app, pumps the widgets, asserts that the count is initially 0 and then taps on the add icon to assert that the count has been incremented to 1. You can see that this test covers a lot of user actions but with incredibly fast speed. We can run this test similarly to unit tests with the flutter doctor command. The widget testing feature is truly amazing.
Integration testing
Flutter integration tests are similar to Xcode UI tests or Android Espresso tests which go through the UI to perform specific operations. Flutter integration tests run in a separate process and can be run on real devices or on simulators or emulators. Flutter provides a separate package, Flutter Driver, to drive these tests. In order to enable those tests in our app, we have to add the flutter_driver package to pubspec.yaml and write integration tests in the test_driver directory at the root of the project.
We also need to create an instrumented app and enable the Flutter Driver extension using the enableFlutterDriverExtension() method. You can find the details of the setup on Flutter documentation, or read an excellent post on how to set up integration testing for a Flutter app here.
We have written an integration test to test the message on the screen here. We can run this test locally using the flutter drive command as follows:
flutter drive -target=test_driver/main.dart
This test will launch the app on the simulator or the emulator and will then assert that the message appears on the screen.
We can set up integration tests on real devices and watch them run to gain confidence in the app.
Testing Flutter apps on Codemagic
We have seen how to run Flutter tests locally, but in order to run them on a regular basis on every code change, we need a continuous integration server. The process of setting up the tests on a CI server usually requires some setup and configuration, but with Codemagic it is entirely painless, as:
- Codemagic analyzes the Flutter project and provides an option to enable the Flutter tests;
- Codemagic also scans the code for integration tests and provides an option to enable the Flutter driver tests.
Codemagic has become the de-facto tool for CI/CD of Flutter apps. The Codemagic getting started guide covers the onboarding process of Flutter apps. Now, we will cover the testing part in details.
What we need?
- Github, Bitbucket or GitLab account to get access to Codemagic
- Flutter app with unit, widget and integration tests. Integration tests are optional but good to have in a Flutter app
That’s it! We are all set to run Flutter tests on Codemagic. In this tutorial, we will use a demo app Codemagic-Demo which has unit, widget and integration tests.
Once you have access to Codemagic, Codemagic will detect your Flutter project and tests. You don’t have to explicitly do anything to enable testing of the Flutter app unless your tests use a custom configuration.
Codemagic testing related features
- Widget testing: Out-of-the-box support for unit and widget tests using Flutter Test
- Widget testing without building apps to save build time.
- UI testing: Support for integration tests with Flutter Drive.
- Fail fast approach: Codemagic runs the tests before building iOS and Android apps which saves time if some of the tests fail. We can also stop the build if a test fails.
- Pre-test and post-test actions: In cas, you need to upload the test artifacts to some other services or install some packages just before test starts. This feature is great to customize Flutter testing.
Running tests
You can enable testing in the Test section of app settings.. In most cases, Codemagic will detect the Flutter project along with the tests and enable them for you by default. You can then explicitly choose which tests you want to run as part of the build process.
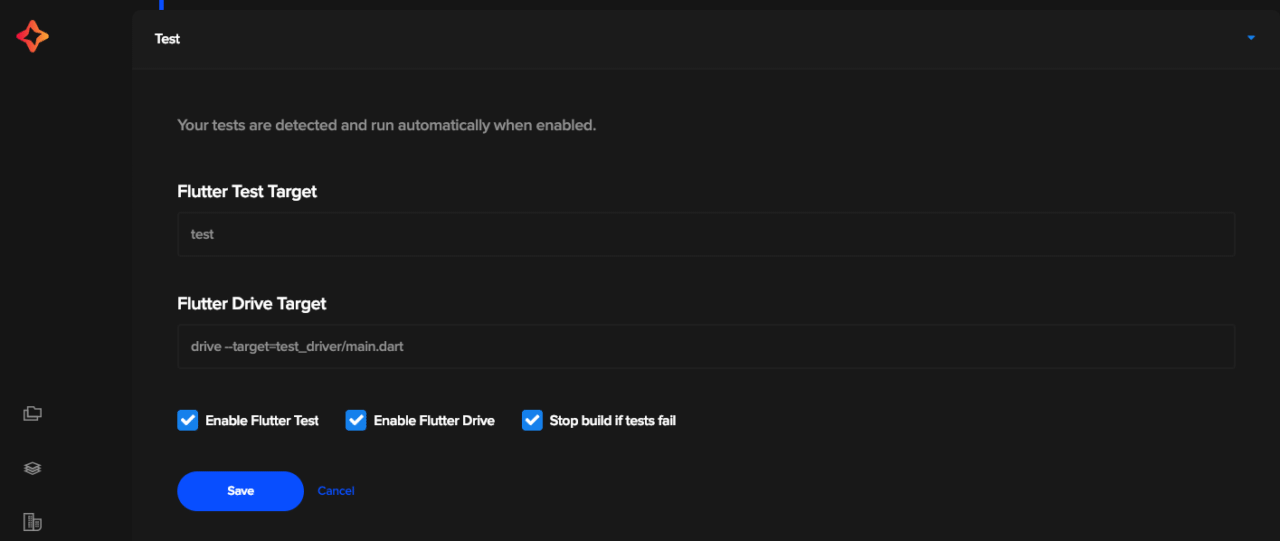
Once we have enabled the tests, we have to save the configuration and trigger a new build. The newly triggered build will run all our tests with the results printed in the console.
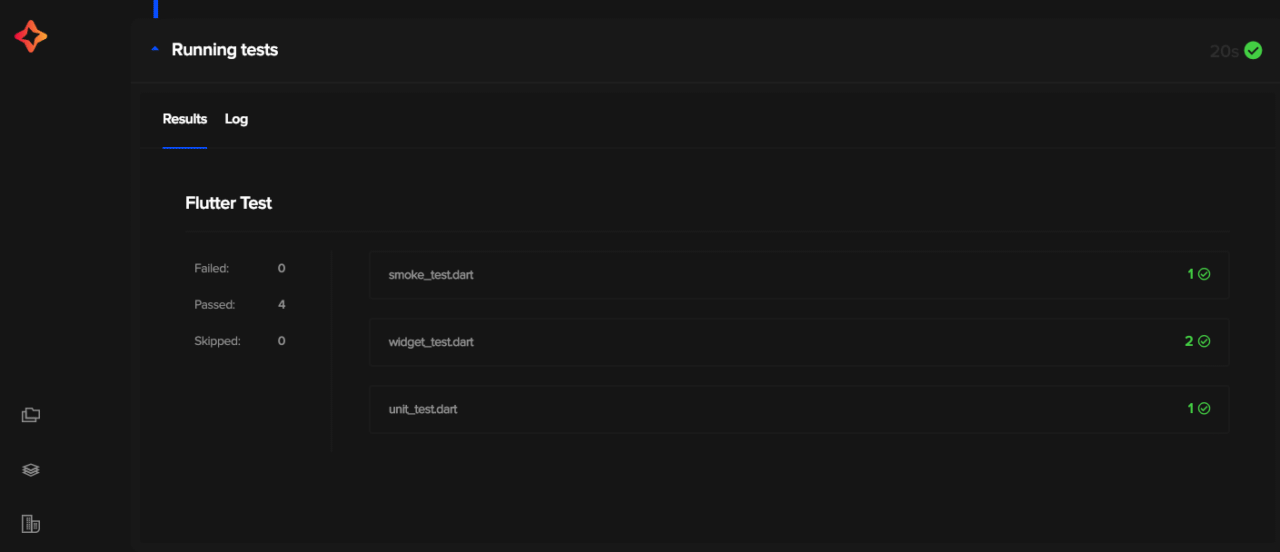
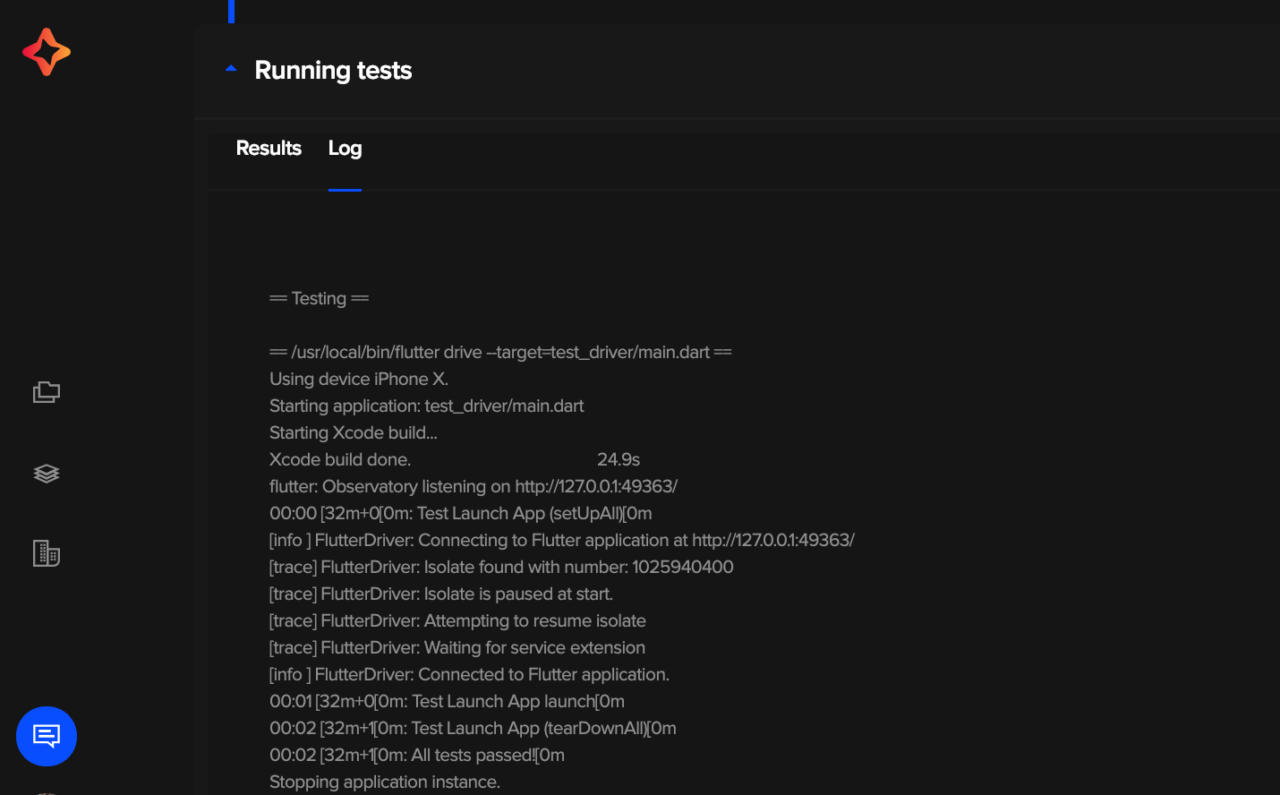
We can also see detailed verbose logs of the tests on the Log tab in test reports. In the case of the Flutter drive test, we got the logs in the console as shown below.
When a test fails, Codemagic will stop the build and send an email with the test report and a link to the build logs.
Cover different testing scenarios
We have just seen how easy it is to get started with testing Flutter apps on Codemagic. However, there are some other complex test execution builds we can run on Codemagic by creating custom workflows. For example:
- You may want to trigger only unit and widget tests on the feature branch and keep the UI tests for the master branch.
- You may want to run UI tests and performance tests on specific branches.
- You can run only widget tests without building app to get quick feedback.
You can easily achieve those scenarios by creating multiple workflows. Simply specify the branches to build in the Build triggering section of app settings and choose which tests to run.
Source code
You can find the source code of all the Flutter tests described here on the Codemagic-Demo app on GitHub. You can clone the project and run widget and integration tests as follows:
git clone https://github.com/Shashikant86/Codemagic-Demo
cd Codemagic-Demo
flutter test
flutter drive --target=test_driver/main.dart
Conclusion
Getting regular feedback on your automated tests is critical in mobile app development. Flutter provides a great automated testing framework to test the app at unit, widget and integration level. With Codemagic, we can automate running the automated tests as part of continuous integration without any setup or configuration.






Discussion about this post