Written by Helina Ariva
One of the killer features of Codemagic is its Apple Developer Portal integration for automatic code signing of iOS apps. With automatic code signing, Codemagic takes care of creating and managing the signing certificates and provisioning profiles for you: just set up the integration once and use the same credentials across all your apps and workflows.
The good news is that our Apple Developer Portal integration just got better as it’s now using the official App Store Connect API, powered by our very own open-source utilities collectively known as Codemagic CLI tools for a transparent code signing experience.
Continue reading to find out what changes with the new Apple Developer Portal integration, how to set it up, and what’s the role of Codemagic CLI tools in all this.
Using API keys instead of login data
Many services, including Codemagic, that used to integrate with Apple’s services did so by asking users for their Apple developer portal username and password to create a session with Apple. This approach came with several problems, such as failure to receive the two-factor authentication code from Apple and expiring sessions that required reconnecting the integration in Codemagic.
Using the App Store Connect API and API keys instead of session-based authentication resolves these issues. There will be no more expiring sessions or hassle with two-factor authentication. In addition, the API keys come with permission levels, which greatly limits our access to your data compared to giving full access to your account. You can create different keys for different teams and use a suitable one per workflow in your Codemagic builds.
Setting up automatic iOS code signing in Codemagic
In order to set up automatic code signing, you need to create an API key in App Store Connect and connect the Apple Developer Portal integration in the Codemagic app for UI builds.
- Note that connecting the Apple Developer Portal in Codemagic app is required only for builds configured in the UI. The builds configured using
codemagic.yamlhave the code signing setup in the configuration file. - Most Codemagic users and teams with a valid Apple Developer Portal session have been automatically migrated to use the API keys. In case automatic migration was not possible, follow the steps below to reconnect the Apple Developer Portal integration in the Codemagic app.
Creating an API key for Codemagic
We recommend creating a dedicated key for use in Codemagic.
- Log in to App Store Connect and navigate to Users and Access > Keys.
- Click on the + sign to generate a new API key.
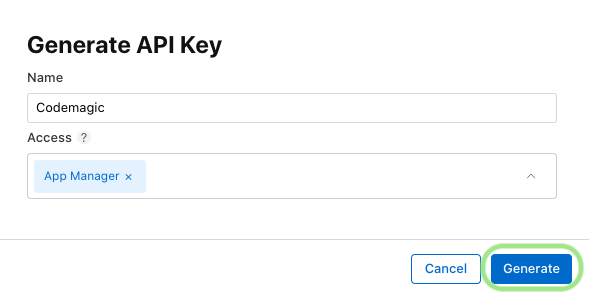
- Enter the name for the key and select an access level. We recommend choosing either Developer or App Manager, read more about Apple Developer Program role permissions here. Then, click Generate.
- As soon as the key is generated, you can see it added in the list of active keys. Click Download API Key and save the key for later. Note that the key can only be downloaded once.

Take note of the Key ID and the Issuer ID above the table of active keys as these are required in the Codemagic setup in addition to the generated key.

Connecting the Apple Developer Portal integration for UI builds
The integration is configured separately for teams and for your personal account. Connecting the integration in team or user settings allows you to conveniently use the same credentials for automatic code signing across all apps and workflows.
- In the list of available integrations, click the Connect button for Developer Portal.
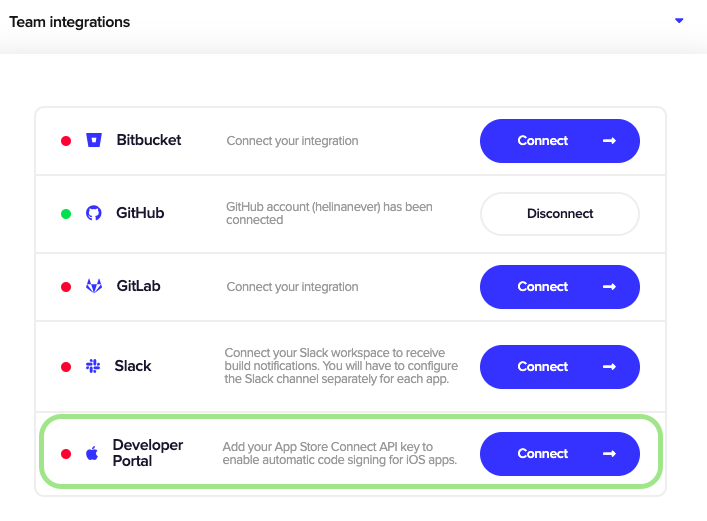
- Fill in the fields in the configuration popup as follows.
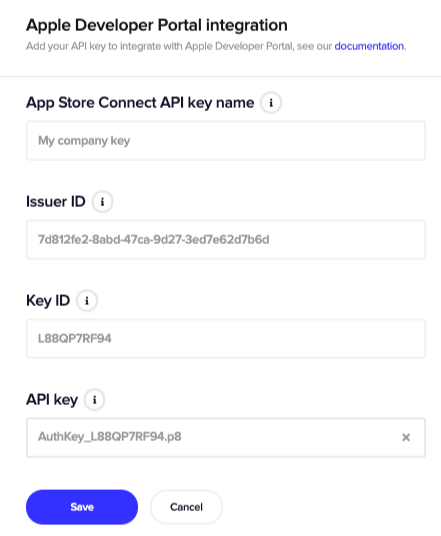
- In the App Store Connect API key name field, provide a name for the key you are going to set up the integration with. This is for identifying the key in Codemagic so that when you have multiple keys available, you can easily pick the right one in workflow settings.
- Enter the Issuer ID related to your Apple Developer account. You can find it above the table of active keys on the Keys tab of the Users and Access page.
- Enter the Key ID of the key to be used for code signing.
- In the API key field, upload the private API key downloaded from App Store Connect.
- Click Save to finish the setup.
If you work with multiple Apple Developer teams, you can add additional keys by clicking Add another key right after adding the first key and repeating the steps described above. You can delete existing keys or add new ones when you click Manage keys next to the Developer Portal integration in user or team settings. See also our documentation about iOS code signing for more information.
Using automatic code signing with YAML builds
When you export your UI configuration that has automatic code signing as a codemagic.yaml file, all your code signing settings will be exported as well. If you’re getting started with codemagic.yaml from scratch, you need to create an API key as described above and save the key, the Key ID and the Issuer ID into environment variables.
environment:
  vars: # Define your environment variables here
    APP_STORE_CONNECT_ISSUER_ID:
    APP_STORE_CONNECT_KEY_IDENTIFIER:
    APP_STORE_CONNECT_PRIVATE_KEY: Encrypted(...)
    CERTIFICATE_PRIVATE_KEY: Encrypted(...)
Additionally, you need to upload a RSA 2048 bit certificate private key to CERTIFICATE_PRIVATE_KEY. This will be included in the signing certificate that Codemagic creates. You can use an existing key or create a new 2048 bit RSA key by running the following command in your terminal:
ssh-keygen -t rsa -b 2048 -f ~/Desktop/codemagic_private_key -q -N ""
We recommend encrypting the sensitive values as the Codemagic configuration file will be stored in the repository. To properly encrypt the App Store Connect private key and the certificate private key, copy the contents of the file and encrypt it in the Codemagic encryption interface. You can then add the encrypted values to the respective environment variables.
The actual code signing must be set up in the scripts section of the codemagic.yaml file, just before running the actual build commands. Based on the bundle ID and provisioning profile type you specify in this section, Codemagic will fetch (or create) the code signing files from App Store Connect.
scripts:
  - find . -name "Podfile" -execdir pod install ;
  - keychain initialize
  - |
# Fetch signing files for specified bundle ID "com.example.app",
# specify provisioning profile type,
# allow creating resources if existing are not found.
  - |
    app-store-connect fetch-signing-files "com.example.app"
      --type IOS_APP_DEVELOPMENT
      --create
  - keychain add-certificates
Read more about the different options for setting up iOS code signing in codemagic.yaml from our documentation.
Under the hood, a set of tools and utilities collectively known as Codemagic CLI tools are used to build and code sign iOS apps. More specifically, we use the xcode-project utility for preparing the code signing properties for the build, the keychain utility for managing macOS keychains and certificates, and the app-store-connect utility for creating and downloading code signing certificates and provisioning profiles. The latter makes use of the App Store Connect API for authenticating with Apple Developer Portal.
We created these utilities to facilitate the many activities related to building and code signing iOS apps when we worked on adding support for building iOS apps with codemagic.yaml and now use them for iOS builds globally. In this log snippet, you can see Codemagic CLI tools in action.
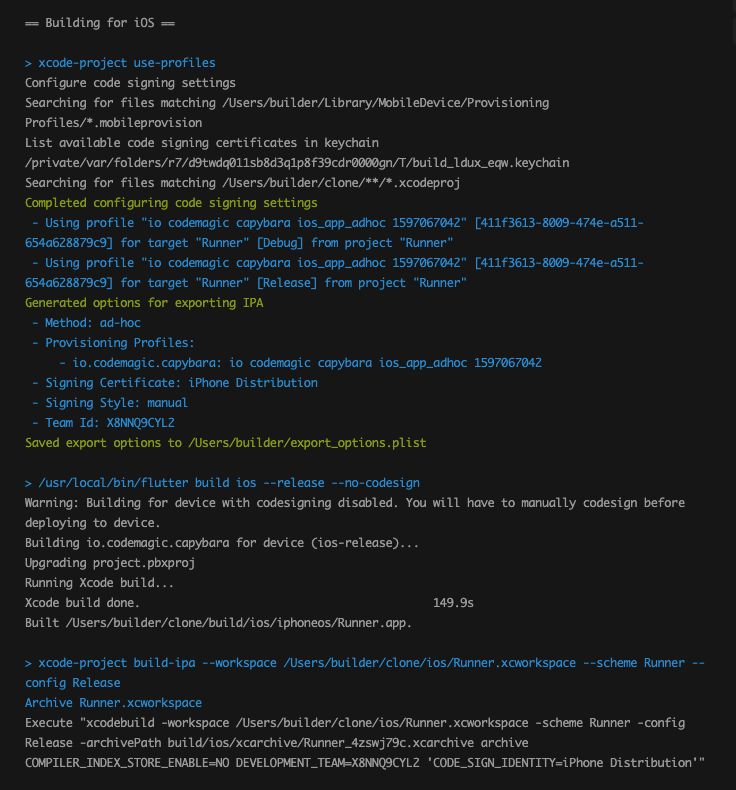
The best part of these tools is that they are open source and can be also used locally for iOS builds and code signing management. Check out our documentation on how to use Codemagic CLI tools locally.




Discussion about this post