Flutter 106 by Scott Stoll
There are lots of ways Flutter makes it easy to create animations, from basic Tweens to Implicit Animations that are built right into the framework. And if those don’t fit your needs then there are third party solutions that do nearly anything you can imagine. From rotations to fades, size transitions and even animations where one Widget flies from one page to another, Flutter makes it easy!
But easy can sometimes be almost too easy. Don’t make the mistake of deciding on the approach that is easiest, without bothering to look at how it works. Some things are more expensive than others and if you use one of those all over the place when something simpler would work just as well, then you could drag your app’s performance down to a crawl.
DnKAWaSh (DINK-a-wash): 1) Don’t Kill an Ant With a Sledgehammer
That’s an acronym they actually teach in some of the top engineering schools in the United States. Scary, isn’t it?
Something that could, potentially, be an example of trying to kill an ant with a sledgehammer is the overuse of AnimatedContainer. It might be very tempting to use it any time you need to animate a Container or make it appear that its children are animating, since it can do most anything. But what you need to be aware is at runtime it’s going to try to animate everything it can, not just the things that changed. You don’t see it because the values for the start and end of the animation are the same, since nothing’s changed. But it’s creating Tweens to animate those properties that haven’t changed, just the same.
So, if you’re only going to animate only a single parameter then you might want to see if you can use a Widget that only animates that specific parameter. If you want to change something’s size, then you can use AnimatedSize Widget. You want to animate Padding, Opacity, Align? Yeah, there’s a widget for that.
Here are some of the things that AnimatedContainer does and how you can accomplish the same things with other animated Widgets.
As you can see, there’s quite a bit. If you read the docs carefully, you’ll see that every property you specify a value for will be animated every time anything changes:
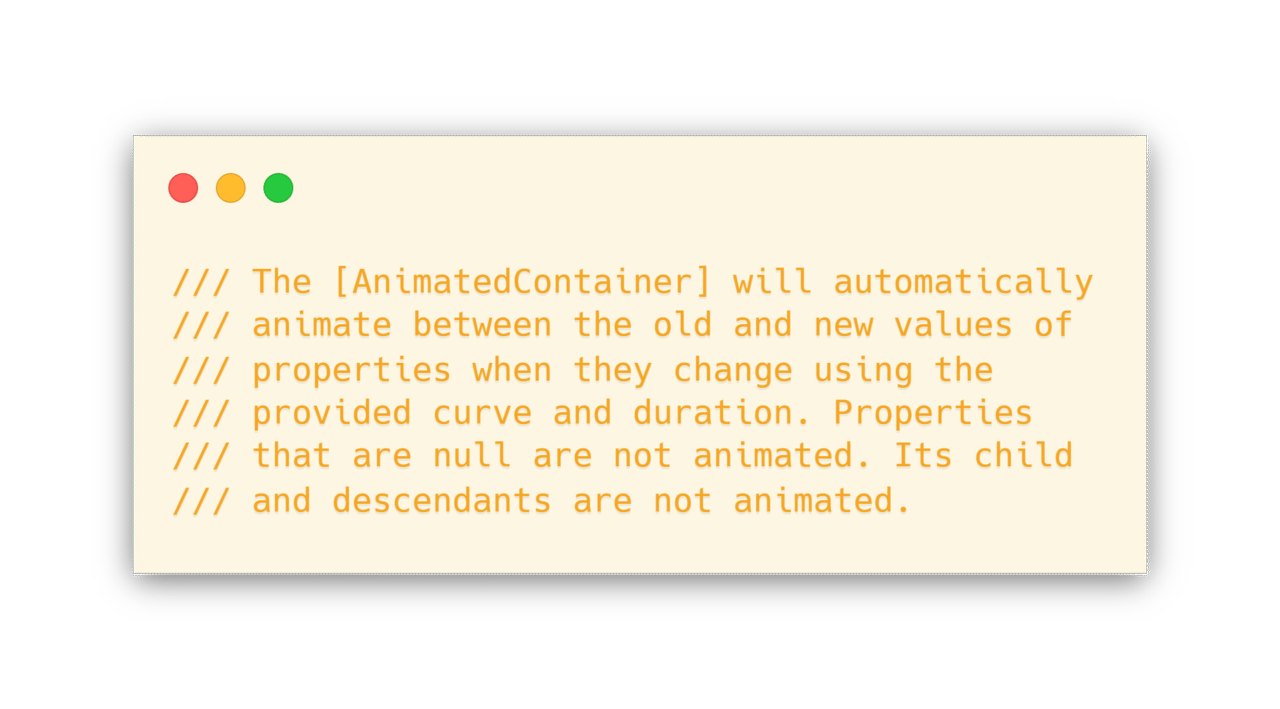
There are three main things to look at here:
- The Container will animate between old and new values when something has changed.
- Properties that are not null are not animated.
- It’s child and descendants are not animated.
Notice there is nothing said here about if old and new values are equal. If you set the values for height, width and color, then when you animate the height the width and color will still have their Tweens calculated.
Is that horrible? Actually, no. It’s really not that bad. It might seem like you’re using a Sledgehammer to kill an Ant but performance-wise it’s not horribly different than this:
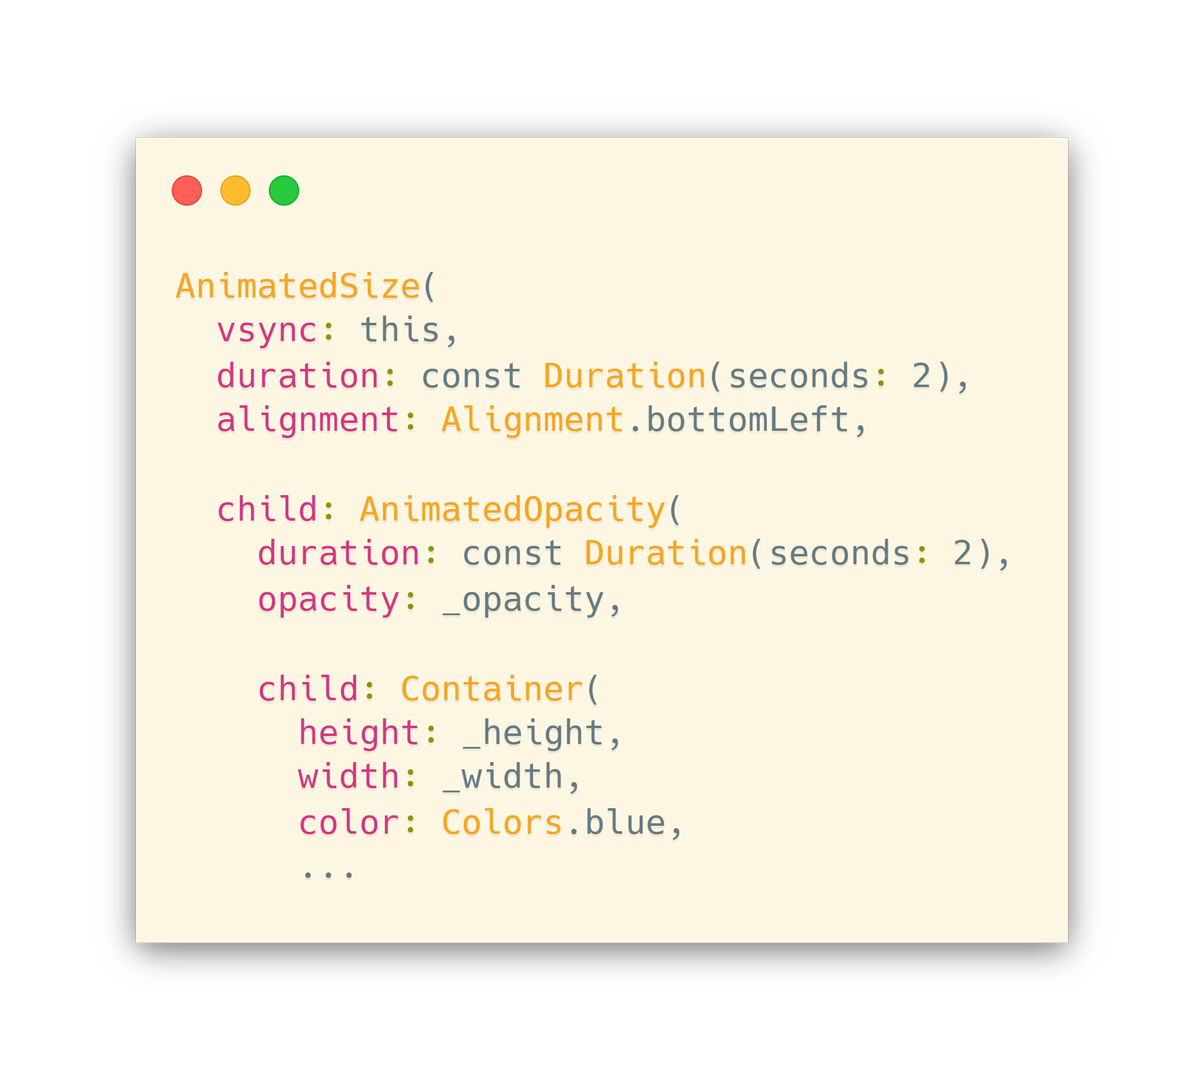
Hopefully, the added whitespace makes it obvious what’s going on here. Per the docs, the AnimatedSize will animate whenever the size of its child changes… but experimentation has shown that it still works even though the Container is the grandchild of the AnimatedSize, not the direct child.
That’s right, changing _opacity, _height or _width each triggers it’s proper animation, even though the _height and _width are contained in the grandchild of the AnimatedSize.
This means you could, that is could, nest an implicitly animated Widget for each property you want to animate, without using an AnimatedContainer that would animate every property you set whether you change it or not. In this case, that would have included the color blue, even though it never changed.
But again, is this a much more performant solution? Well, not really. The main thing it accomplished was getting you to really think about all of these things; that’s how you learn.
Besides, it was the best way I could think of to slip “DnKAWaSh” in here.
Truth is, if you use the AnimatedContainer then you will have a Tween calculated for each property, but there’s only one AnimationController for all of them. If you use separate, nested Widgets, then you’ll have a different AnimationController for each of them, but each one is only triggered if its specific property changes. However, with separate Widgets the fact that the extra AnimationController exists does mean you now have an extra Ticker and an extra Element for each additional Widget you use whether you trigger it or not… so there’s a performance hit if you go that way, too.
In the end, the matter of performance comes down to this: If you really want to tweak for performance then you shouldn’t be using the implicit animations anyway. You should be rolling up your sleeves, doing some custom work, and tuning it like a race car.
But if you wanted to do that then you wouldn’t be reading an article about animations for lazy people, would you? Of course not! Let’s get back to some of the things we can do in EZ-Mode, shall we?
So what are some Implicitly Animated Widgets we can use?
- AnimatedSize
- AnimatedOpacity
- AnimatedPadding
- AnimatedPositioned (Limited use. Only where the Constraints are loose, like a Stack)
- AmimatedWidget (Animates between different types of Widgets, like a Text and an Icon)
- Hero (Animates a Widget from one page to another, when it appears on both pages)
And let’s not forget AnimatedContainer!
More Complex Animations, the Easy Way
Sometimes you need something a lot more complex, but you don’t want to have to create it manually. This is where Rive comes in. You may have heard of them under different names, 2Dimensions and Flare. 2Dimensions was the old name for the company and Flare was the old name for the editor itself. Today, both are known as Rive.
Rive consists of the editor, which can import SVG and Lottie files, and the Rive runtime code. Combined, they work to put your custom animation in your app.
The animations can be reactive, to create all sorts of effects that react to the user’s inputs and actions. IE: Teddy the bear, in the Flutter Interact session on Rive, has his eyes follow the cursor as you type in your Username. He also shows a happy animation if you submit the right password and a not so happy one if you submit the wrong password. The animations can be blended into each other, making for smooth transitions instead of just popping abruptly from one animation to another.
Components can be layered and animated individually, as well as manipulated with bones that use kinematics; much like Unity, Blender 3D and other gaming/animation creation software.
Additionally, also like Unity and Blender, the animations and rigs are independent of the graphic components they manipulate, allowing rigs and animations to be reused over and over by different graphical characters and objects. This means you can create an animation once and reuse it over and over.
You can find out the latest (as of December 2019) by watching their session from Flutter Interact
Hopefully this has given you some ideas of things you can do quickly, and easily. But remember, if the page you’re on is one where you have to worry about performance then you’re better off rolling up your sleeves and doing something custom. However, there are many pages in an app where performance is a concern, and never forget that you have to make decisions about performance for the page that is showing at any given time. If you have a main page where performance is a big concern, you might still be able to get away with using these lazy approaches in other areas of the same app, such as the login or settings pages.
That’s all for now. Until next time, be sure to watch the keynote from Flutter Interact. You’ll see how use of Dart has grown by more than 500% and that Flutter is now in the top 10, and is still climbing fast!
Here’s a challenge for you, make some awesome eye candy using these techniques and post it to Twitter, with a link to this article. Be sure to tag #Flutter, me (@scottstoll2017) and Codemagic (@codemagicio) so we can retweet your creations!
Scott Stoll is a writer for Codemagic, and a Flutter trainer affiliated with ArdanLabs. He can be stalked at @scottstoll2017 on Twitter and you can reach him at scottstoll2017@gmail.com











Discussion about this post