









Written by Maks Majer
Setting up test automation and CI/CD for mobile apps is something that our team at ITCraftship commonly has to do for our projects. It’s a repeatable task, but for every app that we’ve been setting this up, it took a significant time (even up to 2 days).
Based on five years of experience in configuring iOS and Android builds using fastlane for native and hybrid mobile technologies (Cordova, Capacitor, React Native, and Flutter) we established a template that we use to jump-start CI/CD setup for new projects.
This tutorial will present a step by step guide on how to setup Codemagic CI with *fastlane *and publish the Truth or Dare game to both App Store and Google Play using your own developer accounts. The steps will allow you to customize your app name, so modifying this for your specific application will hardly be a challenge.
Good luck releasing your apps!
Truth or Dare — the demo application
The demo project is a very simple open-source Truth or Dare application created in Flutter. It was created as an example for this particular tutorial, but we wanted to make it a bit more fun ?
Here’s a short animation showing the app:
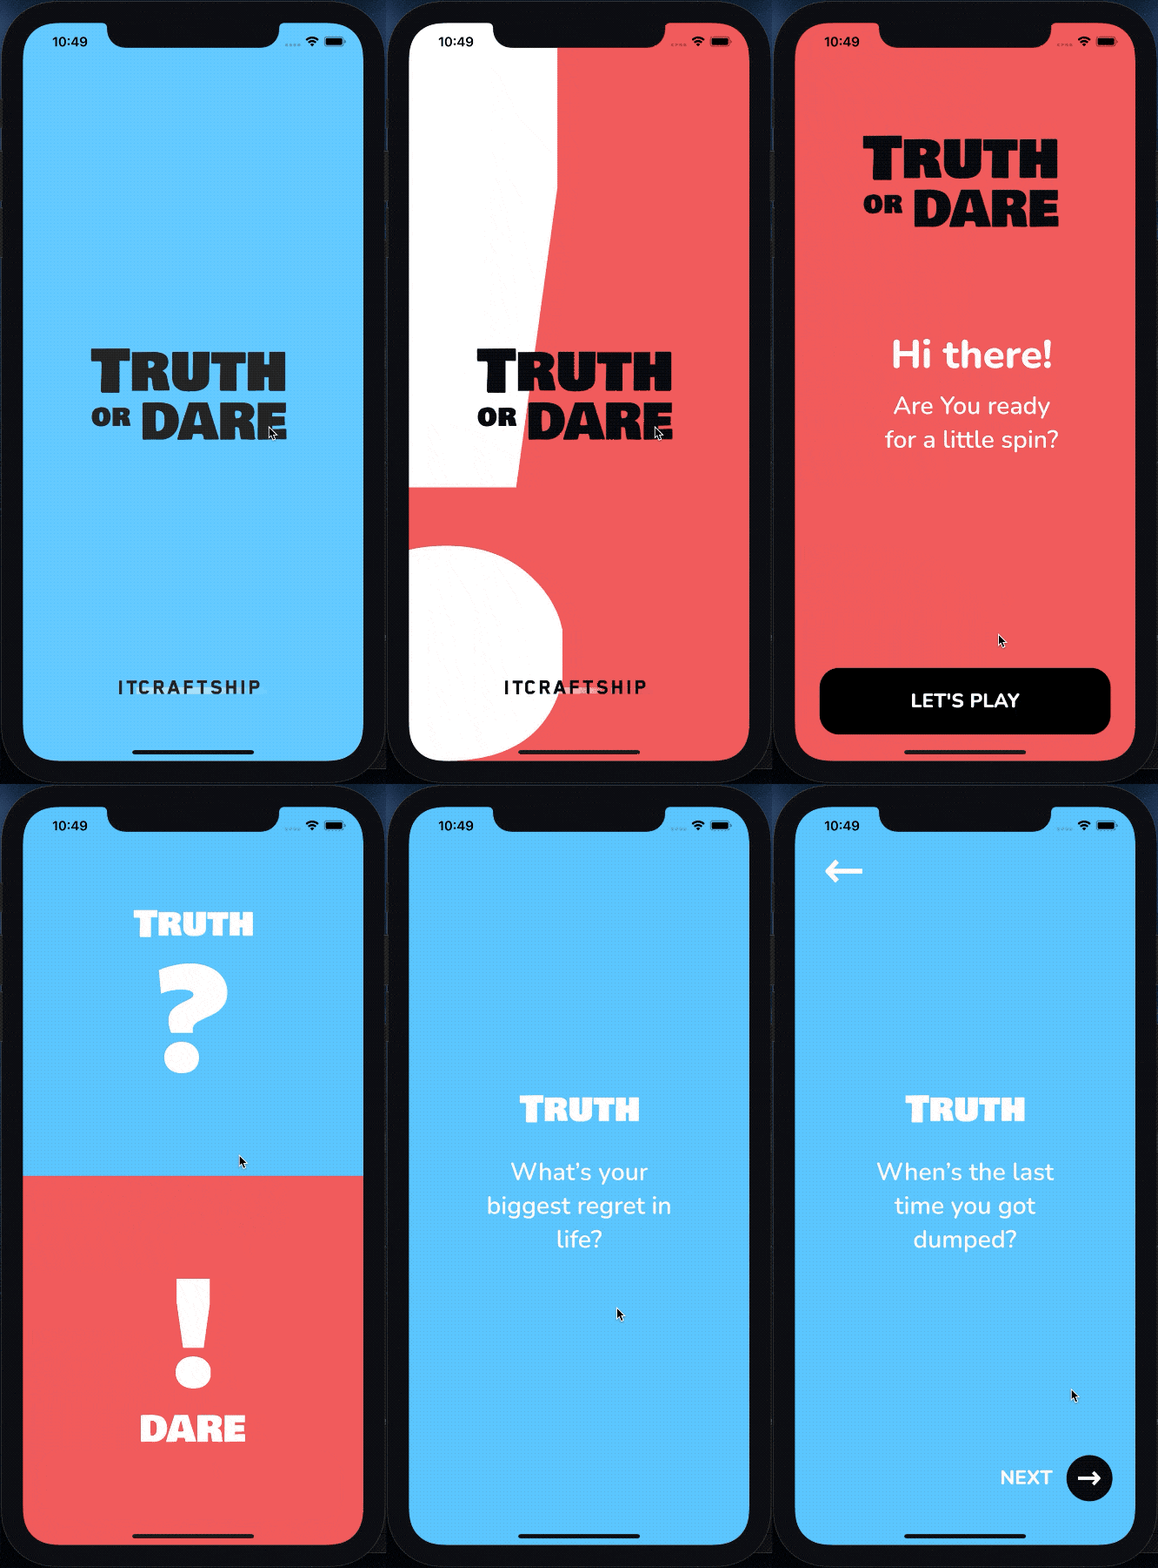
You can download the application from the App Store and Google Play.
DISCLAIMERS
Operating System
Since building apps for iOS relies on having a computer with macOS, we’ll assume that this is the environment you have. If you’re running on a Linux-based OS many of the steps will look the same. On Windows, however, I recommend that you use the Windows Subsystem for Linux to follow this guide.
Shell
We are assuming either zsh or bash for your default shell. If you’re using something else (ex. fish) you will have to use appropriate syntax for some things – like setting environment variables.
Later whenever we mention that you should set an environment variable, besides of running the export command in your current terminal instance, make sure to add this export to your shell profile (ex. .zshrc, .bashrc, .bash_profile ).
Flutter & XCode version
At the time of writing this app, Flutter was at version 1.22.5 and XCode at 12.3. Codemagic allows setting those versions in the YAML configuration, so nothing should change for your CI. However, on your local machine you may experience issues building the app if there were significant breaking changes in Flutter or XCode versions.
Forking the repository
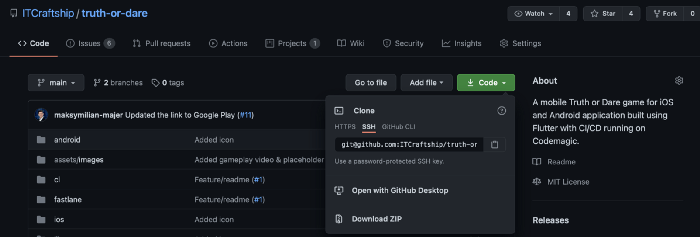
To copy the repository to your account, press the Fork button in the top right corner of the repository. After a while, it should be visible as one of your repositories.
Preparations
Clone the fork
First, start by cloning the repository into a desired location and cd into the directory.
Install the prerequisites
Before you can build and run the project locally, you’ll have to follow the README to install all the required dependencies. I will assume that you already know how to create a new flutter project, but here are some of the steps from our README that will help you make sure you installed everything you need:
brew tap dart-lang/dart brew install dart
brew install dart
RVM & Ruby
You’ll need a ruby environment. It’s recommended to use RVM.
- On a Mac you’ll need to install GPG first, ex: https://gpgtools.org
- Then install RVM by running:
gpg2 --recv-keys 409B6B1796C275462A1703113804BB82D39DC0E3 7D2BAF1CF37B13E2069D6956105BD0E739499BDB &&
 curl -sSL https://get.rvm.io | bash -s stable
- If you just installed RVM, then install Ruby as well:
The ruby version is specified in .ruby-version file.
Build the project
In order to build the project, first, you need to run the command:
If you are using Android Studio you can also enter pubspec.yaml file and press the get button at the top right corner.
Next, use the command
To see if everything is working properly and the app is building.
fastlane
To make the publishing process easier and faster, we will use fastlane. It is already included inside of the Gemfile, so all you need to do is run:
Now you should be ready to go.
iOS Setup
Bundle identifier
The first thing you need to do in order to publish your app to App Store is to change the bundle identifier to something unique.
To make it quick we will use a find and replace all function.
Replace all occurrences of com.itcraftship.truth-or-dare with the bundle identifier of your choice.
- For Android Studio You can use
⌘⇧Ron Mac andCtrl+Shift+Ron Windows - For Visual Studio Code You can use
⌘⇧Fon Mac andCtrl+Shift+Fon Windows, then you need to click the arrow in the top left corner to enable replacing
The files that should be affected are:
fastlane/Appfile
fastlane/Fastfile
fastlane/Matchfile
ios/Runner.xcodeproj/project.pbxproj
It will also replace the value in the tutorial Markdown, but you don’t need to worry about it ?
Team ID
Next, You need to update the Team ID inside Appfile. To access it, go to https://developer.apple.com/account, log in to your account and click Membership tab. Team ID should be the 3rd row from the top.
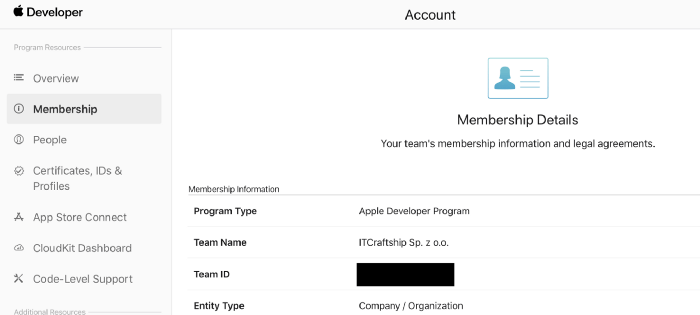
Now, go to Appfile and replace the team_id value with your own.
Apple ID
You will also need to add your Apple ID to environment variables, to avoid typing it every time fastlane or Match need it. Apple ID is the email address you use to log in.
export TOD_APPLE_ID=<your apple id>
Application-specific password
For the CI to be able to upload builds to App Store Connect, you will need to generate an application-specific password. Here is a tutorial on how to do that.
As before, you should add it to environment variables:
export TOD_APP_SPECIFIC_PASSWORD=<your app specific password for CI/CD>
Create an application with fastlane
Now we would like to create the app inside App Store Connect. In order to do that, run the following command:
bundle exec fastlane produce --app_name <application name of your choice> --language <primary language e.g. en-US>
As an example you could call this:
bundle exec fastlane produce --app_name "Tod Tutorial" --language en-US
after that new iOS application should be visible in App Store Connect with the Bundle ID taken from the Appfile.
When you have the app created, you should go to App Store Connect and get the Apple ID for your app from the App Information:
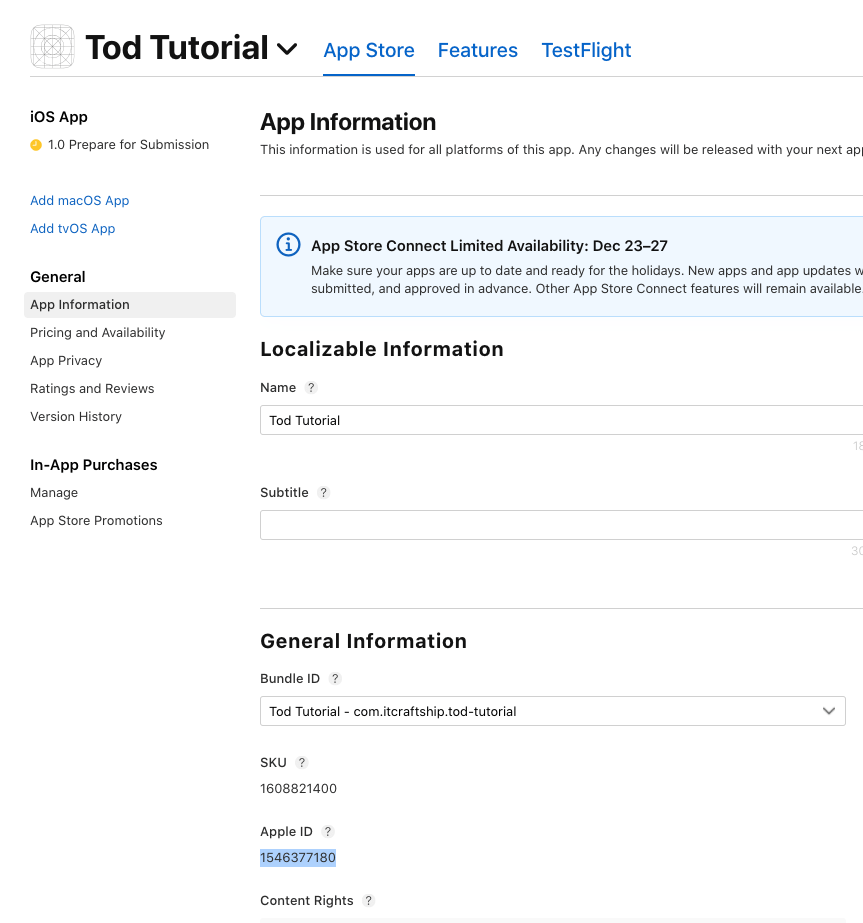
You should copy this Apple ID and set it in the Fastfile for the pilot action. See the code below for reference:
pilot(
  username: APPLE_ID,
  team_id: '120815547',
  skip_submission: true,
  skip_waiting_for_build_processing: true,
  apple_id: "1546377180" # this is where you set it
)
Match
We want to use a tool called match which will be responsible for managing application code signing certificates and provisioning profiles. This is an amazing way to keep code signing in sync in your entire team/company. You can read more about this approach in the Code Signing Guide.
Firstly, create a private repository (e.x on GitHub) where certificates will be stored.
Secondly, add the SSH URL of the repository to environment variables:
export TOD_MATCH_REPO=<repository url>
NOTE: To use Match on Codemagic later on, you will need SSH access from the build machine, so the best practice is to use SSH locally as well — both for the app repository as well as for the certificates repository.
We set this environment variable because later Match will use it during code signing — see the Matchfile.
If you want to include an additional layer of security and add a password to your certificates repository (RECOMMENDED), you will be asked for it the first time you run Match. After it is done You should of course add it also to your environment variables:
export TOD_MATCH_PASSPHRASE=[the password to encrypt/decrypt your match repository]
Later, when you run any match commands, you will need to switch this password to a different environment variable: MATCH_PASSWORD that fastlane uses by default. Here is an example command:
MATCH_PASSWORD=$TOD_MATCH_PASSPHRASE bundle exec fastlane match development
By doing this Match will not ask you for the password each time. The trick of prefixing your environment variables will come in very handy when you set up your local environment to build and sign several different applications. This is why we add the TOD_ prefix for the case of this Truth or Dare repository. Other projects may have different prefixes like TETRIS_, PRO_ or whatever you decide to use as an abbreviation for your project.
After you have set these environment variables, you should set up your new Keychain. This is another trick that will come in handy when codesigning different projects. It’s also very convenient to create your own keychain on different build servers. That way you specify your own keychain password and make unlocking and picking the right keychain easier.
The password isn’t really sensitive (unless you leave your computer unlocked), but you might want to move it to environment variables for added security. Having a separate keychain for your project will also help you keep it clean and don’t pollute your Login keychain with codesigning certificates and profiles. To create your keychain use this command:
bundle exec fastlane ios setup_keychain
By default the keychain will be created in:
/Users/<username>/Library/Keychains/itcKeychain-db
In the future, you may want to replace the itc prefix to something related to your project or company, but you might just leave it like this to keep us warm in your memory ?
Now, to create the certificates run the following command:
bundle exec fastlane refresh_all_profiles
NOTE: When you have no provisioning profiles for your app, this command will create new ones for you. You will also want to use this command whenever you add a new device to your development or ad-hoc provisioning profiles. We added a helpful command in the Fastfile for this specific purpose:
bundle exec fastlane add_device.
Match SSH Key
The most secure way to connect to git repository is by using SSH keys. When you start the deploy build on Codemagic, it will try to download signing certificates and provisioning profiles using Match. When you try it for the first time however, it will give you an unauthorized error. This is because your certificates repository is private. In order to connect successfully, Codemagic will need to have an SSH key which it can use to connect to the repository. It is considered unsafe to share your private key with external CI tools, so we will create a new one, just for Codemagic to use.
To generate an SSH key, run:
You can name the file however you want.
Be sure to Skip the password prompt (press enter when you are asked for it). If you set a password for your SSH key, then Codemagic will not be able to load this key when setting up the build agent. Don’t worry, you will encrypt this SSH key later using the awesome environment variable encryption feature in Codemagic.
Now add the key to the account that you created a private certificates repository with: Here is a GitHub guide. If you’re using a different git provider than GitHub, then consult appropriate documentation to add your SSH key.
We will use that key later, during Codemagic setup.
Setup the testers
In order to set up testers, go to https://appstoreconnect.apple.com, log in and go to My Apps section. Select the app you created and go to TestFlight tab. In there, select “App Store Connect Users` on the left.
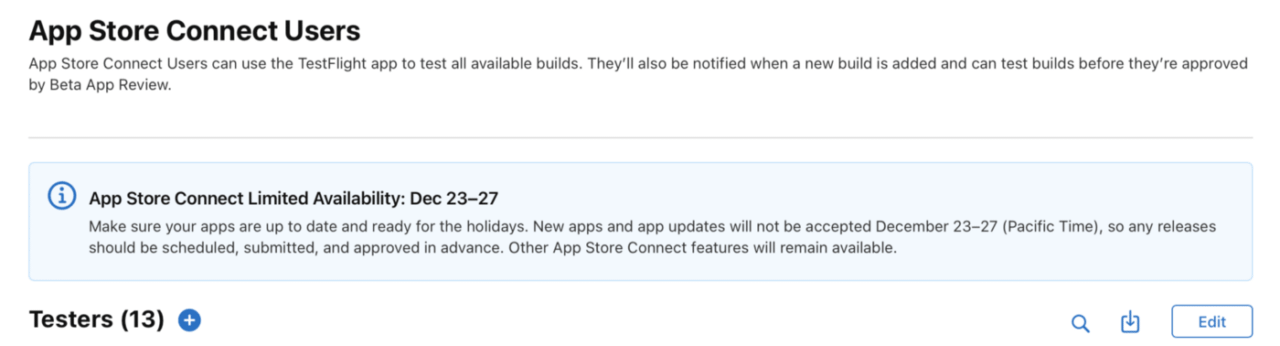
Press the plus sign next to Testers and check whoever you want to test your application.
Release the app from your local machine
Before you build your app for the first time, make sure to install all pods using:
find . -name "Podfile" -execdir pod install ;
Now you should be all set to release the app from your local machine. Just run the following command:
If all went according to plan, then you’ll have a shiny new build uploaded to TestFlight ?
Android Setup
Keystore
In order to sign your Android application, you will need to generate a keystore file. Run the following command:
keytool -genkey -v -keystore <path to use for the key>/key.jks -keyalg RSA -keysize 2048 -validity 10000 -alias <key alias you choose>
After that, you also need to create a key.properties file inside <app dir>/android/key.properties with the following content:
storePassword=<password from previous step>
keyPassword=<password from previous step>
keyAlias=<key alias from previous step>
storeFile=<location of the key store from previous step relative to android/app directory>
Make the keystore path somewhere inside <app dir>/android and update the android/key.properties file correctly.
Here’s an example command:
keytool -genkey -v -keystore android/app/itc-release.keystore -keyalg RSA -keysize 2048 -validity 10000 -alias tod
And the contents of the key.properties file:
storePassword=mySuperSecretP@ss
keyPassword=mySuperSecretP@ss
keyAlias=tod
storeFile=itc-release.keystore
WARNING: Remember not to check those files into a public source control!
Rename your app identifier for Android
The first thing you need to do in order to publish your app to App Store is to change the bundle identifier to something unique.
To make it quick we will use a find and replace all function.
Replace all occurrences of com.itcraftship.truth_or_dare with the bundle identifier of your choice.
- For Android Studio You can use
⌘⇧Ron Mac andCtrl+Shift+Ron Windows - For Visual Studio Code You can use
⌘⇧Fon Mac andCtrl+Shift+Fon Windows, then you need to click the arrow in the top left corner to enable replacing
The files that should be affected are:
android/app/build.gradle
android/app/src/debug/AndroidManifest.xml
android/app/src/main/AndroidManifest.xml
android/app/src/main/kotlin/com/itcraftship/truth_or_dare/MainActivity.kt
android/app/src/profile/AndroidManifest.xml
fastlane/Fastfile
Again this will replace the value in the tutorial Markdown.
Create application inside Google Play
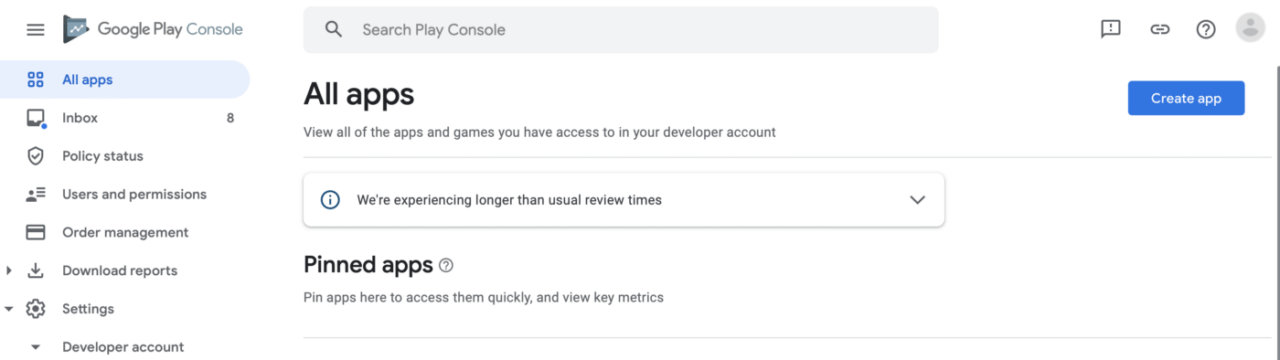
Go to https://play.google.com/console and select All apps tab. In the top right corner, press Create app button.
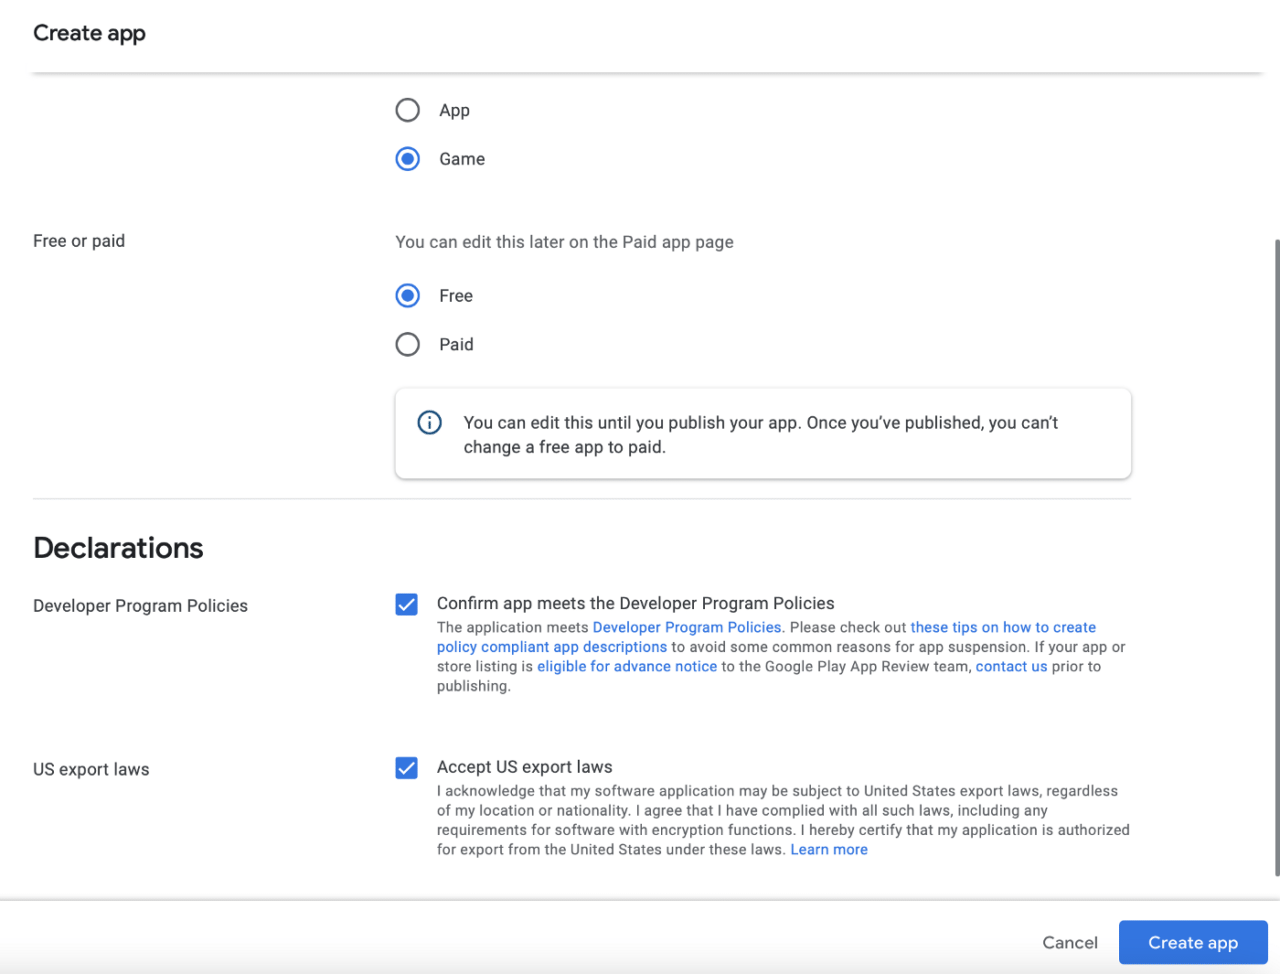
Select a free game category and accept the declarations and click Create app:
Now, you need to set up your app. This is what you should see:
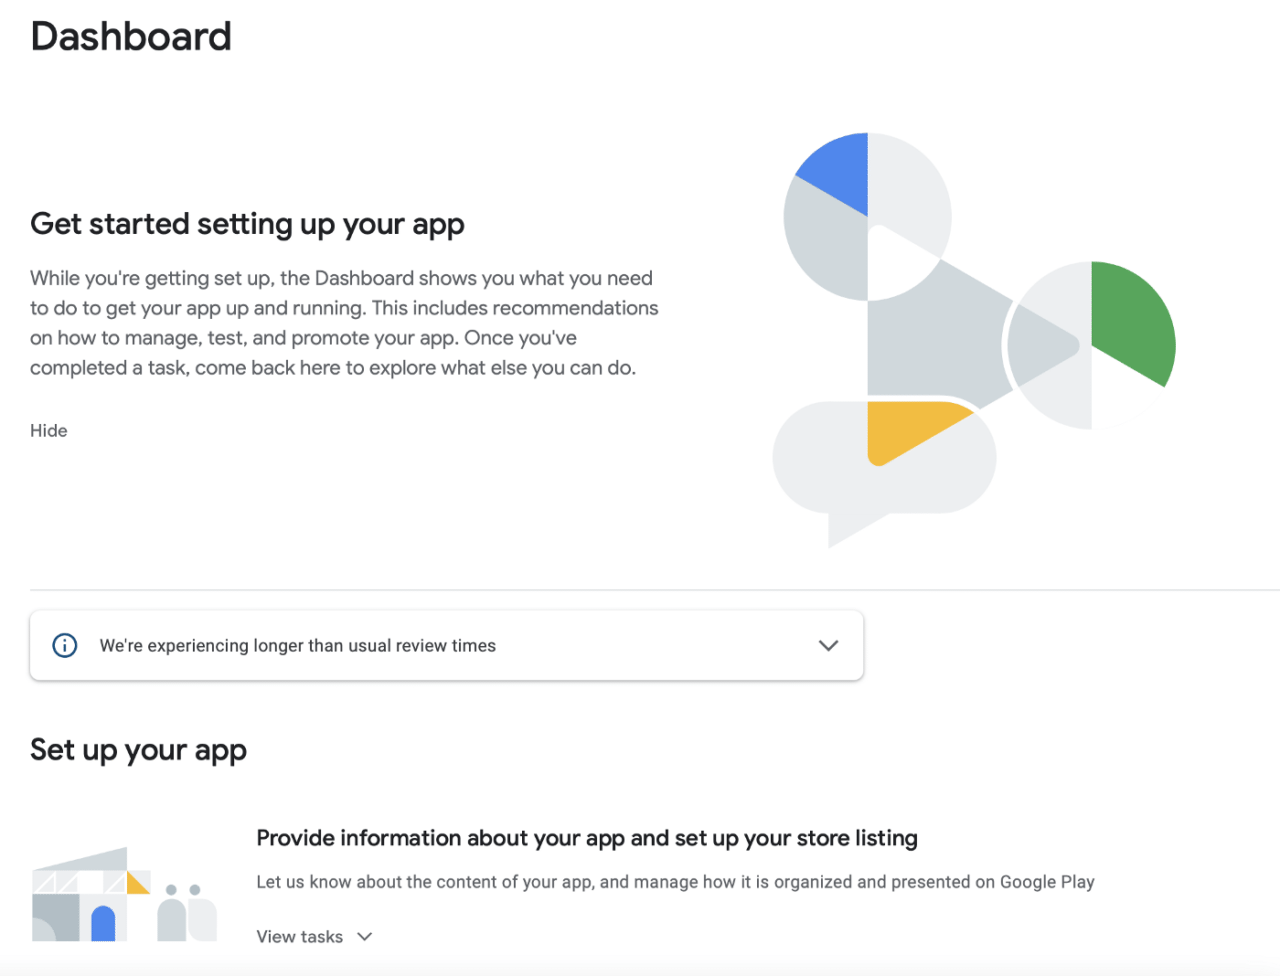
Click at View tasks and this should appear:
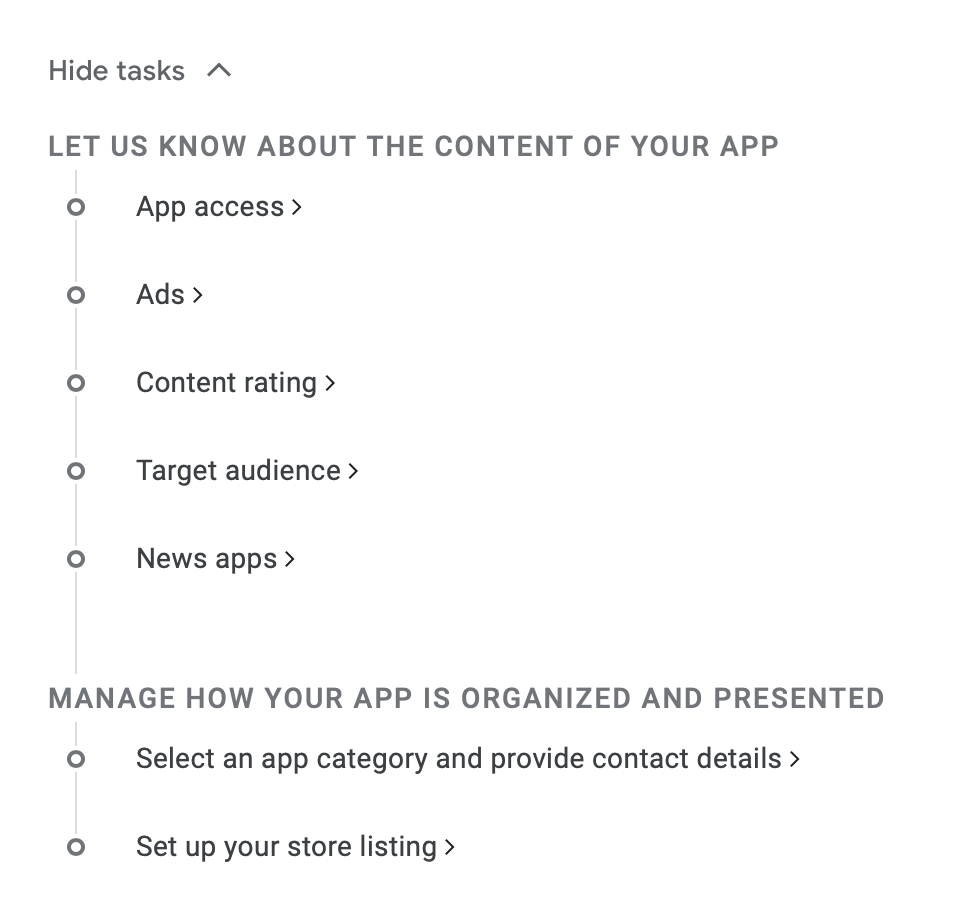
We will now go through each section. Go to App access and select the first option:
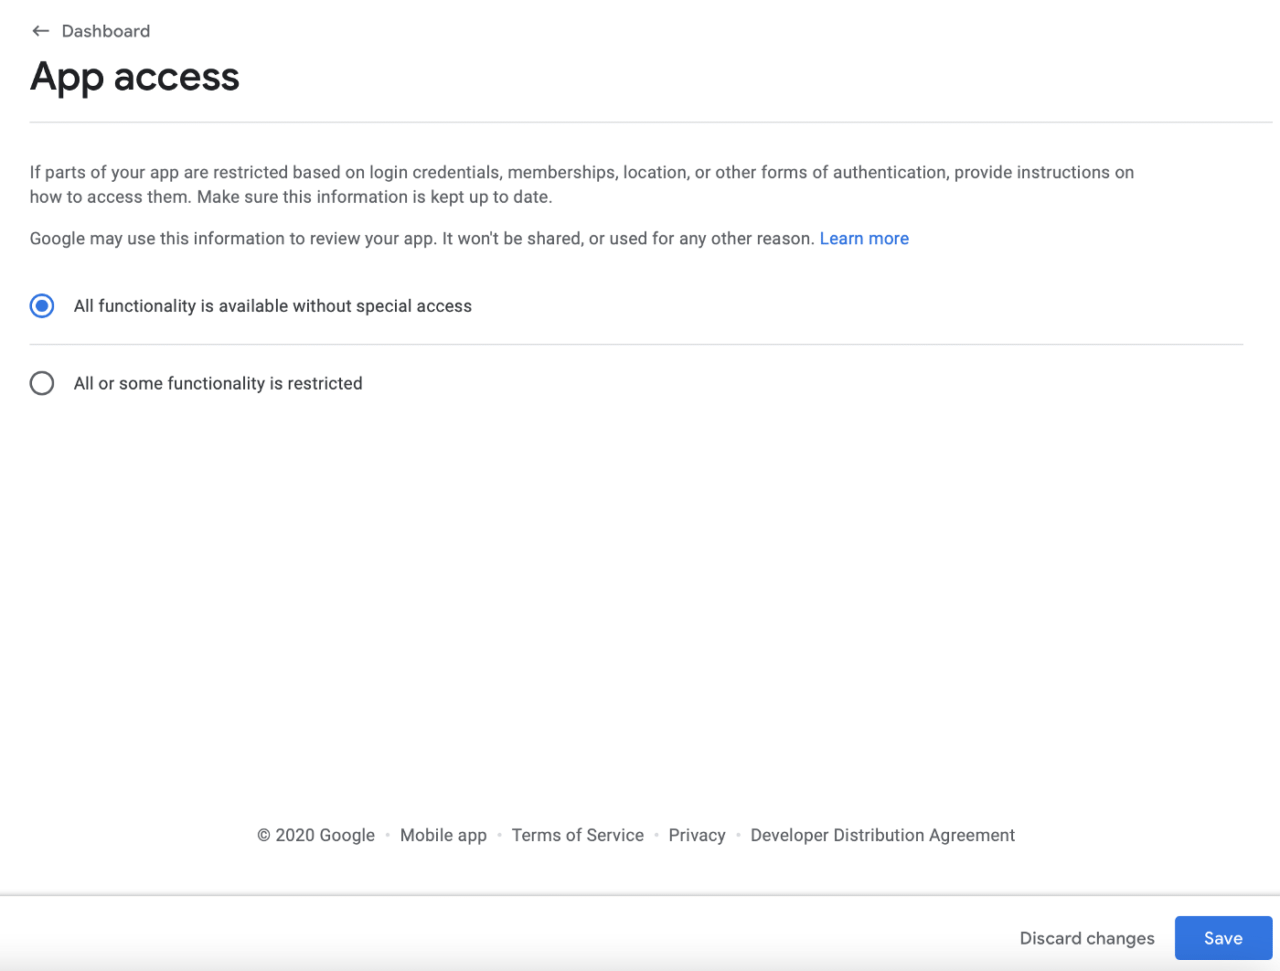
Press Save and go back to Dashboard. Now go to Ads:
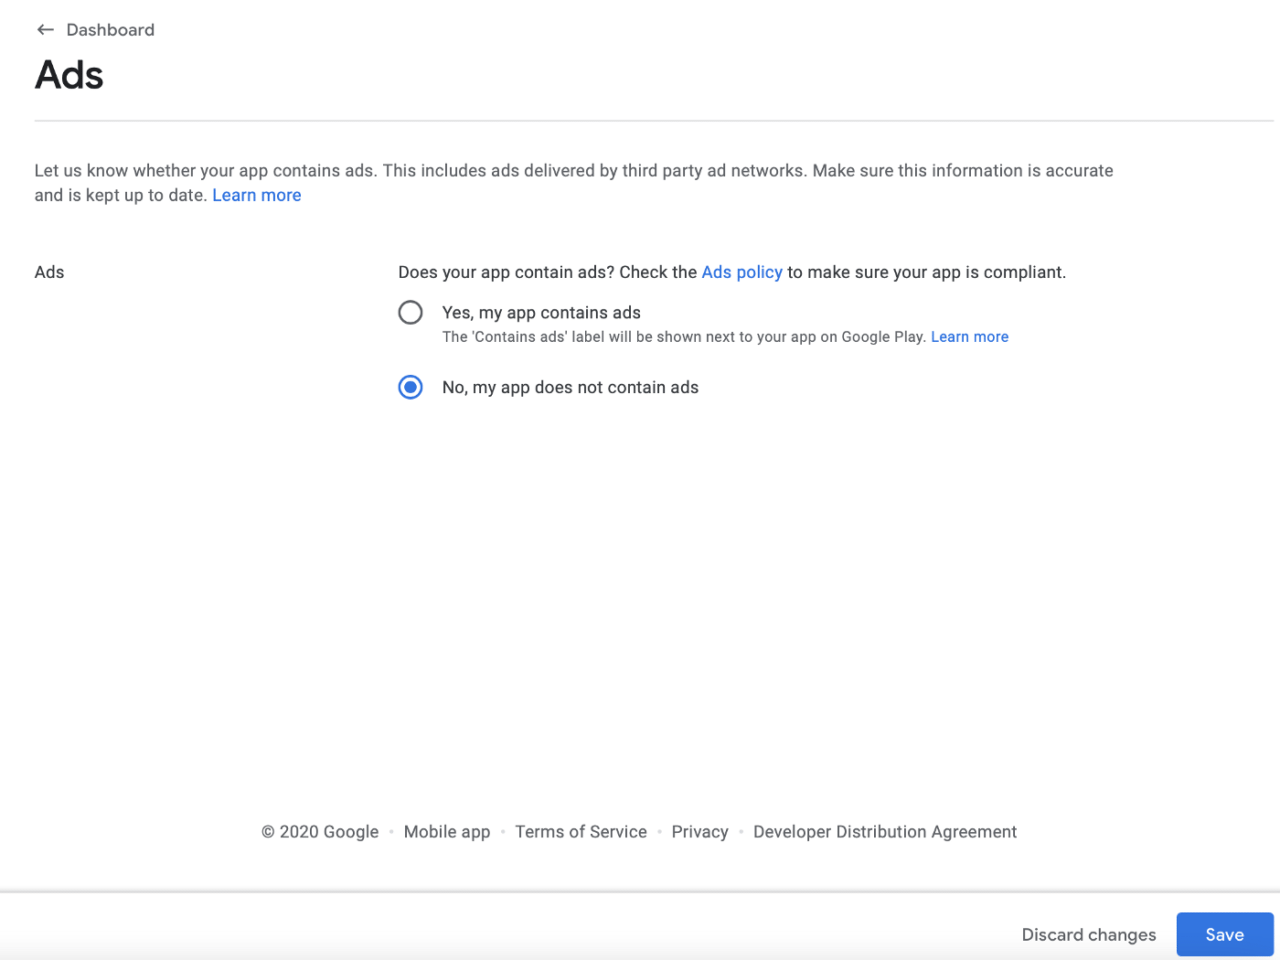
Select no ads, press save and go to next section: Content ratings. Provide your email address and select Game category:
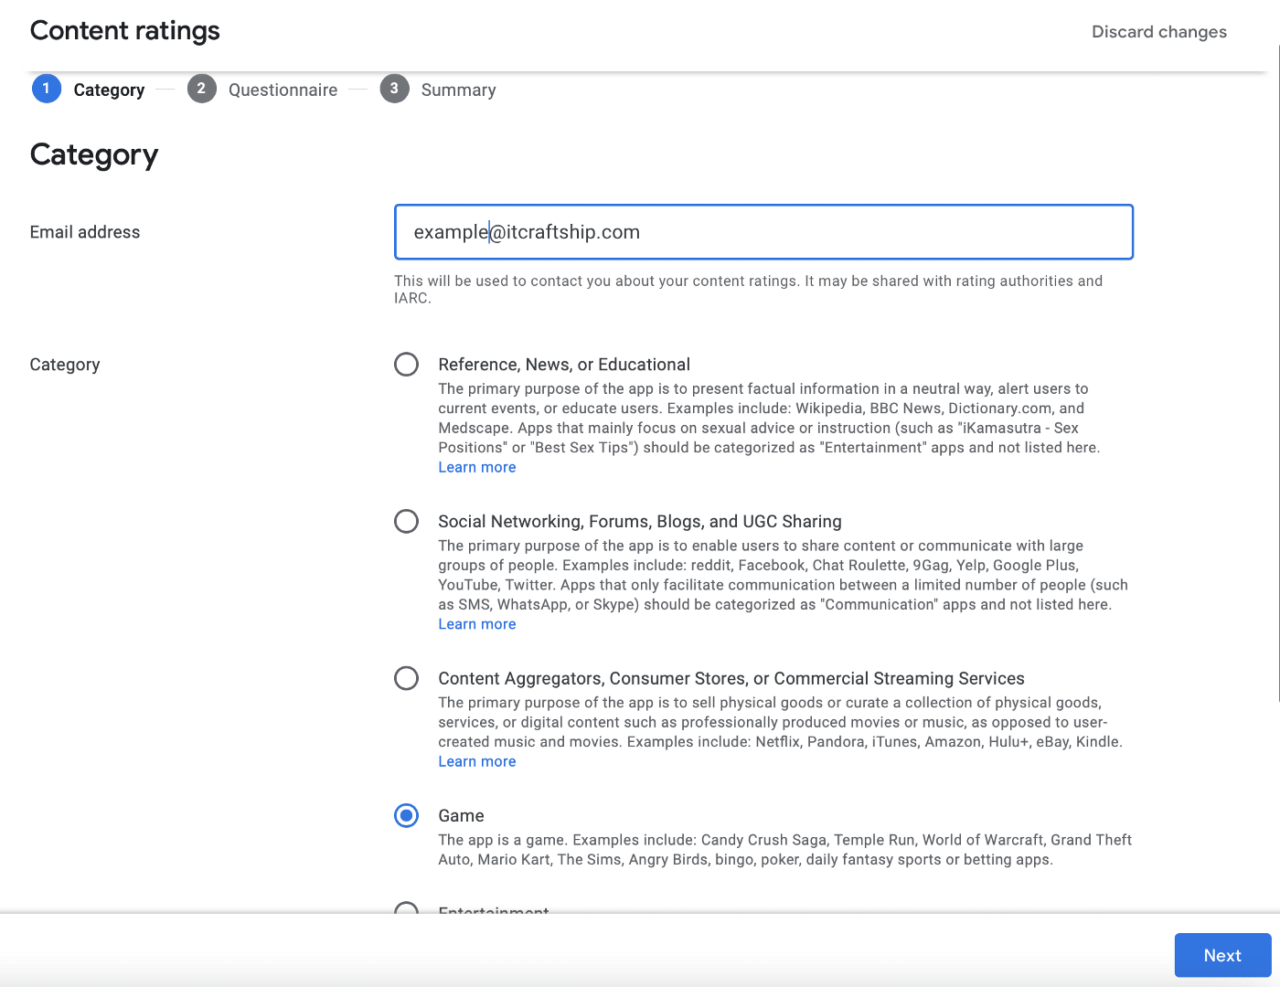
Next, start the questionaire and select No in every possible option:
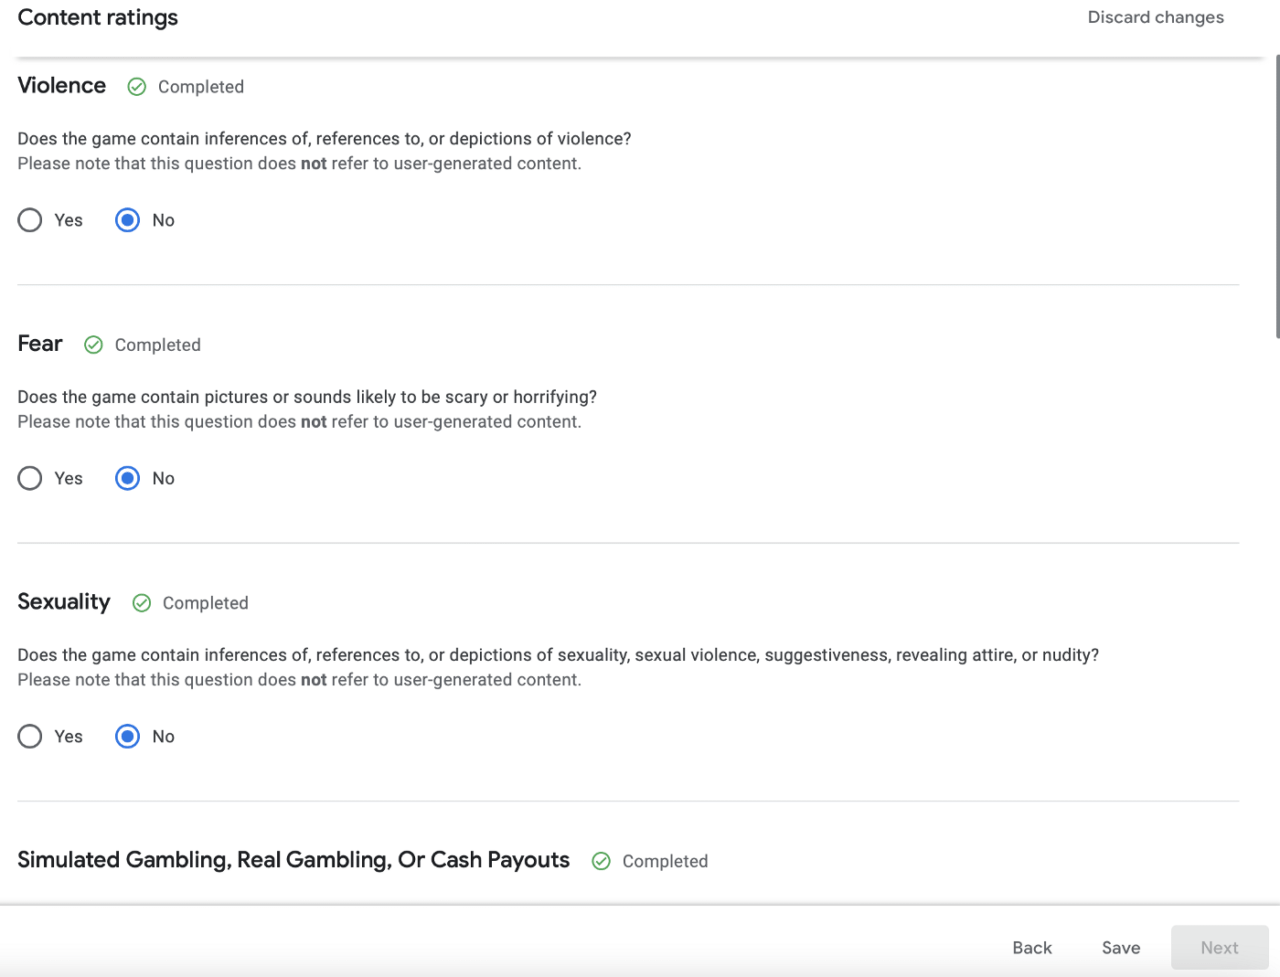
On summary screen press Submit and again, go to Dashboard and select the next section: Target audience and content:
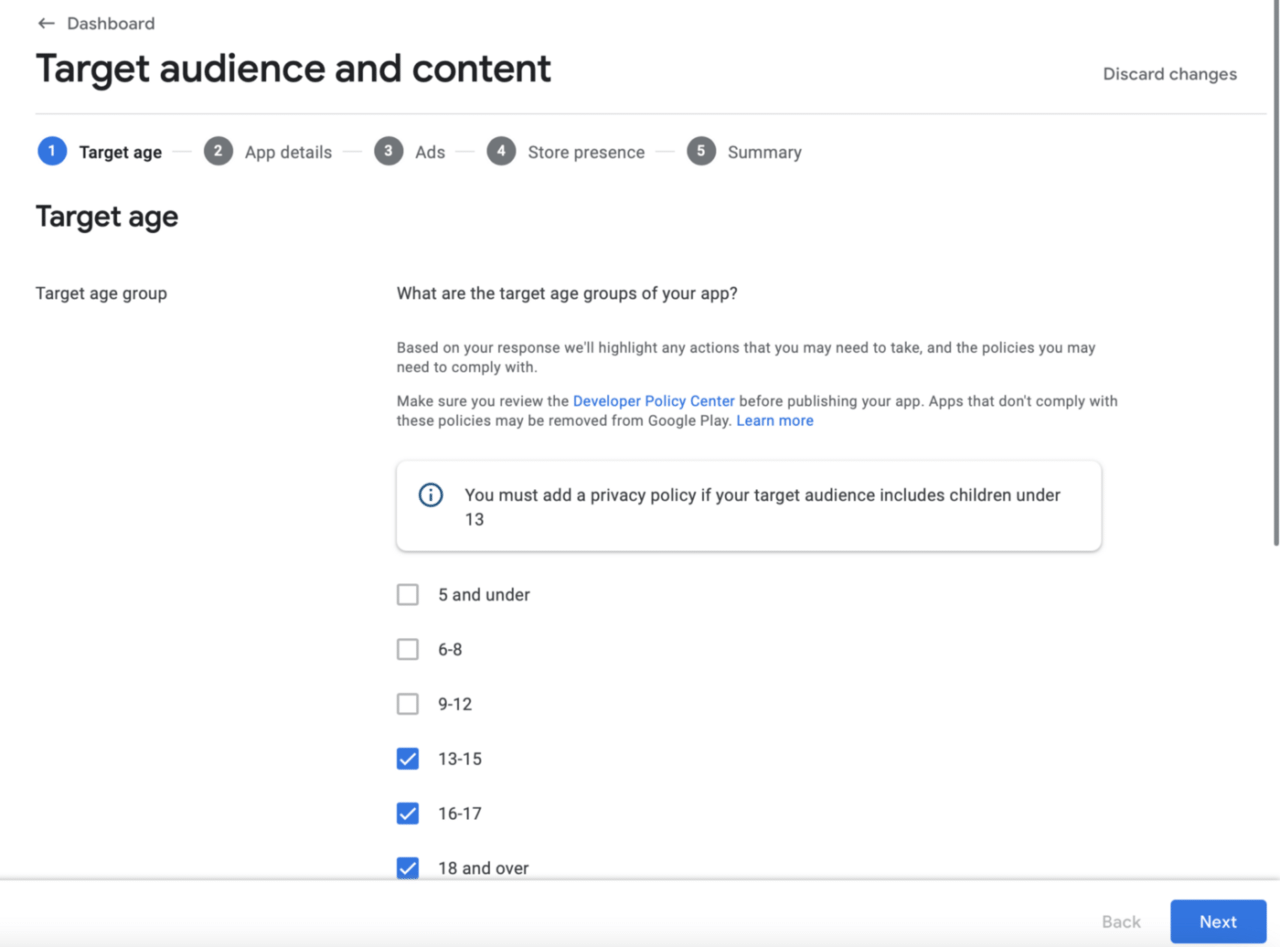
Select ages from 13 up, otherwise you will have to provide a privacy policy (you can do that of course if you want).
On the next screen press No
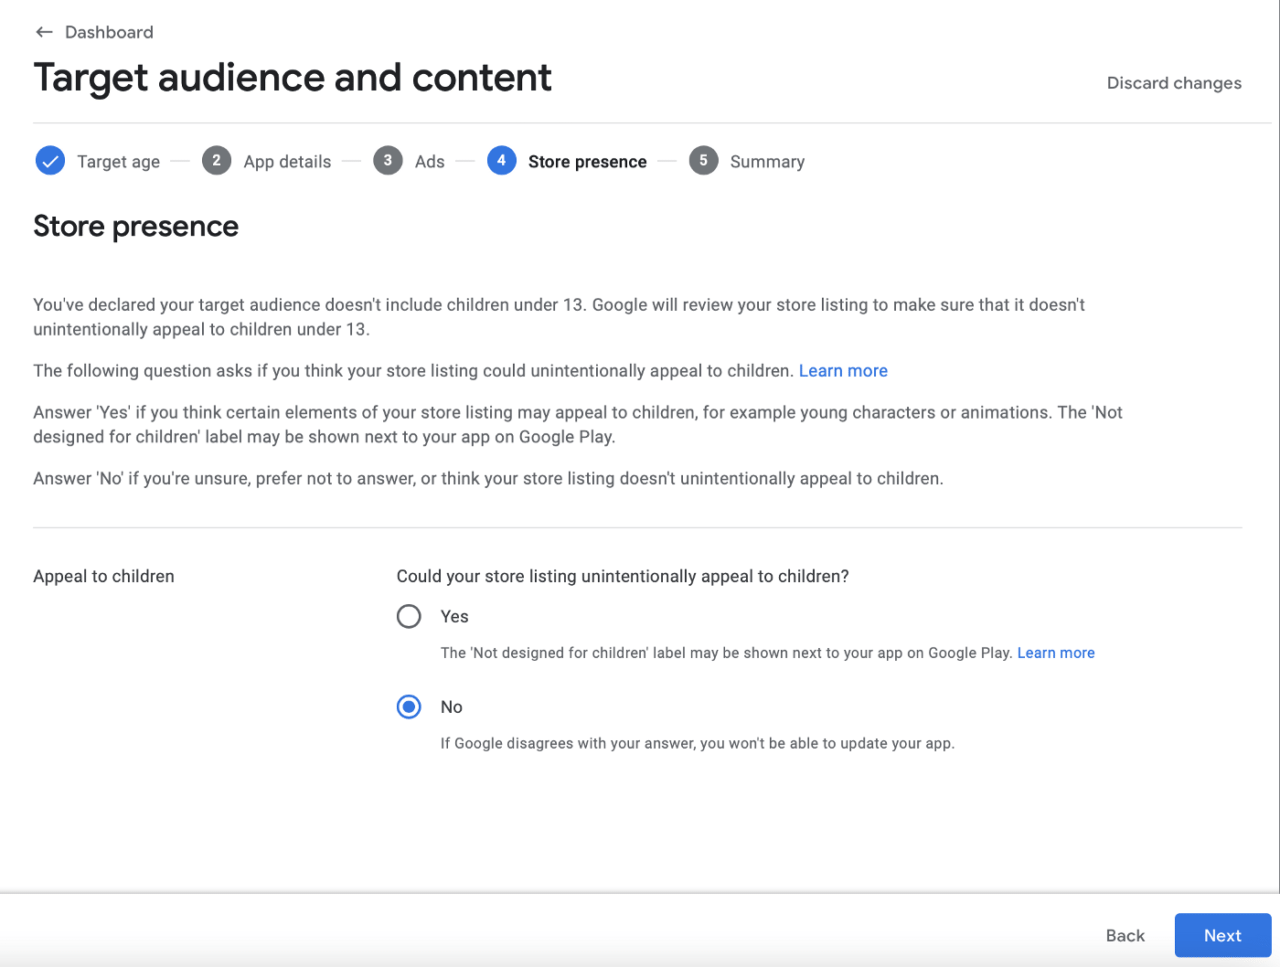
Go to summary, press Save and again go back to dashboard and next section: News app
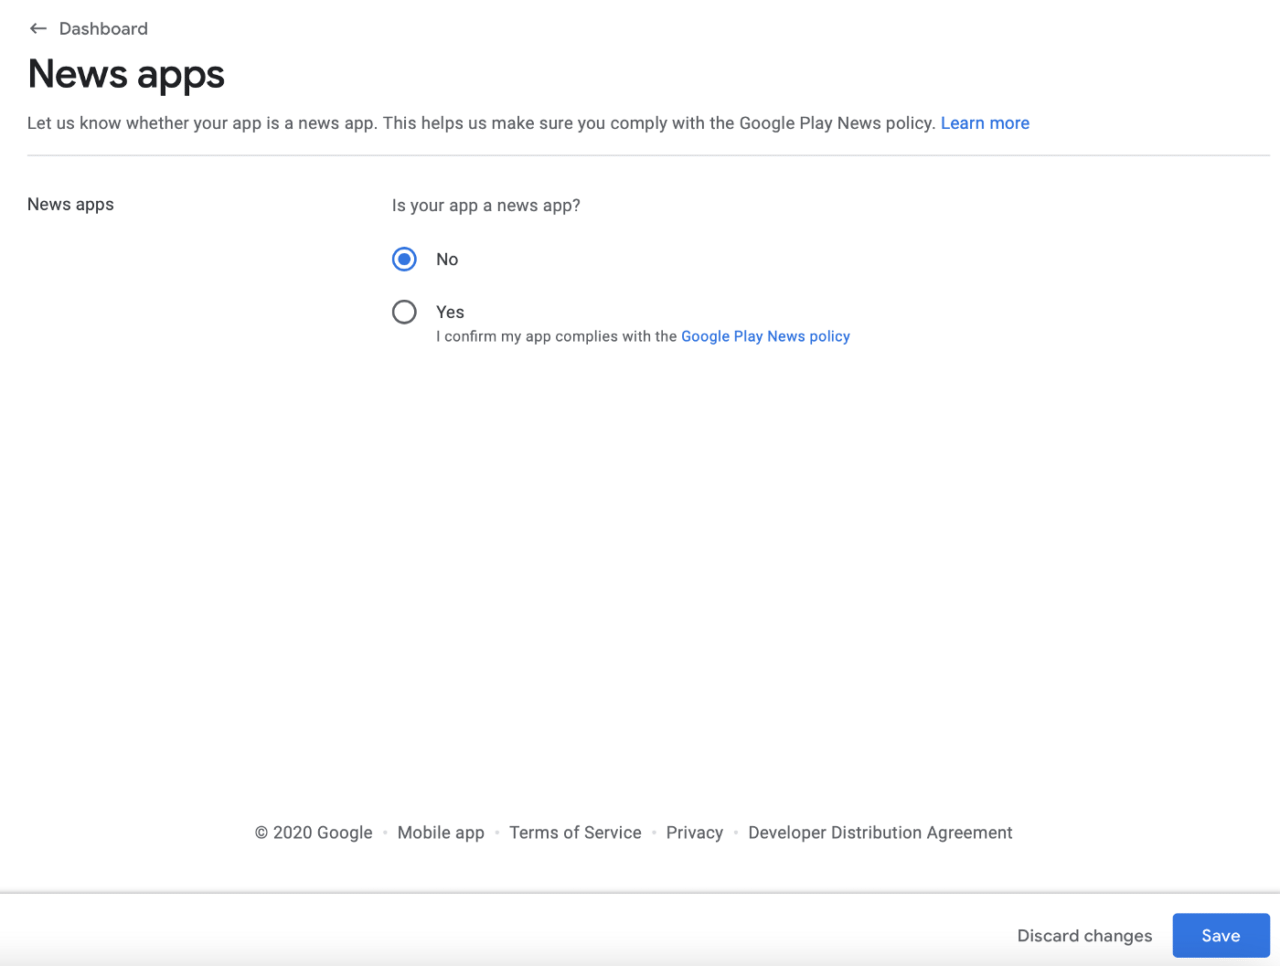
Select No, save and go to next section: Store settings:
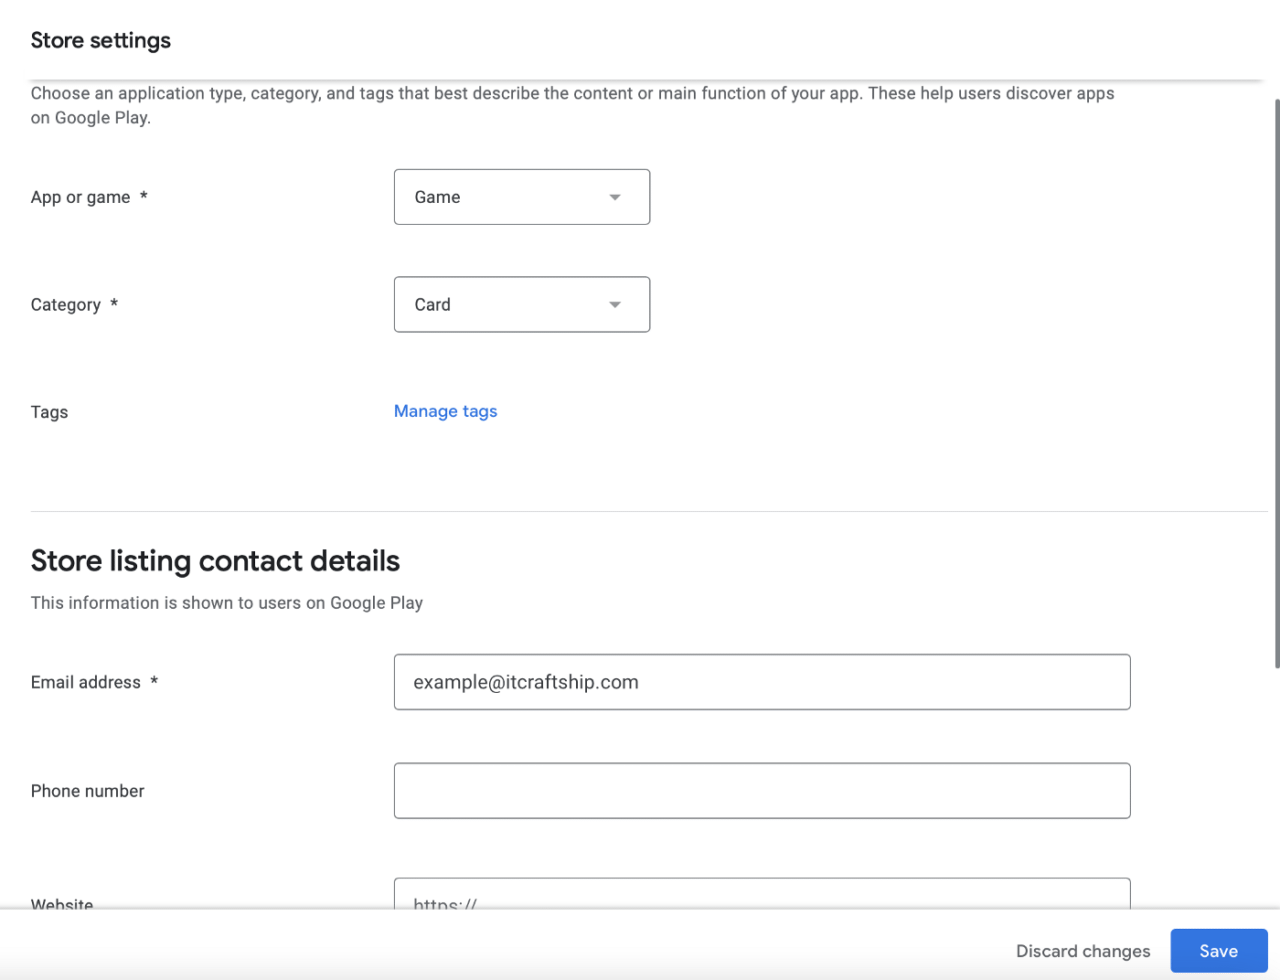
Select Game and Card category. Provide you email address and click save. The next section we need to go to is Main store listing:
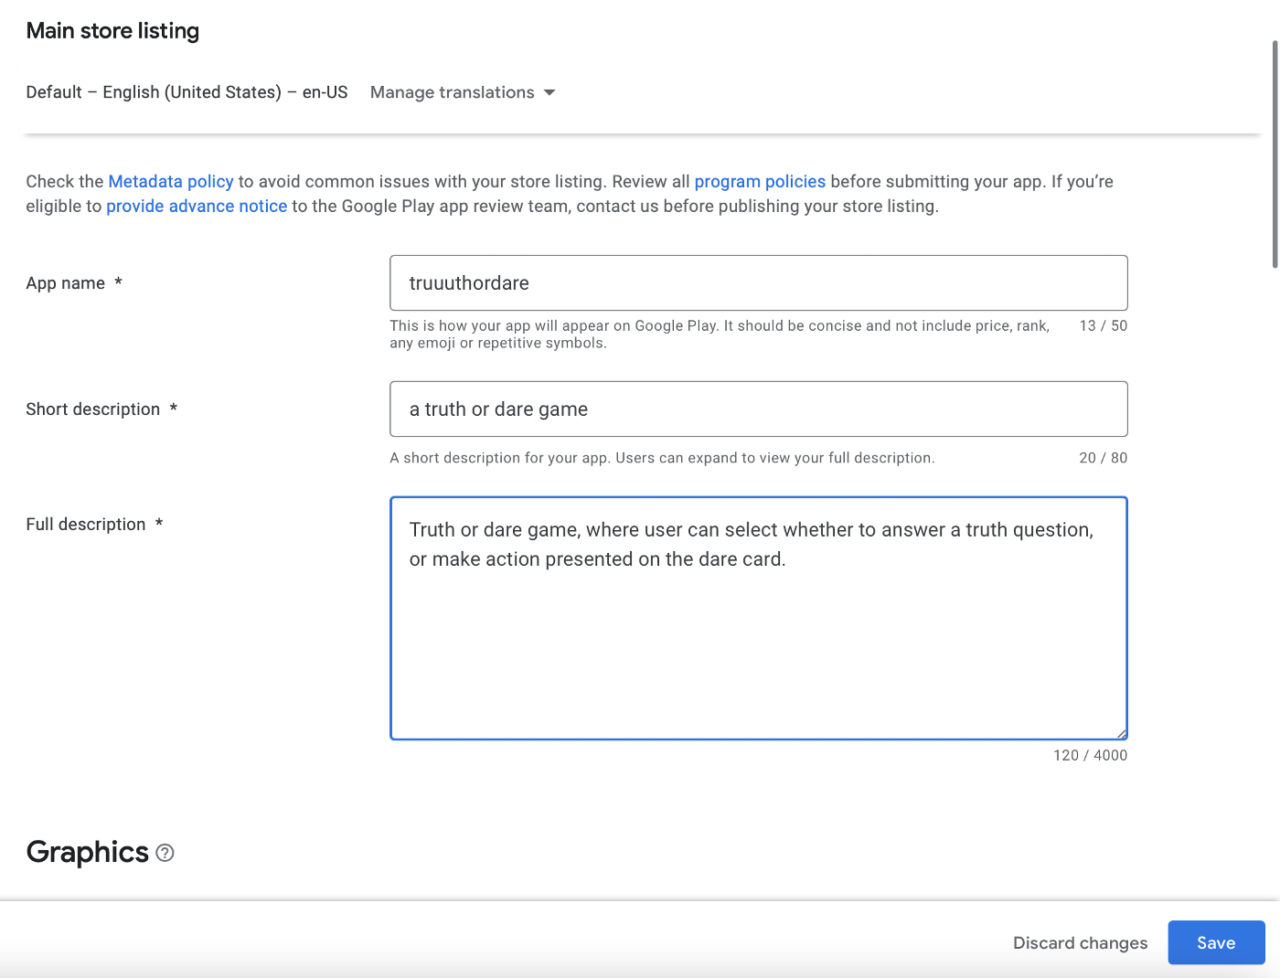
Here, you need to provide app name and two types of descriptions. It is totally up to you. Later you need to add app icon and some screenshots. After that, press save and that should be it for the app setup. Now, go back to Dashboard and expand the second cell:
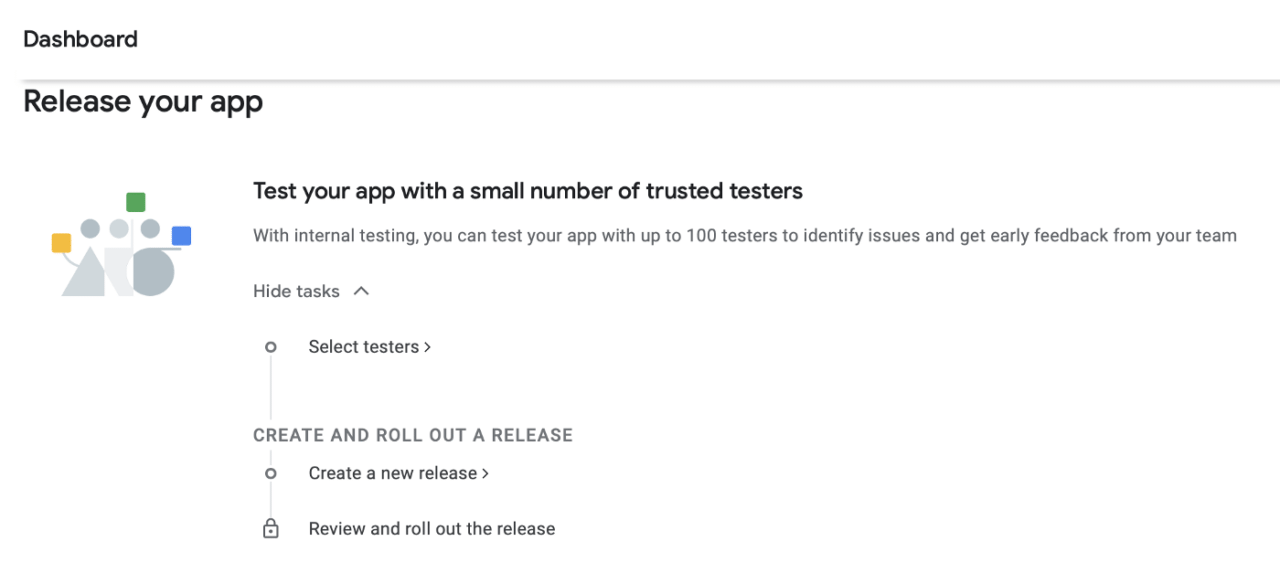
Go to Select testers:
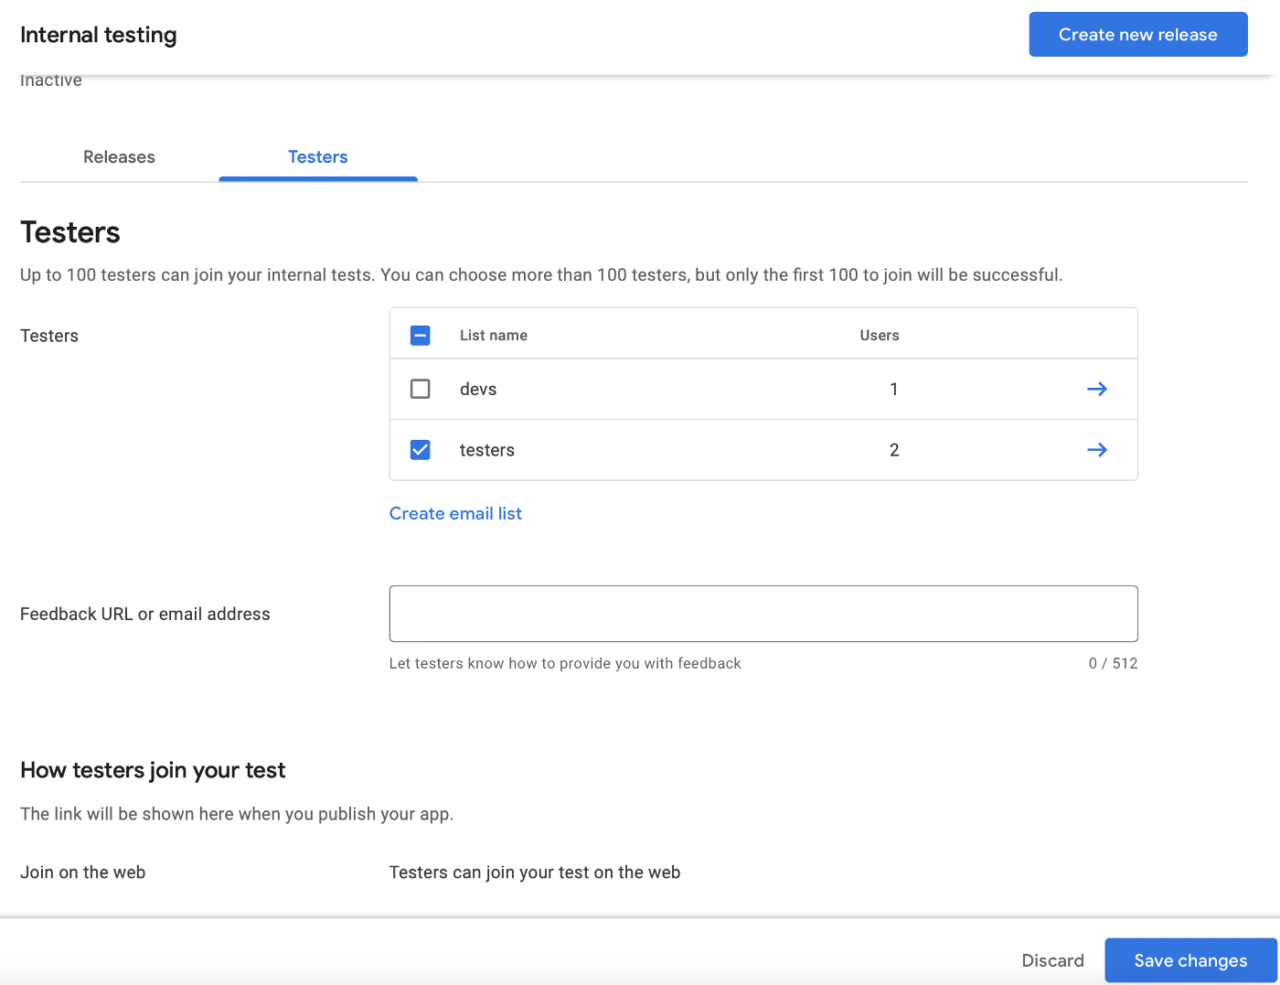
Select list names you want or create one if there are none existing. Press Save changes.
Now we should upload a new build manually, but first, we need to acquire GooglePlay.json file.
Google Play JSON
Again, go to https://play.google.com/console and log in.
After you entered your account, go to Settings -> API access
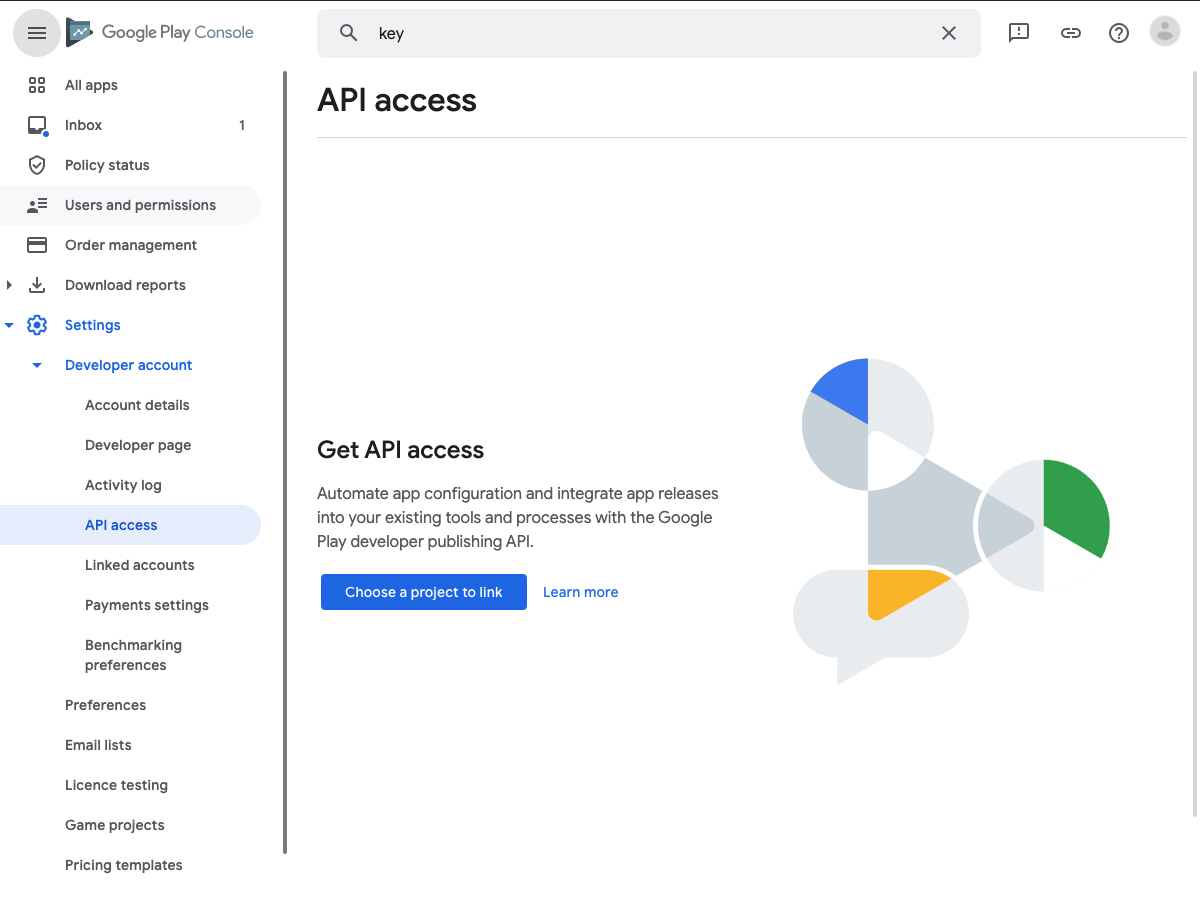
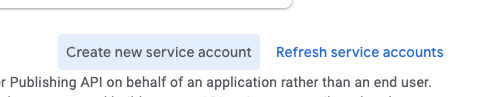
Press the Choose a project to link button. After that, press Create new service account button.
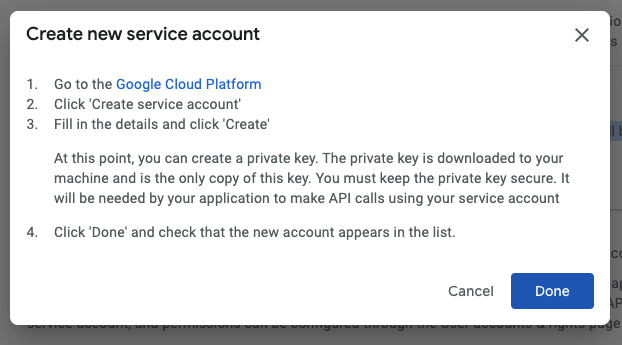
A small window should be displayed:
Go to the Google Cloud Platform and press the Create service account button once again:
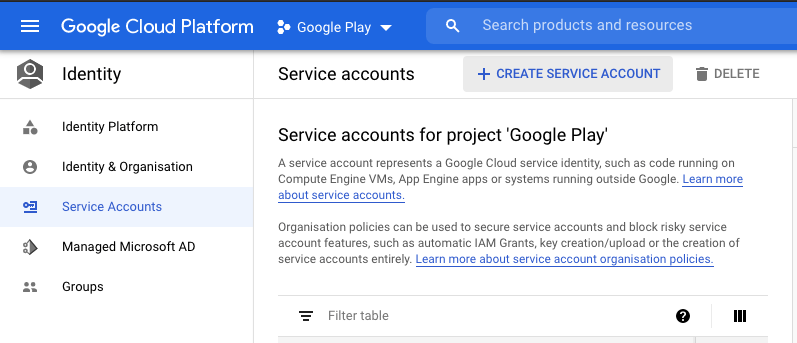
At the first step provide the name and description of your choice:
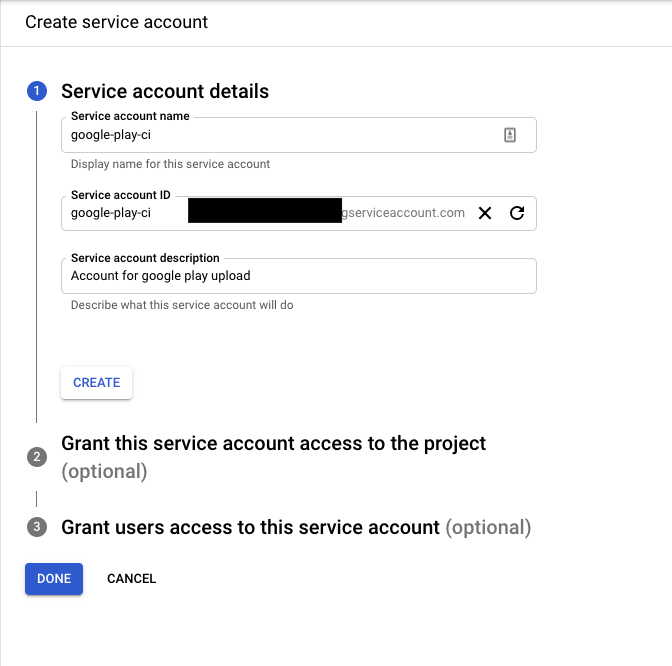
Proceed to step 2 and select the Editor role:
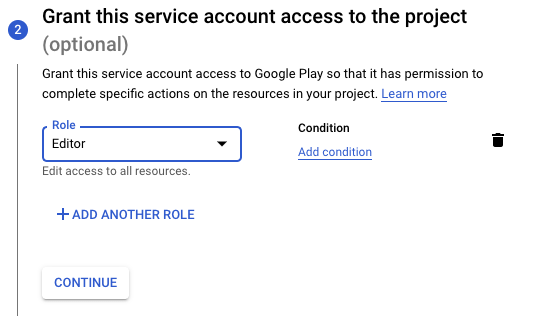
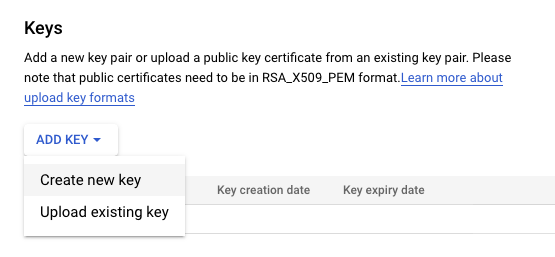
You can skip step 3 and click Done. Next, scroll down to the Keys section. Press the Add Key and then Create new key button:
Select the JSON format:
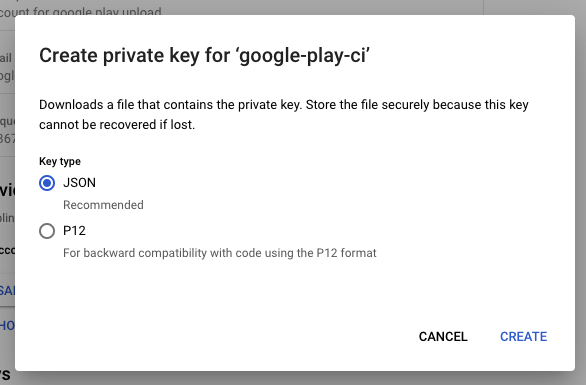
Now it should download to your machine. After that, it should be visible on the list:
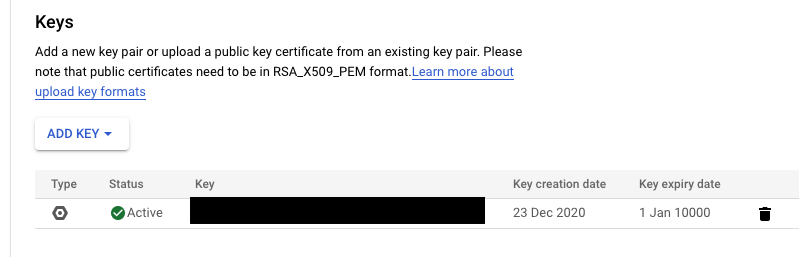
Now, go back to Google Play Console and a new service account should be visible. Press Grant access next to it:
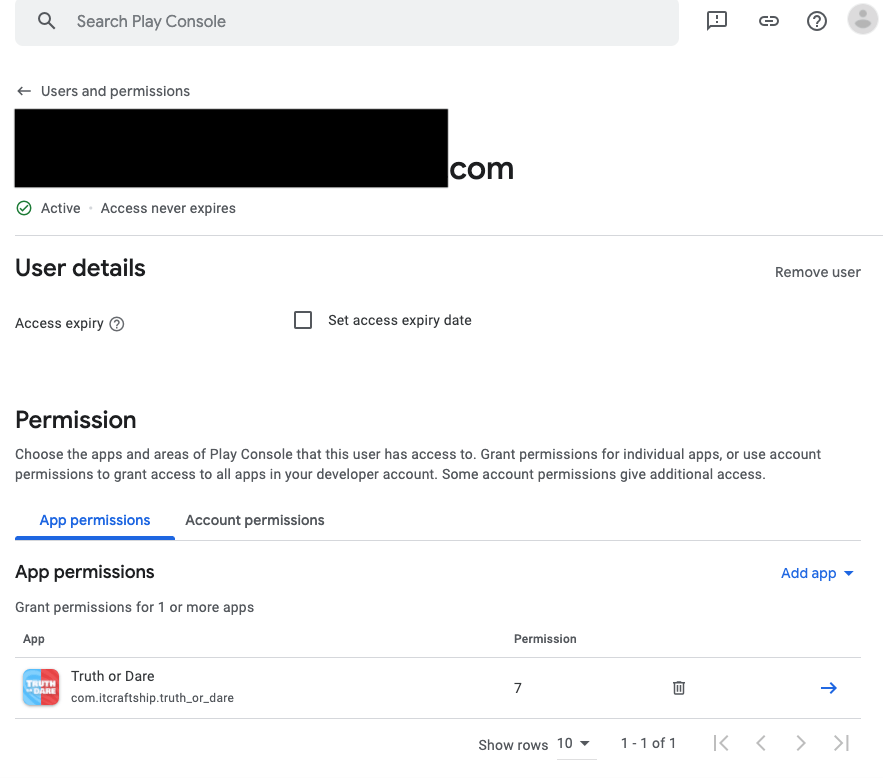
At the bottom switch the tab to App permissions:
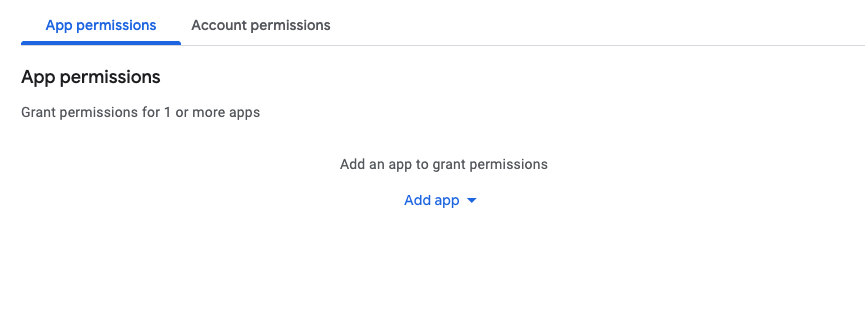
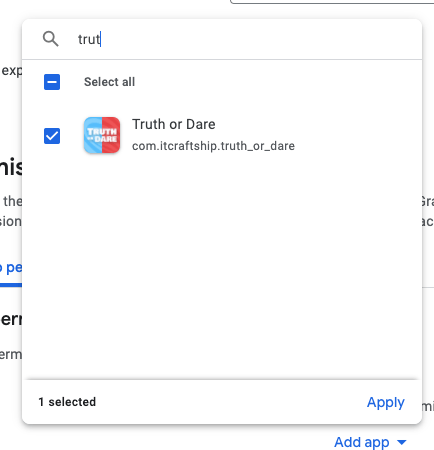
Click Add app and select your truth or dare app.
On the next screen press Next:
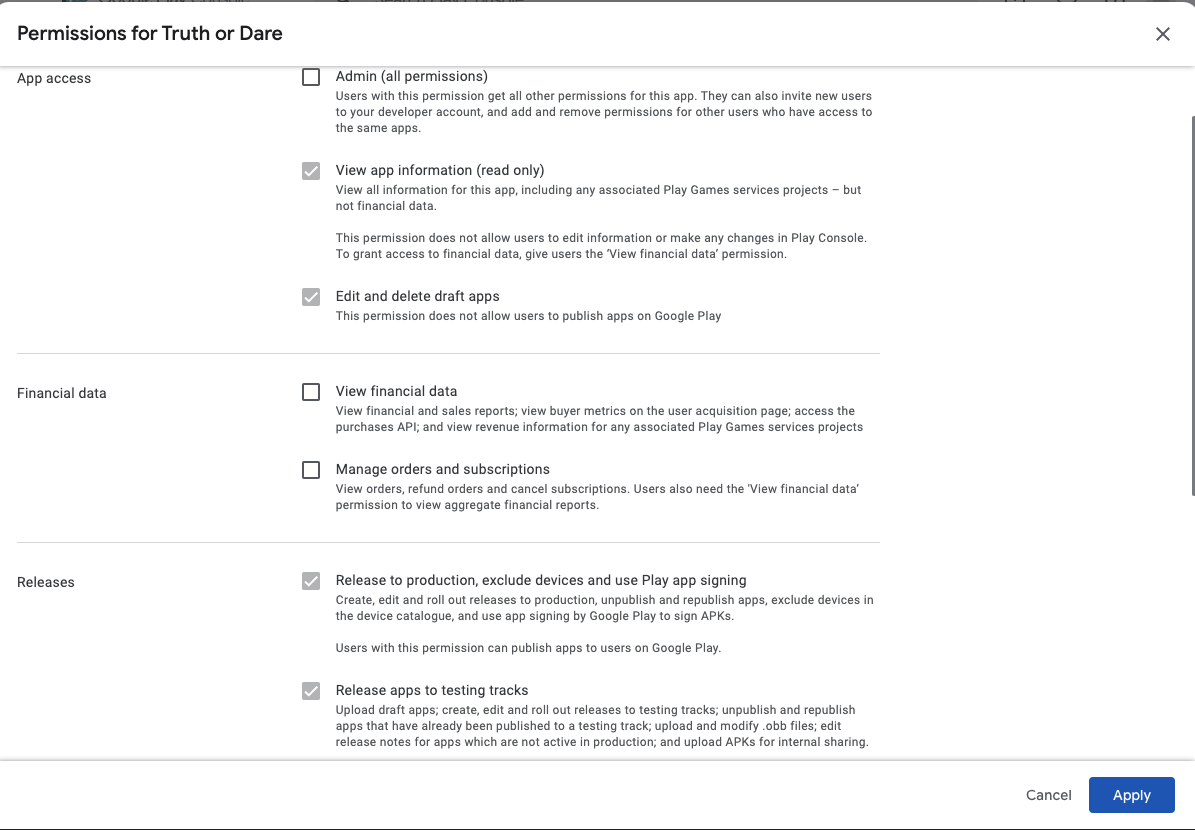
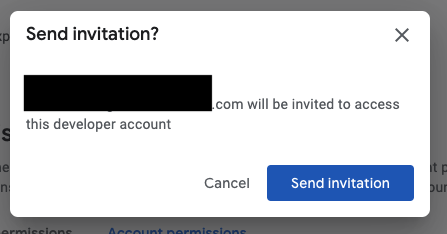
And confirm sending the invitation:
Finally, this is what you should see:
s
First Upload
Put the google_play.json the file inside your project root directory.
WARNING: Remember not to check in this file to a public code repository.
Now, we should be good to go and build our first .aab. Go to the terminal, change directory to your project and run:
If everything goes right, a path to .abb should be printed.
Now, go to Google Play console, enter Dashboard and go to Create a new release section:
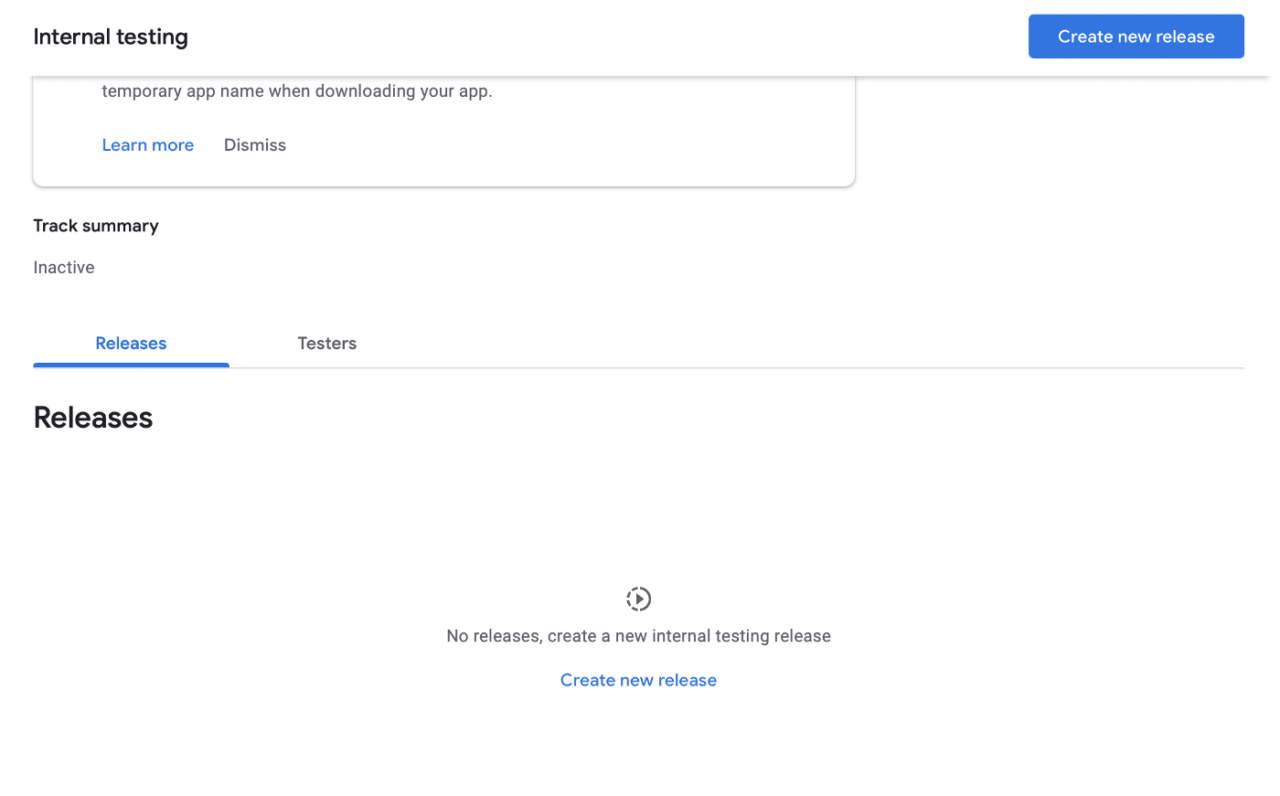
Press Create new release, click Continue in the middle of the screen and then upload an .abb you just built.
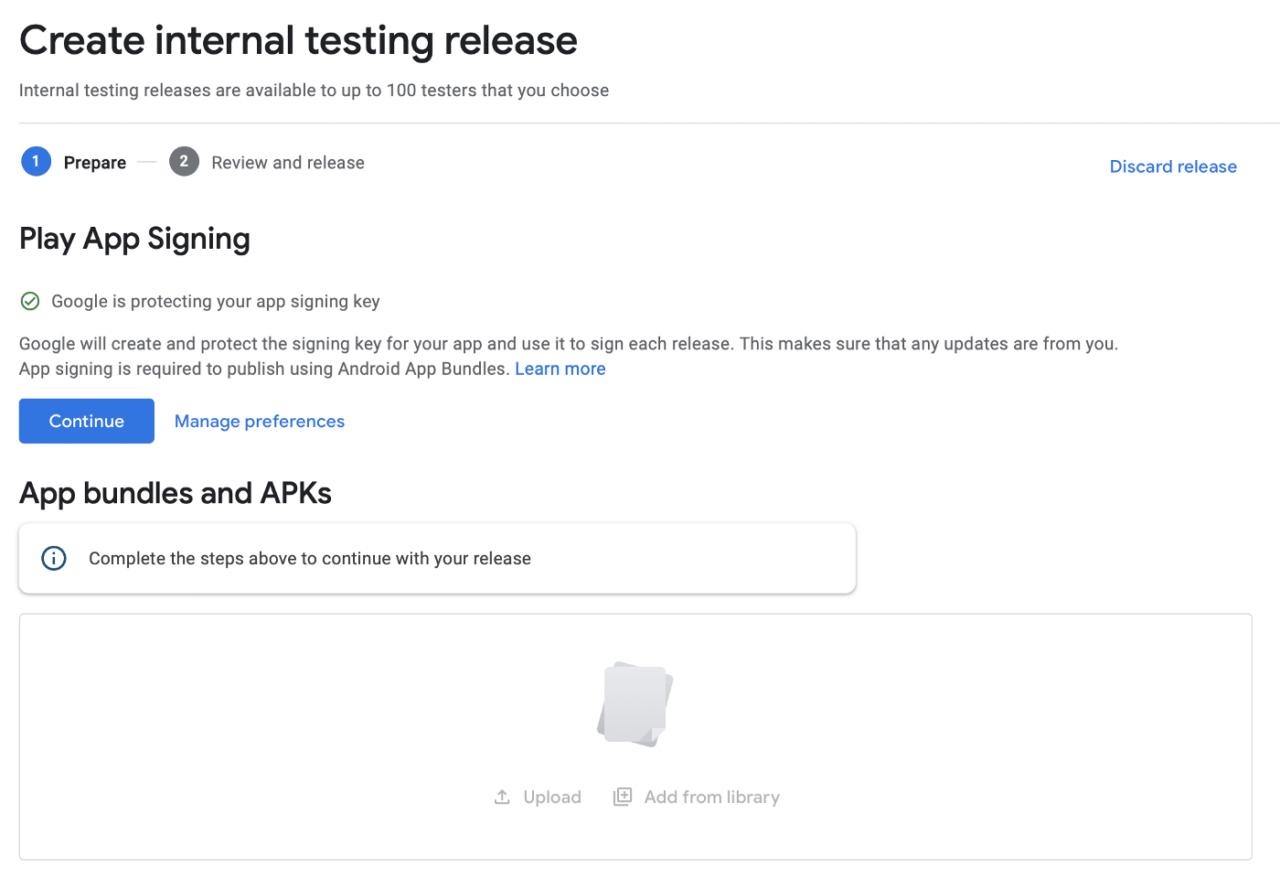
After that, press Save, then Review Release and finally Rollout.
Now you should be all set to create a local release to Google Play using fastlane. To do this run the following command:
BUILD_NUMBER=0 sh ci/build_android_qa.sh
The $BUILD_NUMBER environment variable needs to be a unique value or Google Play will reject the upload. So the next time you run this command you’ll need to increment the build. Also remember, that Codemagic will set a value for this variable for each build. If you use a specific number locally, a build with the same number will fail on Codemagic.
Codemagic setup
Configuring the project
After you log in to your Codemagic account, go to Teams tab:
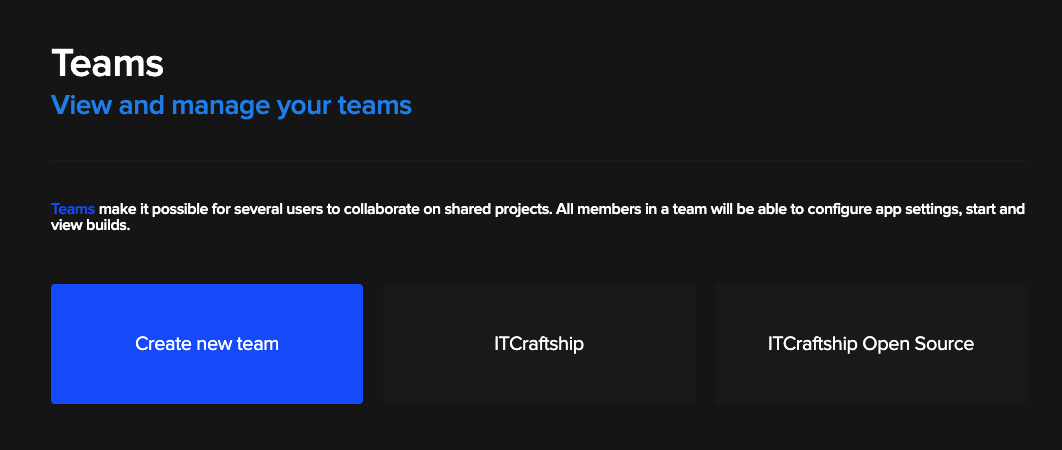
If you haven’t already, create new team.
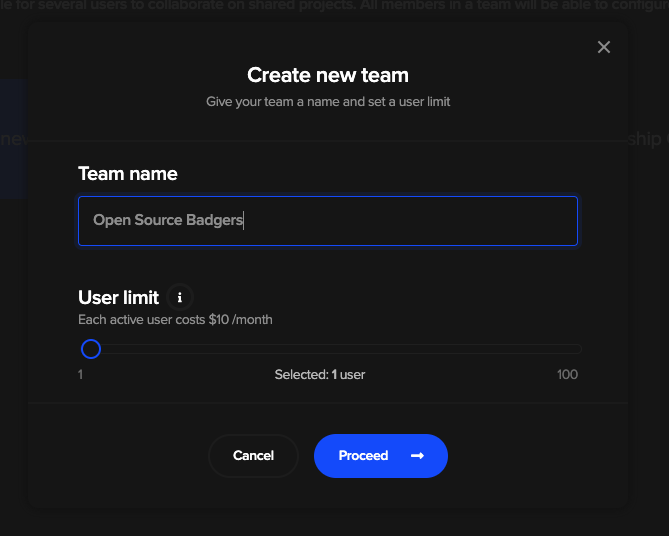
Provide team name, user limit, and billing information later on. After that you should see a similar screen:
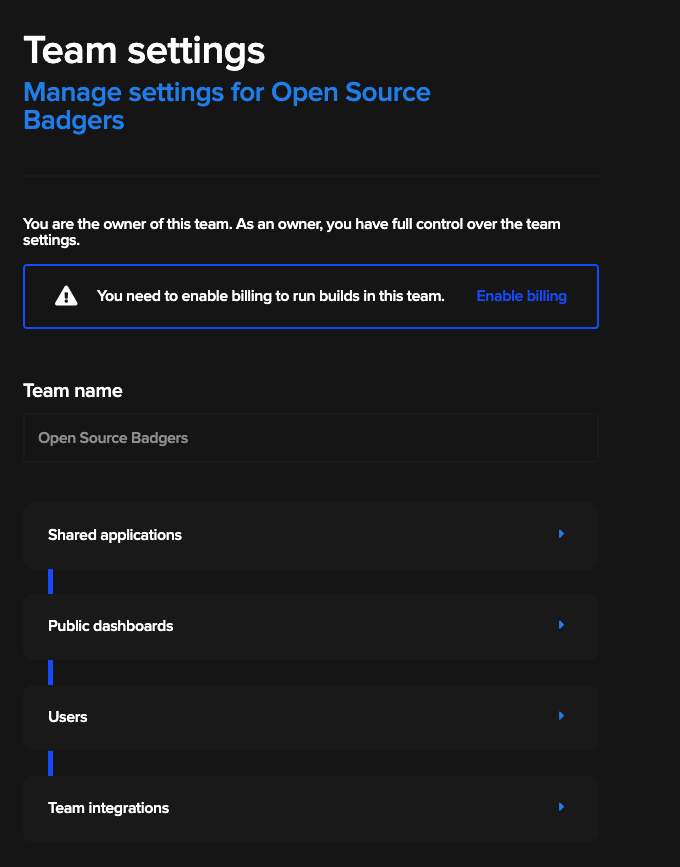
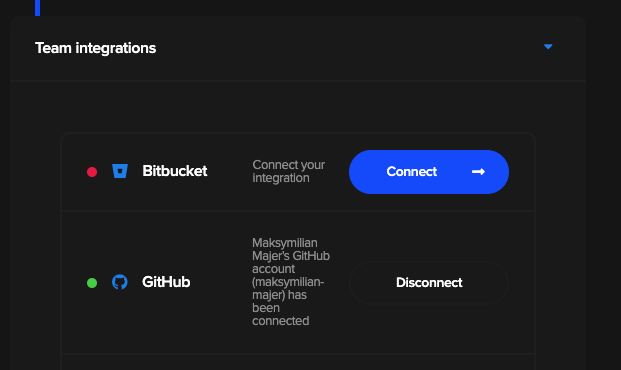
Go to Team integrations and connect to the service you are using (e.x. GitHub).
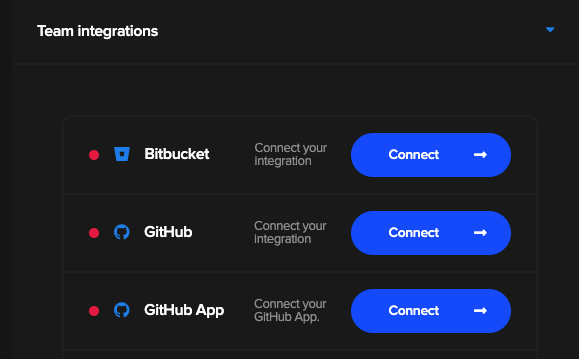
After successful connection you should see a green light:
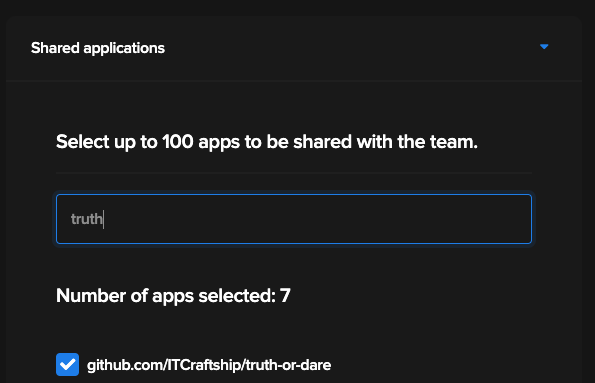
Now, go to Shared application and select your truth or dare repository:
Next, go to Apps tab. Your application should be visible there. Press the Finish build setup button next to it. Select Flutter App.
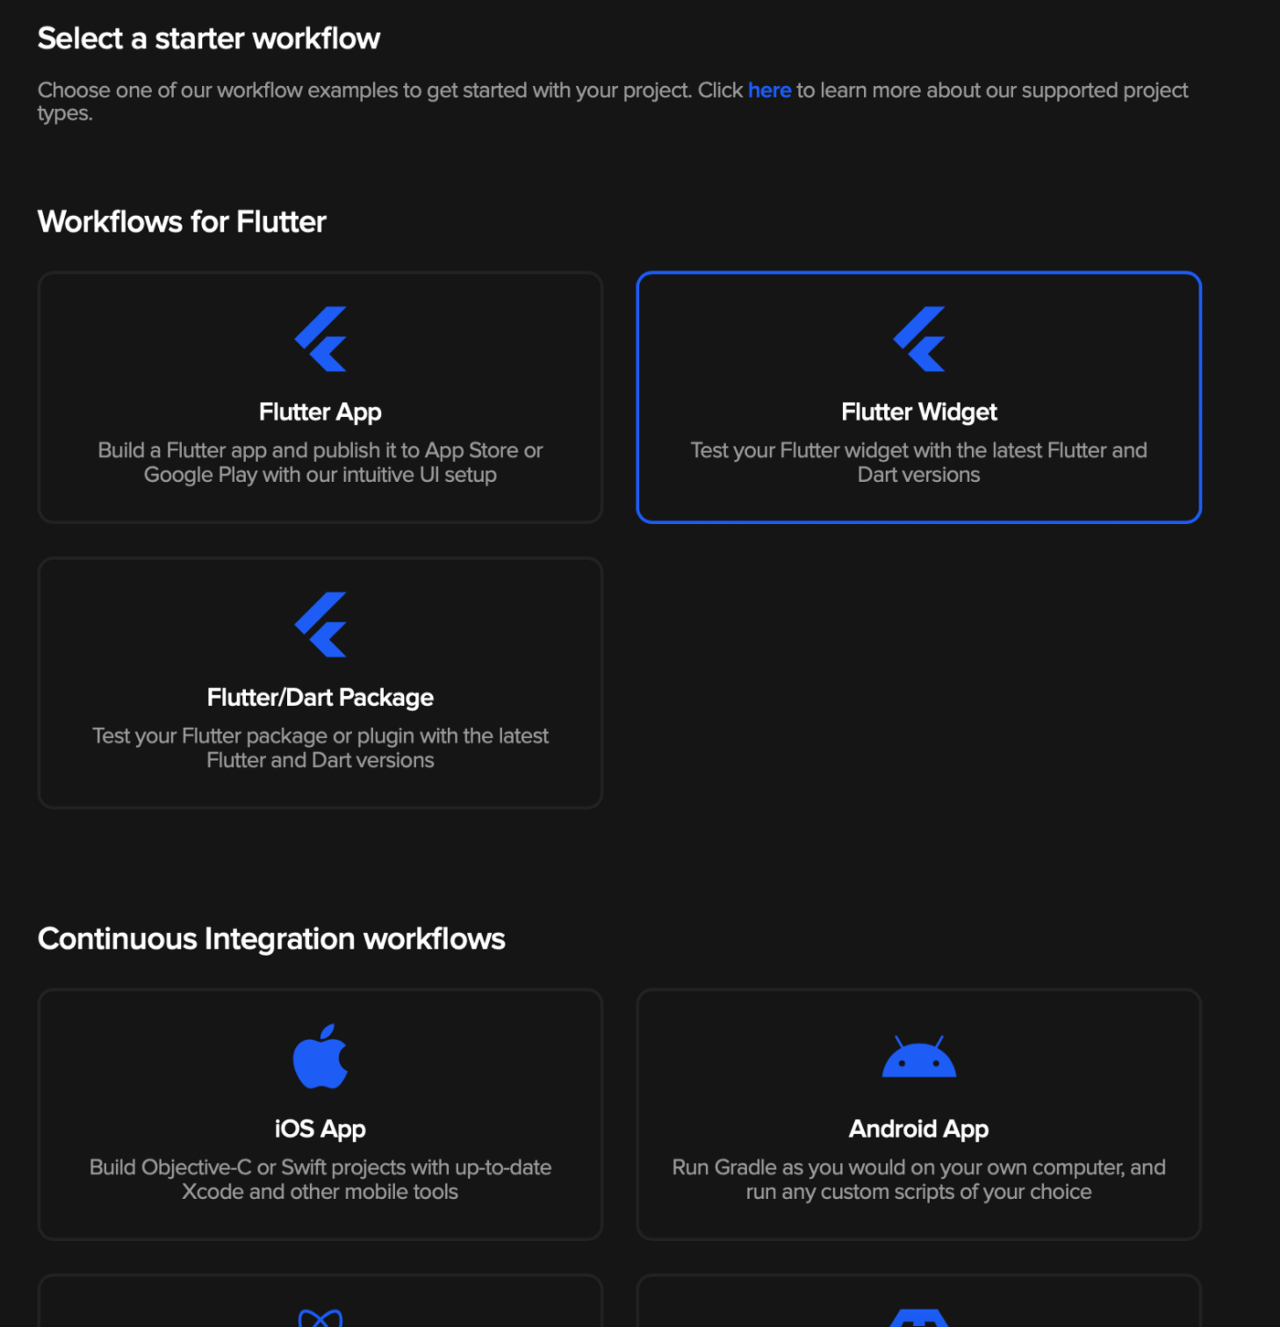
We are almost done by this point.
Now, on the right side of the screen, click the Encrypt environmental variables. You should see something like:
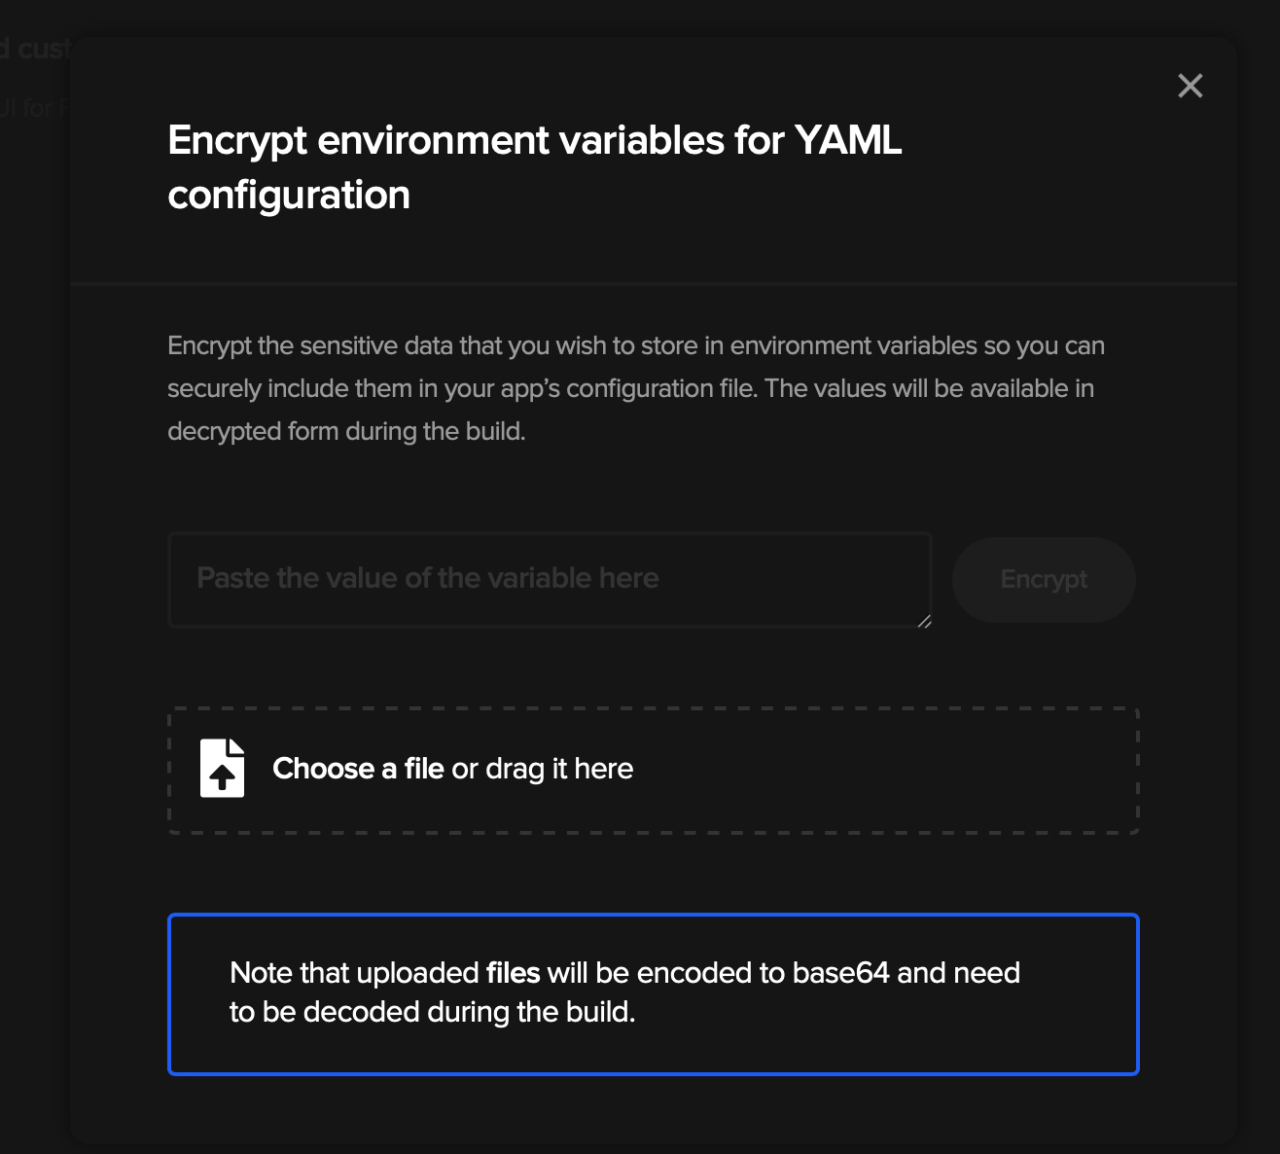
Now, this part is kind of time-consuming. You now need to paste every environmental variable we set up during this tutorial and copy the result to Codemagic.yaml file. You can enter mentioned file to see the list of all needed variables.
Here is an example:
TOD_APPLE_ID: Encrypted(Z0FBQUFBQmYzZ2dSVkIxQzRZYXlCS2FaMXQ1bS0waFNialQwX0NfZWxIUlNYOE9kWG5heWdPRXlIZzB3ZJHD8HFa2dtbzNiZGNScWIxZFlRVjhJZXV4MUdnNExBam9tTy1JTzVEd1hYaWY5WEk2dDBKTFVCdkk9)
Here are all the values you’ll need to set for the publish-qa workflow:
TOD_MATCH_REPO: Encrypted(...)
TOD_APPLE_ID: Encrypted(...)
TOD_APP_SPECIFIC_PASSWORD: Encrypted(...)
TOD_MATCH_PASSPHRASE: Encrypted(...)
ANDROID_KEYSTORE: Encrypted(...)
MATCH_SSH_KEY: Encrypted(...)
ANDROID_KEY_PROPERTIES: Encrypted(...)
GOOGLE_PLAY_JSON: Encrypted(...)
After you make changes don’t forget to commit and push them to your version control system.
Bumping the version
Before you trigger a new build, make sure you bump the version in the pubspec.yaml file. You should increase either major.minor.patch version or the -X pre-release suffix.
Updating the recipients for build notifications
Make sure to update the recipients section in the codemagic.yaml file to use your own email address to get notified about build success or failure.
Running the build on Codemagic
When you’re done, press Start new build button, on the bottom of that window press Select workflow from codemagic.yaml, select the branch you are using and select publish-qa workflow. Press Start new build and wait for your build to complete. If everything goes well, new builds should be uploaded to App Store Connect and GooglePlay.
Triggering builds
The codemagic.yaml configuration we prepared triggers builds on two events:
- When you make a PR to the
mainbranch, theprworkflow will be triggered - When you tag a commit on the
mainbranch and push it to the remote, thepublish-qa
This is helpful when you want to have proper continuous delivery implemented for your mobile app.
Using this for an existing Flutter app
When you set up your new app you can use this tutorial and repository README as your guide to creating a similar boilerplate for your own organization. Most importantly for a new flutter project, you can copy:
codemagic.yaml- the configuration under the fastlane directory
- the scripts under the ci directory and then
.gitignore
then follow the tutorial and you should be set as well.
Final words
We tried to make this tutorial into a comprehensive guide that will cut down the time you need to set up your build automation for a Flutter mobile application using Codemagic and fastlane. When running through the steps, the whole process took us less than 2h for completely new app identifiers. We hope that it will also help you reduce some friction in your projects. If anything isn’t clear or you noticed an error in this tutorial, we’ll appreciate raising an issue in the repository or a PR submission.
Thanks for reading and happy building! ?
P.S.
If you’re looking for an experienced hybrid mobile development team that specializes in Flutter, Ionic, and React Native, feel free to reach out to contact@itcraftship.com.





Discussion about this post