

Written by Souvik Biswas
Flutter allows you to build cross-platform apps that run on mobile, web, desktop, and embedded devices using a single codebase. Desktop support for Flutter is currently in beta, but a snapshot of the beta desktop support is available on the stable channel of Flutter to make it easier for users to try out.
This article will help you get started with building a Linux desktop app using Flutter, configure it for the release build, and publish the app to Snapcraft using Codemagic.
If you want a more in-depth getting started guide for Flutter desktop apps, check out this article.
What is Snapcraft?
To avoid any confusion between a few different terms containing the word “snap,” here are some brief definitions of them:
-
The Snap Store is the app store for Linux. You can go there to browse and download apps for Linux.
-
The apps built for Linux are known as snaps. A snap is basically a bundle that contains the app and its dependencies, and it works across different Linux distributions.
-
snapd is the background service that manages and maintains your snaps on the Linux platform.
-
Snapcraft is a tool that you can use to build and publish your Snaps to the Snap Store.
Creating a Flutter app for Linux
Before you get started with creating a new Flutter app, you should have Flutter installed on your Linux system. If you don’t have Flutter installed, follow the installation guide here.
If you already have Flutter installed on your system, make sure the version is above
2.0. You can check your Flutter version by using theflutter --versioncommand.
Once you have Flutter installed, run the following command to enable Linux support in Flutter:
flutter config --enable-linux-desktop
You can run the flutter doctor command to check if there are any unresolved issues. You can also use the flutter devices command to verify whether linux is listed as one of the available devices.
Now, you are ready to create a new Flutter app. Use this command:
flutter create <project_name>
Replace
<project name>with the name that you want to use for the project – for example,flutter create flutter_desktop_sample.
This will create the default Flutter counter app project. To run it on your Linux system, use the command:
Configure for building a snap package
There are two main tools you will need to generate a snap of your Linux app:
- The Snapcraft command line tool is used to build and release a Linux app to the Snap Store.
- The Multipass virtualization manager or LXD container manager provide an isolated build environment for generating a snap. By default, Snapcraft uses Multipass to create the build environment, but if your CPU doesn’t support virtualization, you can use LXD as an alternative.
Install Snapcraft
To check if Snapcraft is already installed on your system, use the following command:
This should print the version of Snapcraft on your system if you have it installed.
Otherwise, use the following command to install Snapcraft on any of the supported Linux systems:
sudo snap install snapcraft --classic
Some Linux distributions may have issues when running the command above. You’ll find a specific installation guide for each of the supported Linux distributions here.
If you have the apt version of Snapcraft installed, remove it using
sudo apt remove snapcraft, and install the snap version in its place. The latest version of Snapcraft is only available as a snap. This means that if you have the apt version, it is an older one that lacks a lot of features.
Install Multipass
Multipass requires access to CPU virtualization to work properly. So, before installing this tool, make sure your CPU supports virtualization and that it is turned on. You can manage and enable virtualization from the BIOS.
Install Multipass using the following command:
sudo snap install multipass --classic
If you don’t have virtualization enabled, you should see the following error:
launch failed: CPU does not support KVM extensions
If you face any issues with Multipass, use LXD instead.
Install LXD
You can use LXD as an alternative to Multipass if your CPU architecture doesn’t support virtualization or if you face any other issue with Multipass. LXD will run automatically during the snap build process.
Install LXD using:
Initialize LXD using the command below. You can continue with the default answers (just press Enter to accept a default answer) to the configuration questions during this step.
Upon first running LXD, you might see the following error:
An error occurred when trying to communicate with the 'LXD'
provider: cannot connect to the LXD socket
('/var/snap/lxd/common/lxd/unix.socket').
You need to add your username to the LXD group for it to be able to connect to its socket. Use the following command:
sudo usermod -a -G lxd <your_username>
Replace
<your_username>with the username of your Linux system. You can find your username using thewhoamicommand.
Defining the snapcraft.yaml file
To build a snap package of your Flutter Linux app, you need to define a configuration file called snapcraft.yaml. This file specifies the build instructions that are used while generating the snap.
Run the following command from your project directory:
snapcraft init
This will create a template snapcraft.yaml file inside the <project_root>/snap folder.
Replace the contents of this file with the following:
name: flutter-desktop-sample
version: '1.0'
summary: Desktop Counter App
description: Super Cool Counter App.
confinement: strict
base: core18
grade: stable

apps:
  flutter-desktop-sample:
    command: flutter_desktop_sample
    extensions: [flutter-master]

parts:
  flutter-desktop-sample:
    plugin: flutter
    source: .
    flutter-target: lib/main.dart
Let’s try to get a more detailed look at what’s going on inside this YAML file.
Generally, the snapcraft.yaml file is organized into three sections:
- Metadata
- Apps
- Parts
Metadata
This section contains some general information about the snap app, like its name and version.
name: flutter-desktop-sample
version: '1.0'
summary: Desktop Counter App
description: Super Cool Counter App.
Some build configurations are also specified here.
confinement: strict
base: core18
grade: stable
Confinement determines whether the snap should be restricted in access. You should use strict for releasing to production. If you want to see your app in the store, stick to confinement: strict.
Base defines the runtime environment of the snap. It is recommended to set it to core18 (based on Ubuntu 18.04 LTS).
Grade defines the quality of the snap. You can either use devel (development version) or stable (stable release version).
Check out this page for more information about the properties you can use in the Metadata section.
Apps
This section defines the apps and services that will be exposed to the host system when this snap is installed. In our case, we need to expose only the single Flutter app.
apps:
  flutter-desktop-sample:
    command: flutter_desktop_sample
    extensions: [flutter-master]
The value that you define inside the command should match your Flutter app name defined inside the pubspec.yaml file. To build Flutter Linux apps, you need to define flutter-<channel> under extensions. flutter-master is defined here, which means it will use the master channel of Flutter while building the snap.
Check out this page for more information about the properties you can use in the Apps section.
Parts
This section defines where to import the source of the app from and the plugins required to build the snap.
parts:
  flutter-desktop-sample:
    plugin: flutter
    source: .
    flutter-target: lib/main.dart
Here, the root directory is used as the source, and Flutter is only imported as the plugin. The flutter-target property defines the main entry point of the Flutter app.
Check out this page for more information about the properties you can use in the Parts section.
Define the Desktop file and icon
Linux apps use configurations stored inside a file with a .desktop extension to define how the app will look on the Linux desktop menu. The name and icon of the app are the main properties specified here.
Create a file called <app-name>.desktop inside the folder <project-root>/snap/gui. For this sample app, it should be <project root>/snap/gui/flutter-desktop-sample.desktop.
Add the following inside this file:
[Desktop Entry]
Name=Flutter Desktop Sample
Comment=Super Cool Counter App
Exec=flutter-desktop-sample
Icon=${SNAP}/meta/gui/flutter-desktop-sample.png
Terminal=false
Type=Application
Categories=Utility;
The Name, Icon, and Categories of the app are defined here. You can choose from among the categories listed here.
More information about the Desktop file is available here.
Place the icon that you want to use inside the <project root>/snap/gui folder, and make sure the icon file uses the <app-name>.png format (for example, flutter-desktop-sample.png).
NOTE: The Desktop and the Icon file should use the same app name as defined in the
nameproperty of thesnapcraft.yamlfile. You can find information about supported icon sizes and formats here.
Generate a snap
Now, you are ready to generate the snap.
To use Multipass to build the snap, run:
To use LXD to build the snap, run:
Once the build is complete, there should be a file called <app-name>.snap inside the root project directory.
You can install the generated snap locally using the following command:
sudo snap install <app-name>.snap --dangerous
For example,
sudo snap install flutter-desktop-sample.snap --dangerous
The --dangerous flag is used here, as the snap is not signed by the Snap Store.
You can run the app using:
For example:
flutter-desktop-sample.
Release the snap
To release the snap to the Snap Store, follow the steps below:
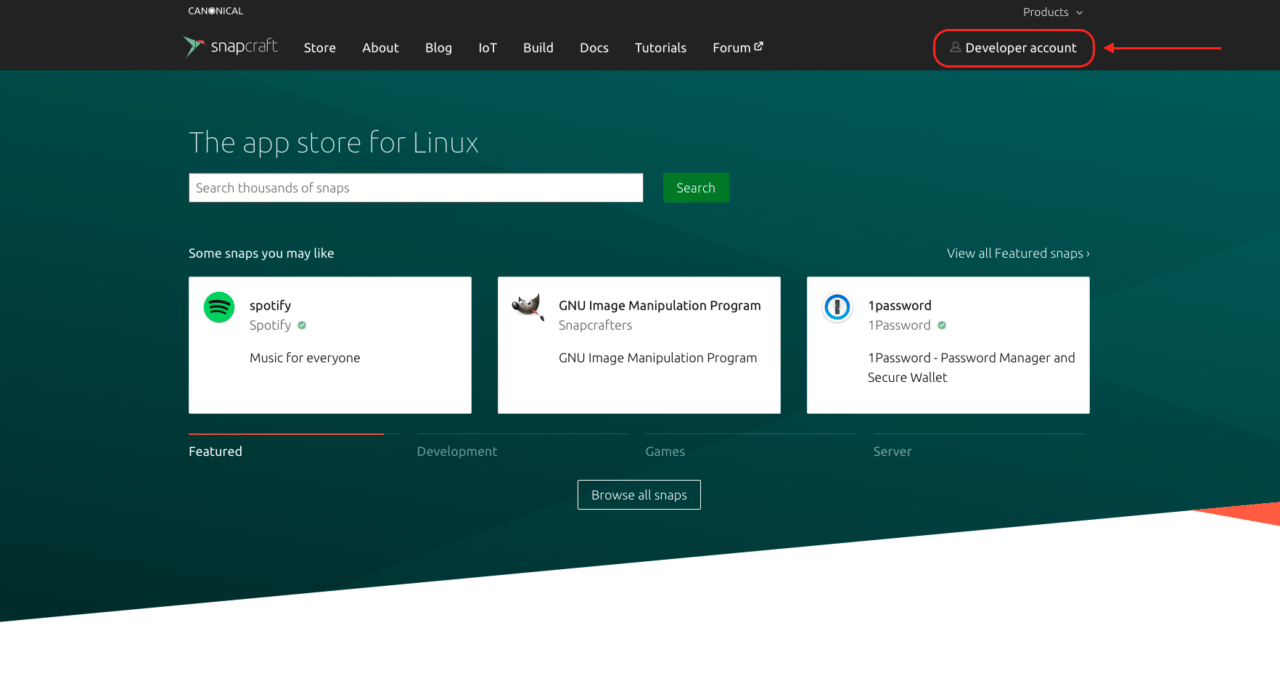
- Go to Snapcraft, and click on Developer account.
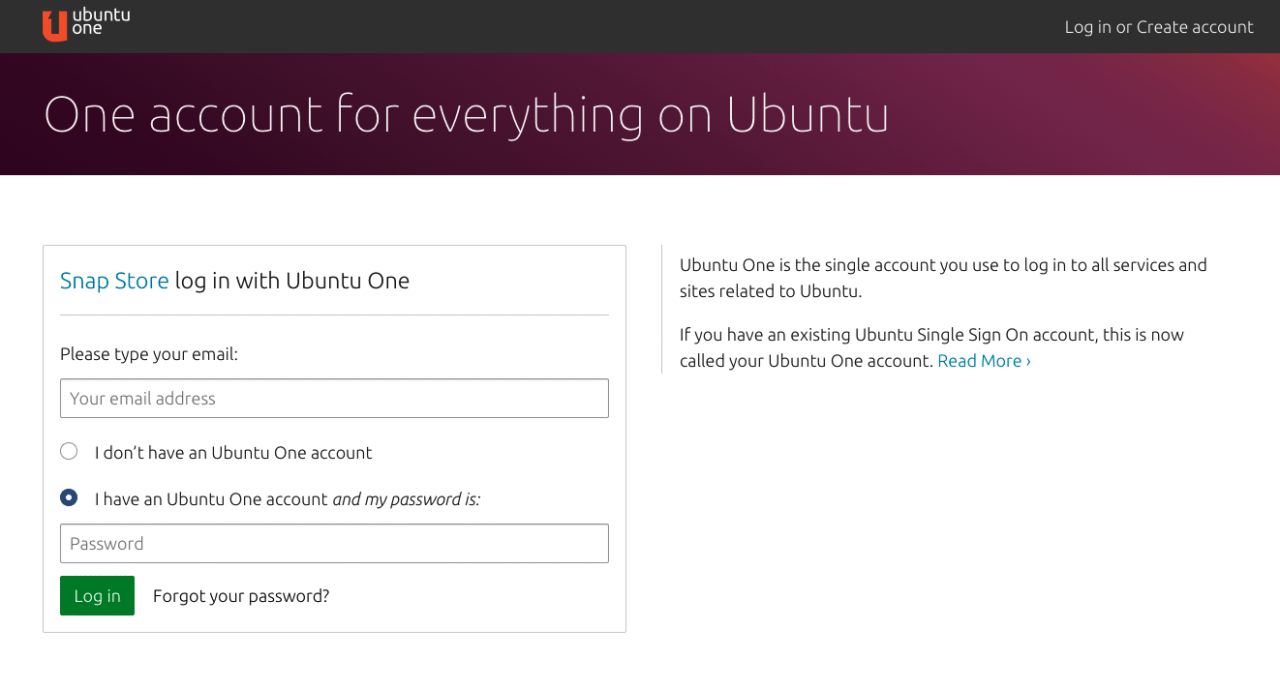
- Log in to your Ubuntu One account. If you don’t have an account, create one from that page.
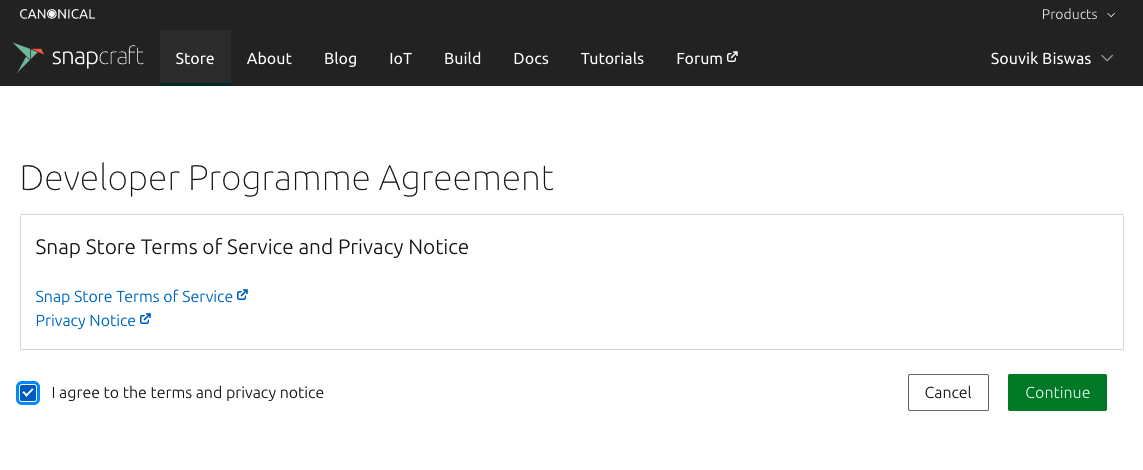
- Accept the Developer Programme Agreement and click Continue.
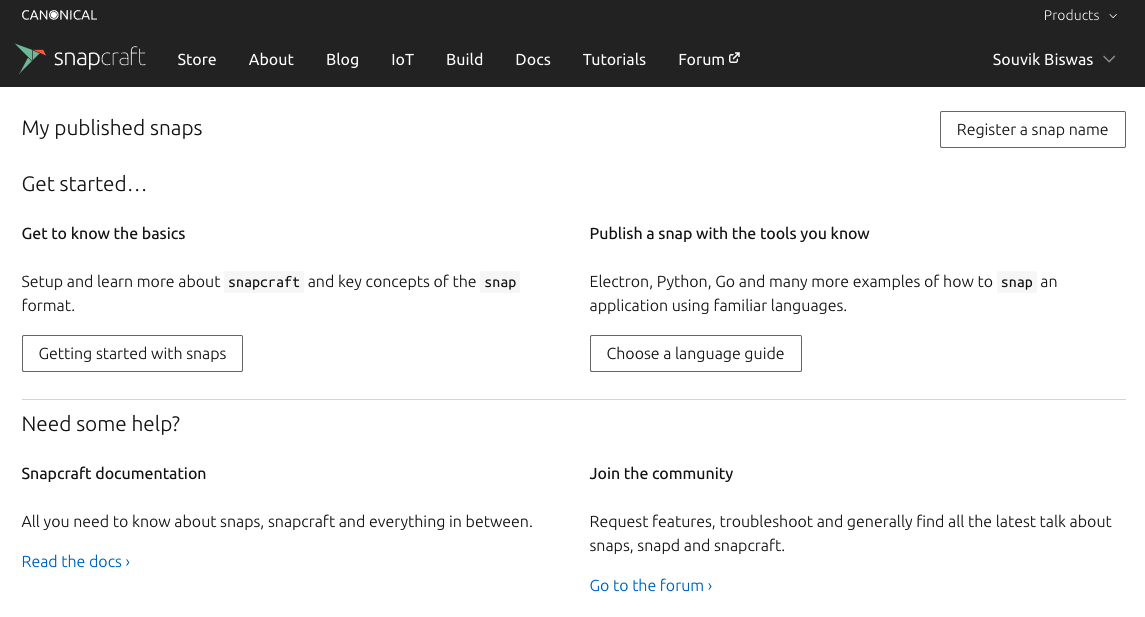
- Your Developer account creation is now complete. You should be taken to the following page:
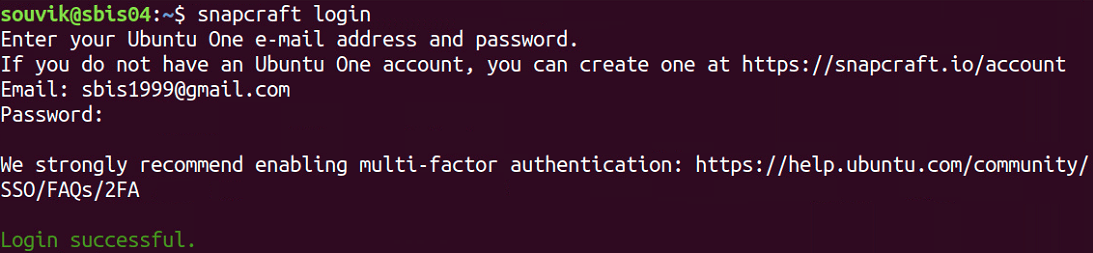
- Go back to your Terminal, and log in to Snapcraft using:
- Register your snap:
snapcraft register <app-name>
For example:
snapcraft register flutter-desktop-sample
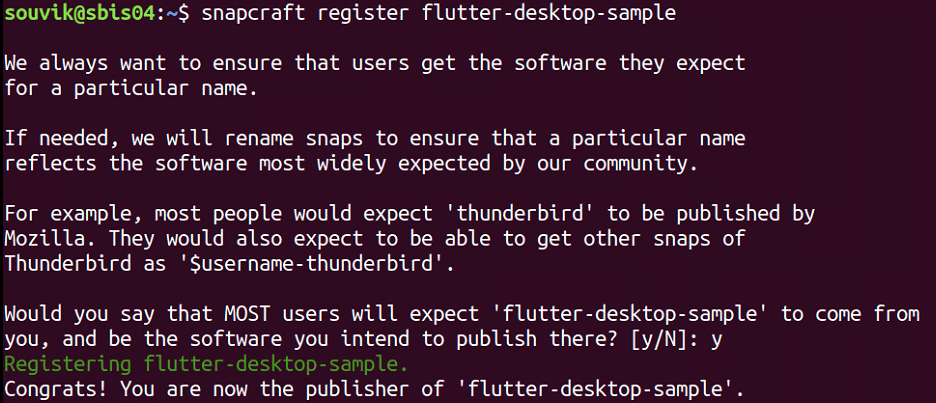
You are finished registering your Flutter Linux app on the Snap Store, and you are ready to publish the app.
You can publish it locally, but once you start improving your app, it gets daunting to build, test, and release it manually every time. Let’s take a look at how you can automate this entire process using Codemagic.
Adding your project to Codemagic
First of all, add your project to a Git provider (GitHub, Bitbucket, or GitLab). Now, follow the steps below to get started with Codemagic:
-
Connect to the Git provider where you have uploaded your Flutter project by going to Integrations under Settings. Make sure you have given permission to access the repository where you have uploaded your app.
-
Navigate to the Applications page and click Add Application.

- Select the Git provider:
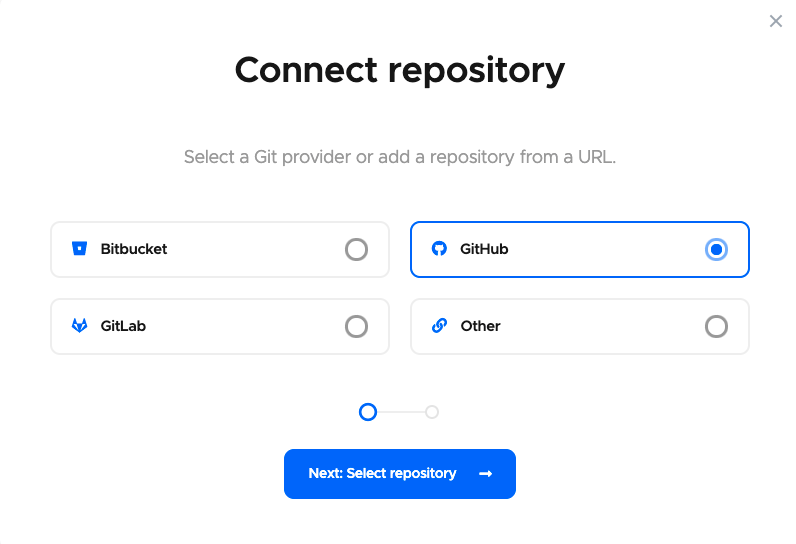
- Click Next: Authorize integration to authorize Codemagic. If you have already authorized your selected Git provider, click Next: Select repository instead.
If you are using GitHub as your Git provider, there is one additional step you need to take before selecting the repository. Click Install GitHub App to set up the integration. Learn more about configuring GitHub App integration here.
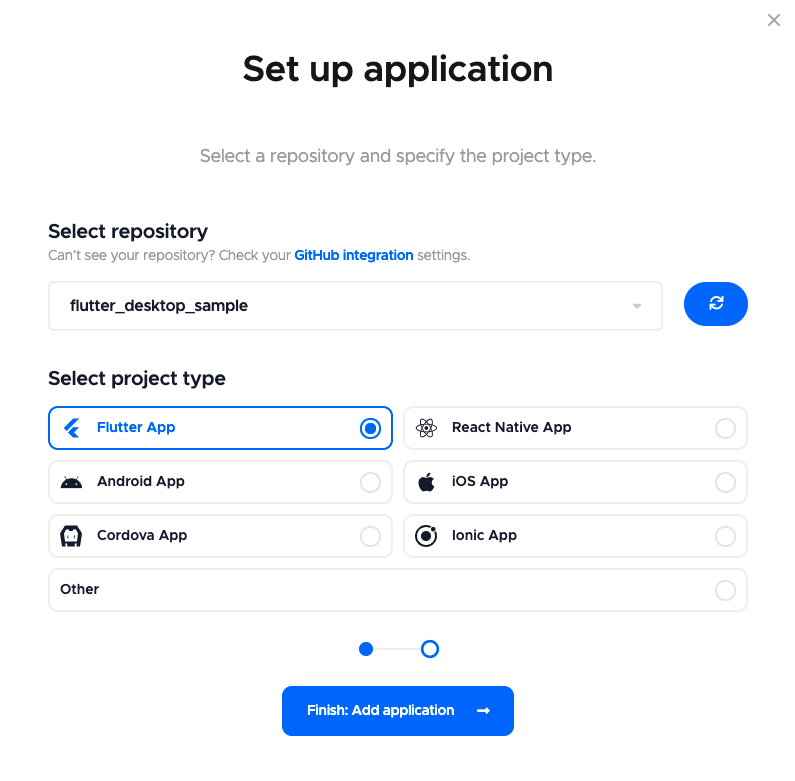
- Now, select the repository from the dropdown menu, and select the project type as Flutter app. Then click Finish: Add application:
- You will be taken to the project settings. The Workflow Editor tab will be selected by default.
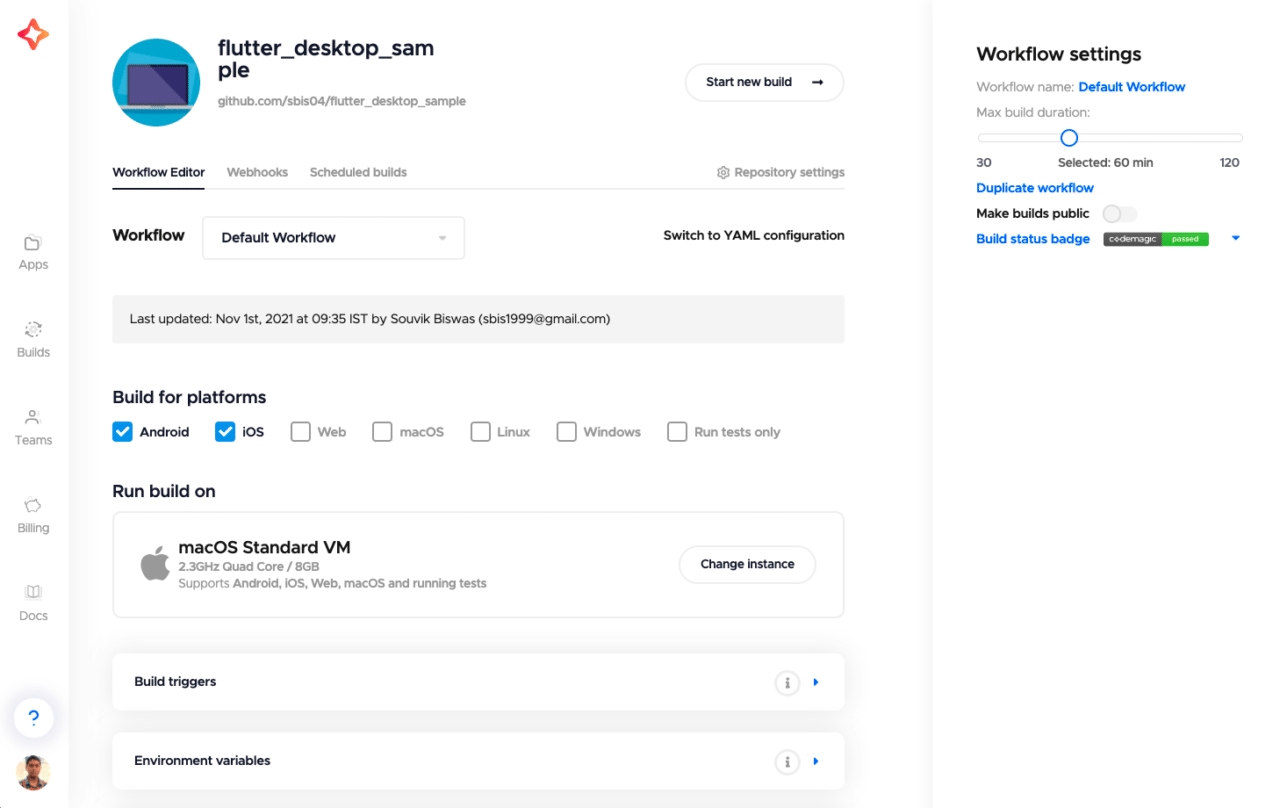
Building and publishing using Codemagic
There are two ways to build a Flutter app using Codemagic: using either Workflow Editor or the codemagic.yaml file. To build Linux apps using Codemagic, you need to enable billing by going to this page.
Configuring Codemagic using Workflow Editor
To configure your project using Workflow Editor, go to the Workflow Editor tab on Codemagic. Follow the steps below:
-
Select Linux under Build for platforms.
-
Change the VM instance to either Linux Standard VM or Linux Premium VM.
-
Scroll down to the Build tab. Select the Flutter version that you need for building the project, check the Build Snap package checkbox, and set the Mode to
Release. -
Now, go to the Distribution tab below. Click to expand the Snapcraft tab. Check the Enable Snapcraft publishing checkbox.
-
To get your Snapcraft login credentials, go back to your Linux terminal, and run the following command:
snapcraft export-login snapcraft-login-credentials
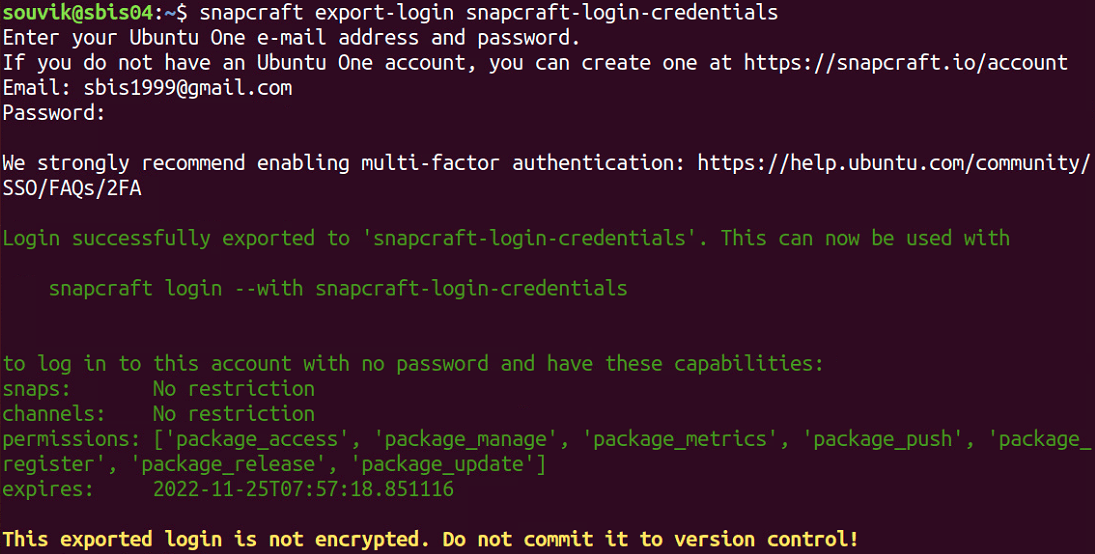
This will save your Snapcraft credentials inside the snapcraft-login-credentials file.
-
Drag and drop this file under the Snapcraft login credentials of Codemagic.
-
Select the Channel where you want to publish your snap.
-
Click Save changes.
-
You have completed configuring your Linux publishing workflow. Click Start your first build at the top of this page, and then click Start new build to start the build process.
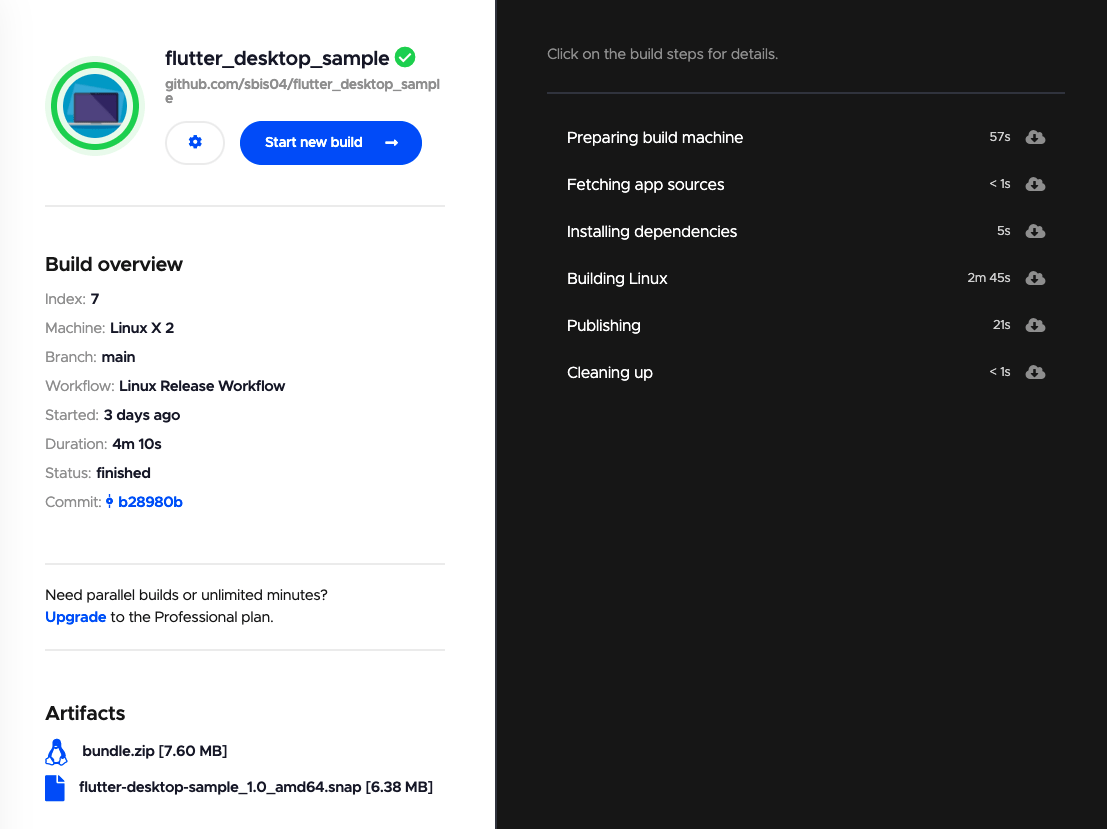
Configuring using Codemagic YAML
To configure your build using Codemagic YAML, go to your Flutter project, and create a new file inside the root directory called codemagic.yaml.
Add the following template to the file:
workflows:
  my-workflow:
    name: Workflow name
    instance_type: mac_mini
    max_build_duration: 60
    environment:
      groups:
        - ...
      flutter: stable
    cache:
      cache_paths:
        - ~/.pub-cache
    scripts:
      - ...
    artifacts:
      - ...
    publishing:
      email:
        recipients:
          - name@example.com
This is a basic workflow template for building apps on Codemagic. Check out the Docs for more information.
To build a snap and publish your Linux app, modify the workflow according to the steps given below:
- Set an appropriate workflow name, and define a Linux VM instance:
workflows:
  linux-workflow-release:
    name: Linux release workflow
    instance_type: linux
    max_build_duration: 60
For a Linux app build, you can use either
linux(Standard VM) orlinux_x2(Premium VM) as theinstance_type.
- Add the following as environment variables:
environment:
  vars:
    SNAPCRAFT_BUILD_ENVIRONMENT: host
  groups:
    - snapcraft_credentials
  flutter: master
You must set the
SNAPCRAFT_BUILD_ENVIRONMENTenvironment variable ashostto avoid virtualization.
You need to upload your snapcraft_credentials to the Application environment variables in an encrypted format.
- To get the Snapcraft login credentials, go to your Linux terminal, and run the following command:
snapcraft export-login snapcraft-login-credentials
This will save your Snapcraft credentials inside the `snapcraft-login-credentials` file.
- Encrypt the file to
base64format using:
 sudo apt-get install xclip
 cat snapcraft-login-credentials | base64 | xclip -selection clipboard
This will copy the encoded string automatically.
- Now, go to your project page on Codemagic, and click Switch to YAML configuration. Go to the Environment variables tab, and add encoded credentials. Enter the Variable name as
SNAPCRAFT_LOGIN_CREDENTIALS, and paste the value inside the Variable value field. Create a group calledsnapcraft_credentials. Make sure the Secure checkbox is checked, and click Add.
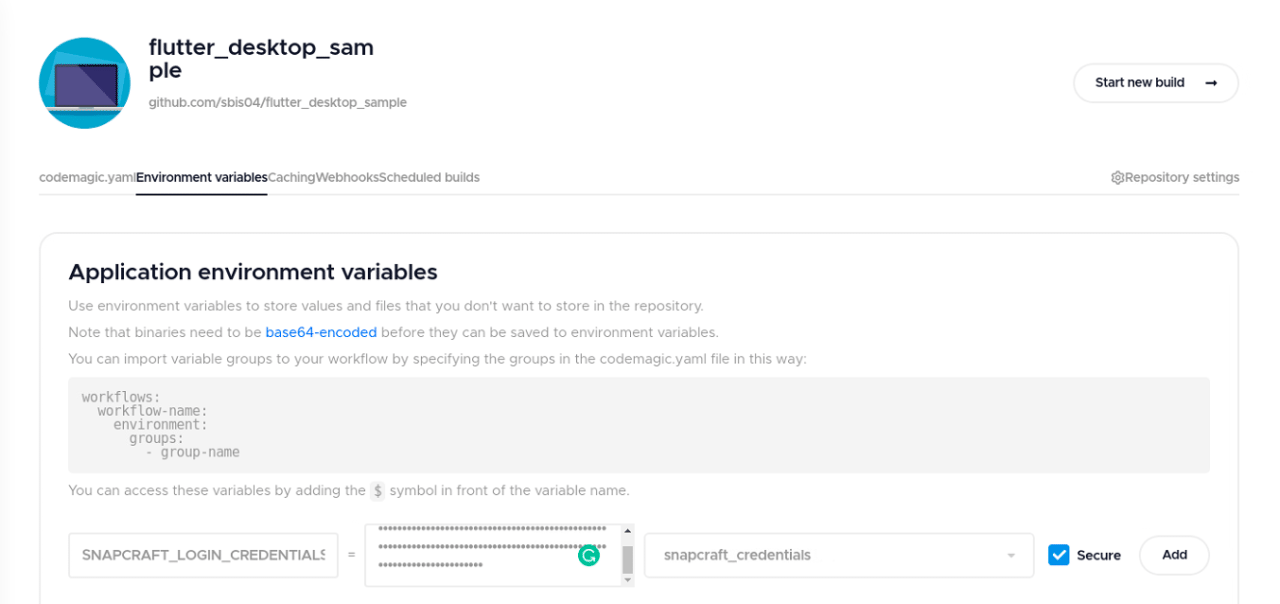
- Under the
scriptssection, first get the Flutter packages:
scripts:
  - name: Get Flutter packages
    script: flutter packages pub get
- Enable the Linux platform:
- name: Configure for Linux
  script: |
    flutter config --enable-linux-desktop
- Authenticate using the Snapcraft credentials:
- name: Login to Snapcraft
  script: |
    echo $SNAPCRAFT_LOGIN_CREDENTIALS | base64 --decode > /home/builder/snapcraft-login-credentials
    snapcraft login --with /home/builder/snapcraft-login-credentials
- Generate the snap package using:
- name: Create Snap package
  script: snapcraft snap --output flutter-desktop-sample.snap
- Upload the snap to the
stablechannel of the Snap Store using:
- name: Upload to Snapcraft
  script: snapcraft upload flutter-desktop-sample.snap --release stable
- Under the
artifactssection, use the following path:
- Replace the email under
publishingwith yours.
The codemagic.yaml file is ready. Commit/add this file to your Git provider.
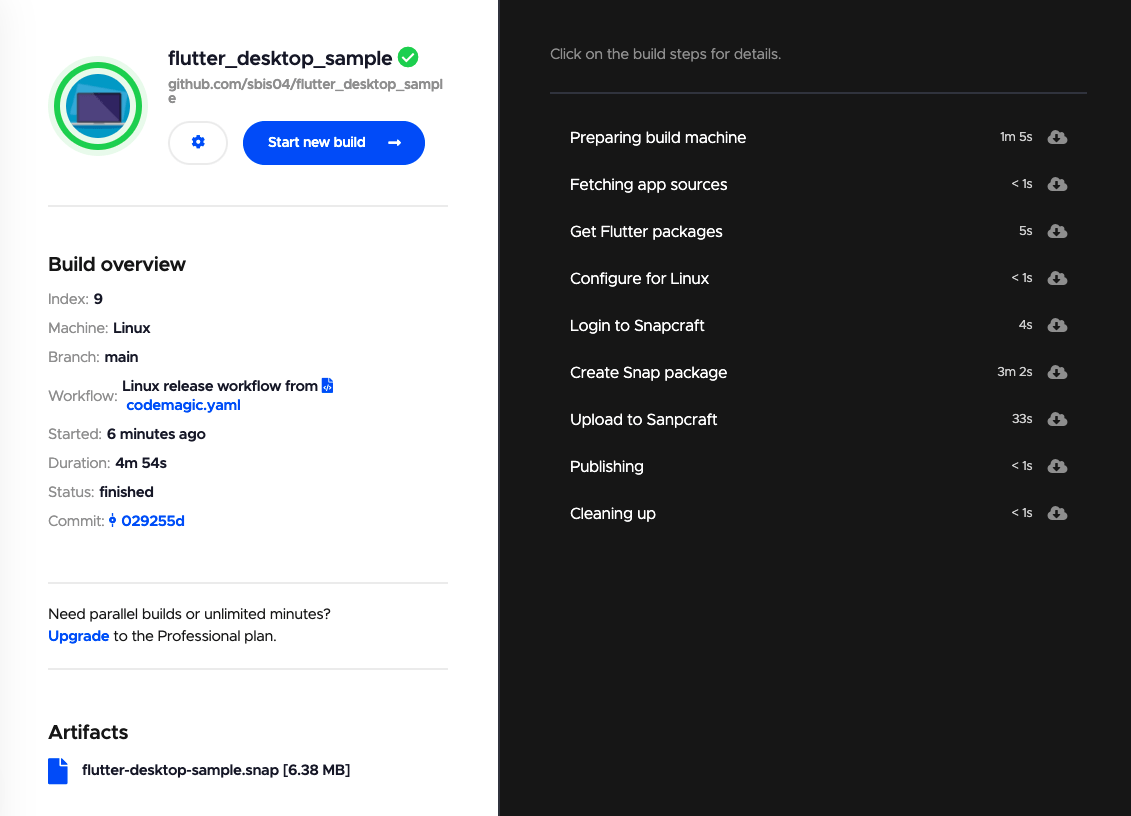
Now, to start building your Linux app using the YAML file, go to your project page on Codemagic, and click Start your first build. Select your workflow, and then click Start new build to start the build process. Your first Linux app will be built and published with Codemagic.
Conclusion
Great job! ? You have successfully built your first Flutter Linux app and published it to the Snap Store using Codemagic. You can now view your published snap by going to your snaps page. To get more traction on the Snap Store, update the Listing page of your snap with an attractive icon, title, description, and images – all this information will be displayed on your snap’s page.
After adding any new features to your app, just push the changes to the Git provider, and then you can easily build and publish your Linux snap app with Codemagic.
You can find the complete codemagic.yaml configuration file for this particular Flutter Linux app here. Check out the sample Flutter desktop app on this GitHub repository.
Souvik Biswas is a passionate Mobile App Developer (Android and Flutter). He has worked on a number of mobile apps throughout his journey. He loves open-source contribution on GitHub. He is currently pursuing a B.Tech degree in Computer Science and Engineering from Indian Institute of Information Technology Kalyani. He also writes Flutter articles on Medium – Flutter Community.


Discussion about this post