

This Flutter Navigator 2.0 tutorial assumes that you have a working knowledge of Dart and Flutter.
Navigation is a core concept in mobile app development. It enables users to move from one screen to another. Well-managed navigation keeps your app organized and enhances its capabilities.
Flutter offers an imperative API (Navigator 1.0) and a declarative API (Navigator 2.0) routing mechanism. In Navigator 1.0, you can only add a page to the top of the navigation stack and remove the topmost route. On the other hand, the declarative mechanism allows you to control the navigation stack completely.
In this article, you’ll learn how to set the navigation history stack in a declarative way. You’ll learn how to:
This article is written by Ivy Walobwa
Navigator 2.0
Navigator 2.0 is the standard reference to declarative navigation and does not replace Navigator 1.0, as you can use them together.
Navigator 2.0 offers a new declarative API design, Pages, for the existing Navigator widget. It also introduces a new Router widget.
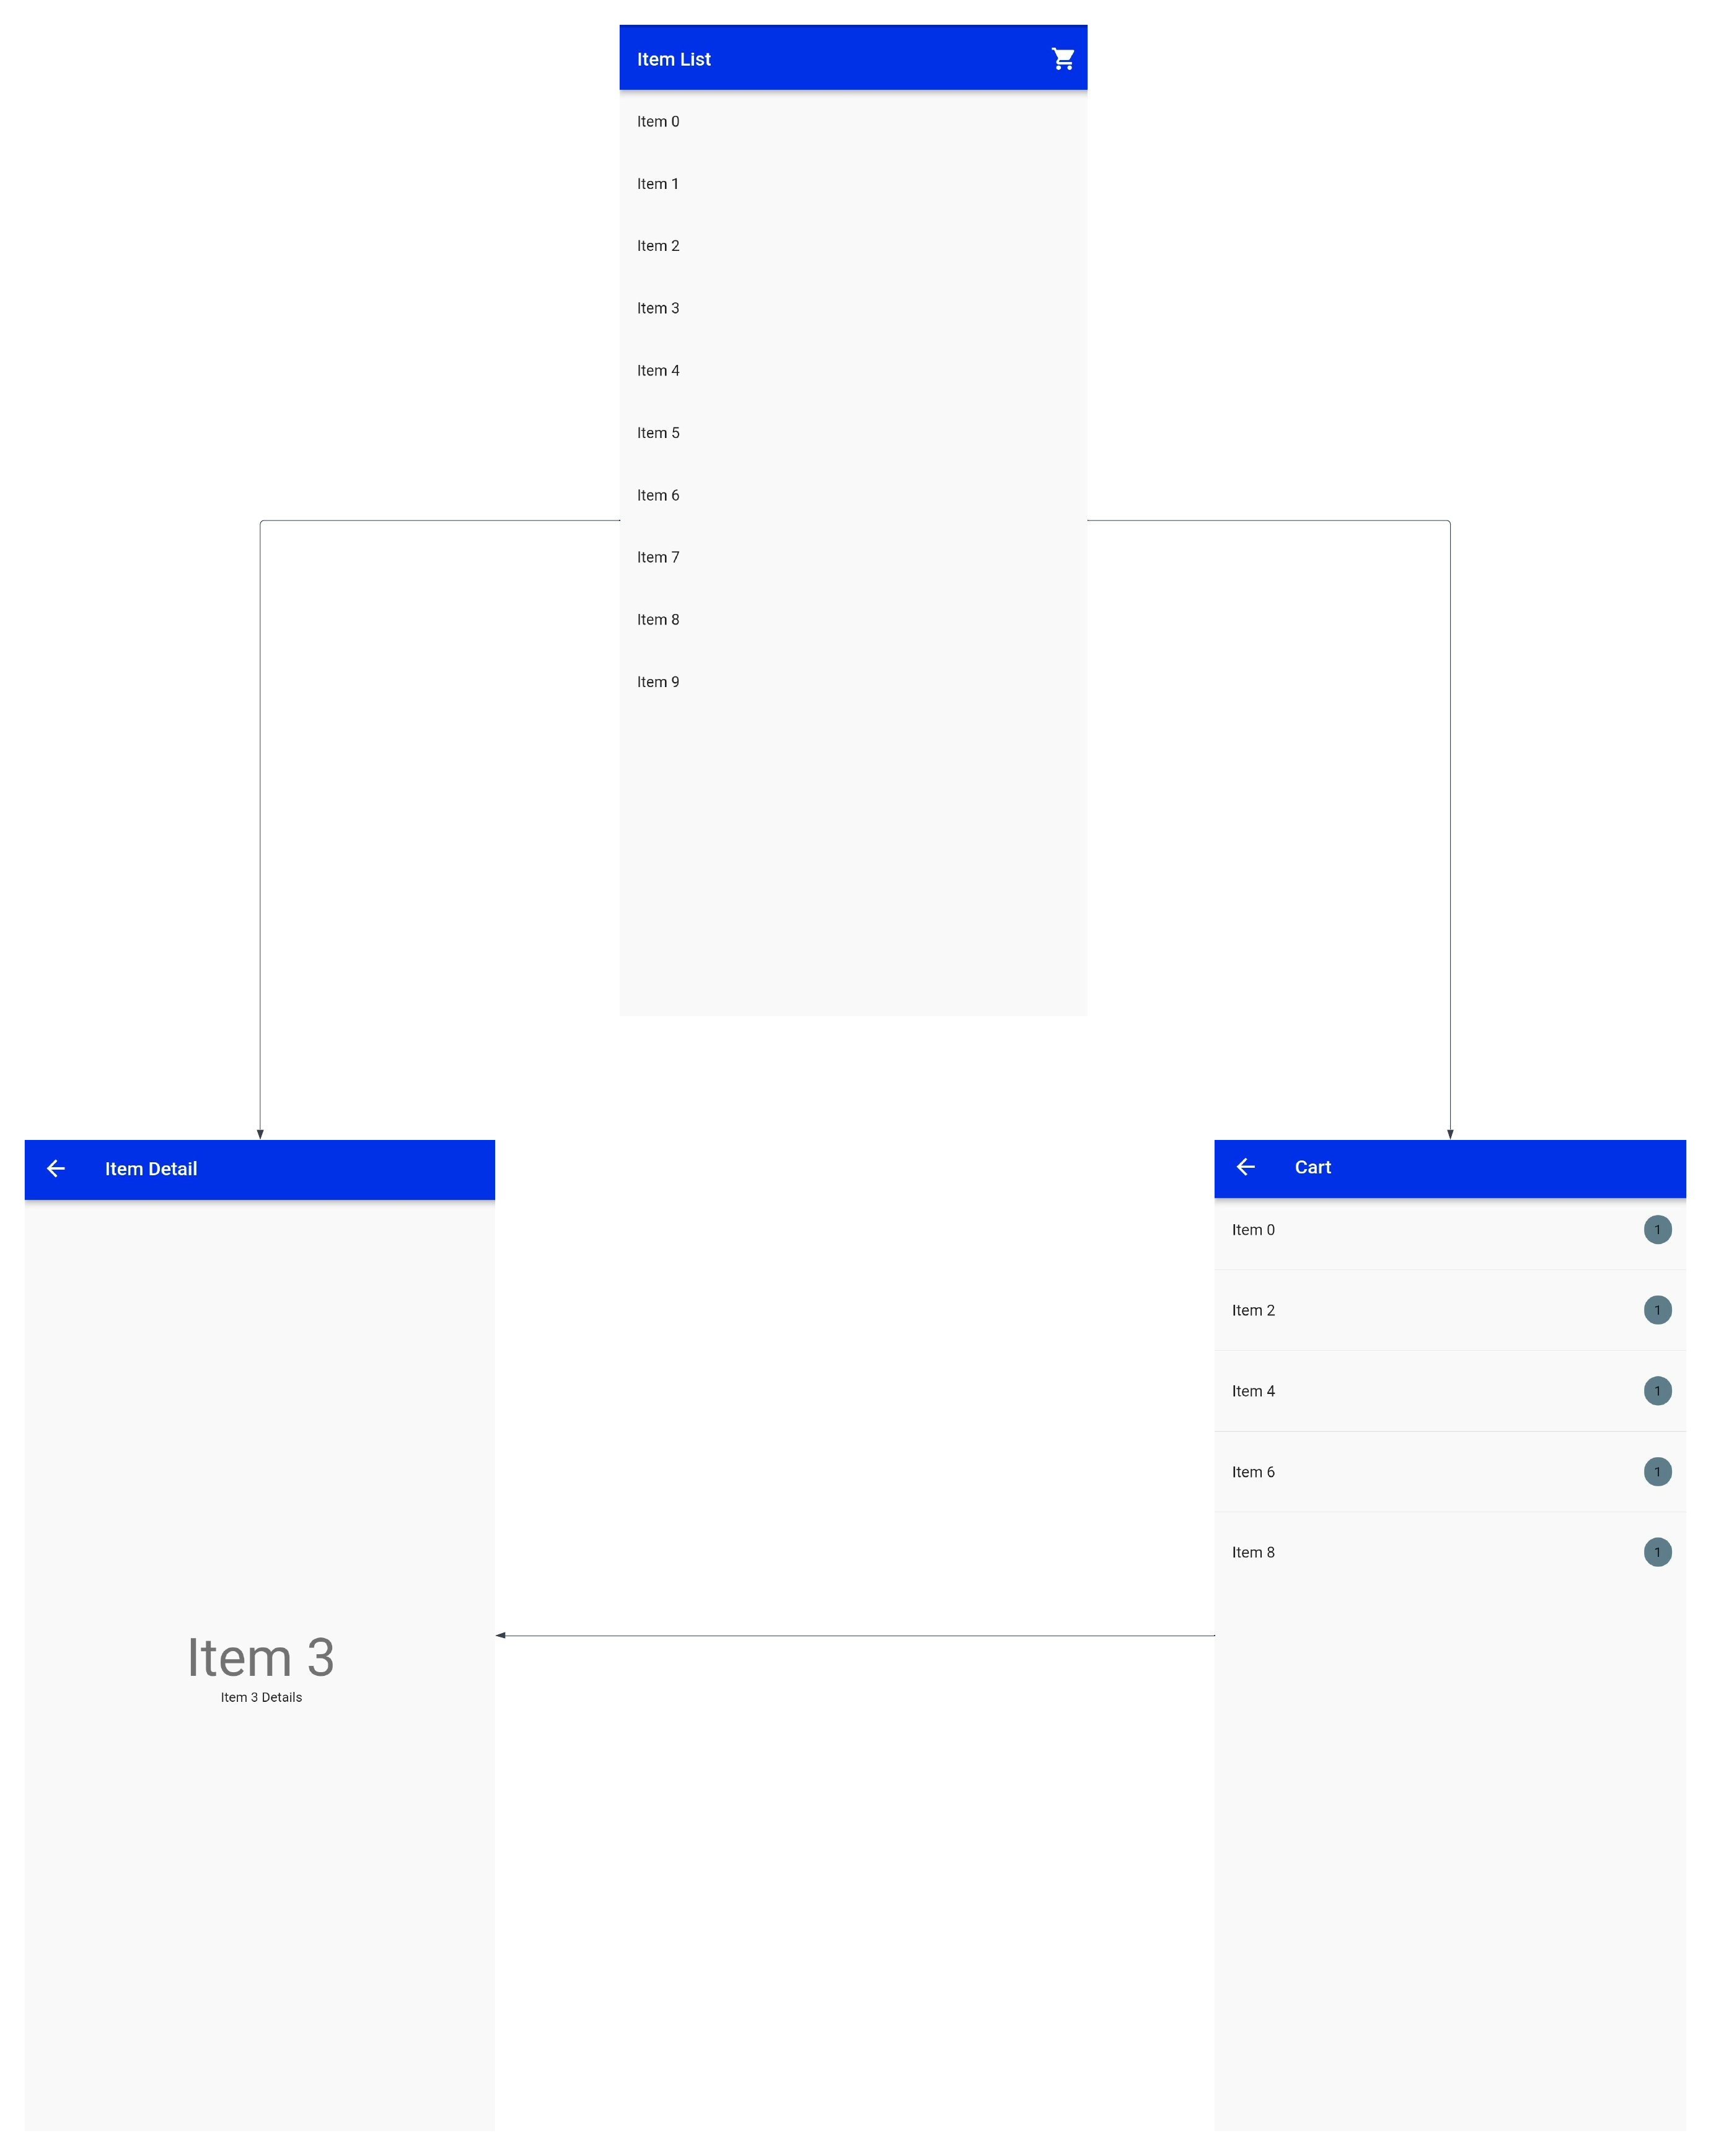
We’ll be working on a shop list app with three screens. It allows navigation, as shown here:
Working with Pages
The Pages API sets the history stack of the Navigator declaratively by taking in a list of Page objects. The Navigator then inflates the Page objects into Route objects. The order of Routes corresponds to the order of Pages in the list provided.
When the list of Page objects changes, the new list is compared to the old list, and the stack is updated correctly.
In addition to a list of Page objects, the Navigator takes in:
- An
onPopPagecallback that allows the Navigator to pop a page. It’s only ever called for the topmostPage. - A
transitionDelegatethat decides how Routes transition on or off the screen. The default delegate implements a push-like transition effect.
Let’s try it out!
Add the Navigator widget
First, you’ll add the Navigator widget to your MaterialApp widget, as shown below:
MaterialApp(
    ...
    home: Navigator(
      pages: [],
      onPopPage: (route, result)=>route.didPop(result),
    ),
)
The onPopPage callback is required. You’ll use the default transition delegate in this tutorial.
Add the first page to the stack
Next, you’ll add the first page to the history stack. This page will be visible when your app is first launched.
home: Navigator(
  pages: const [
    MaterialPage(
      key: ValueKey('ItemListScreen'),
      child: ItemsListScreen(),
    )
  ],
  onPopPage: (route, result) => route.didPop(result),
),
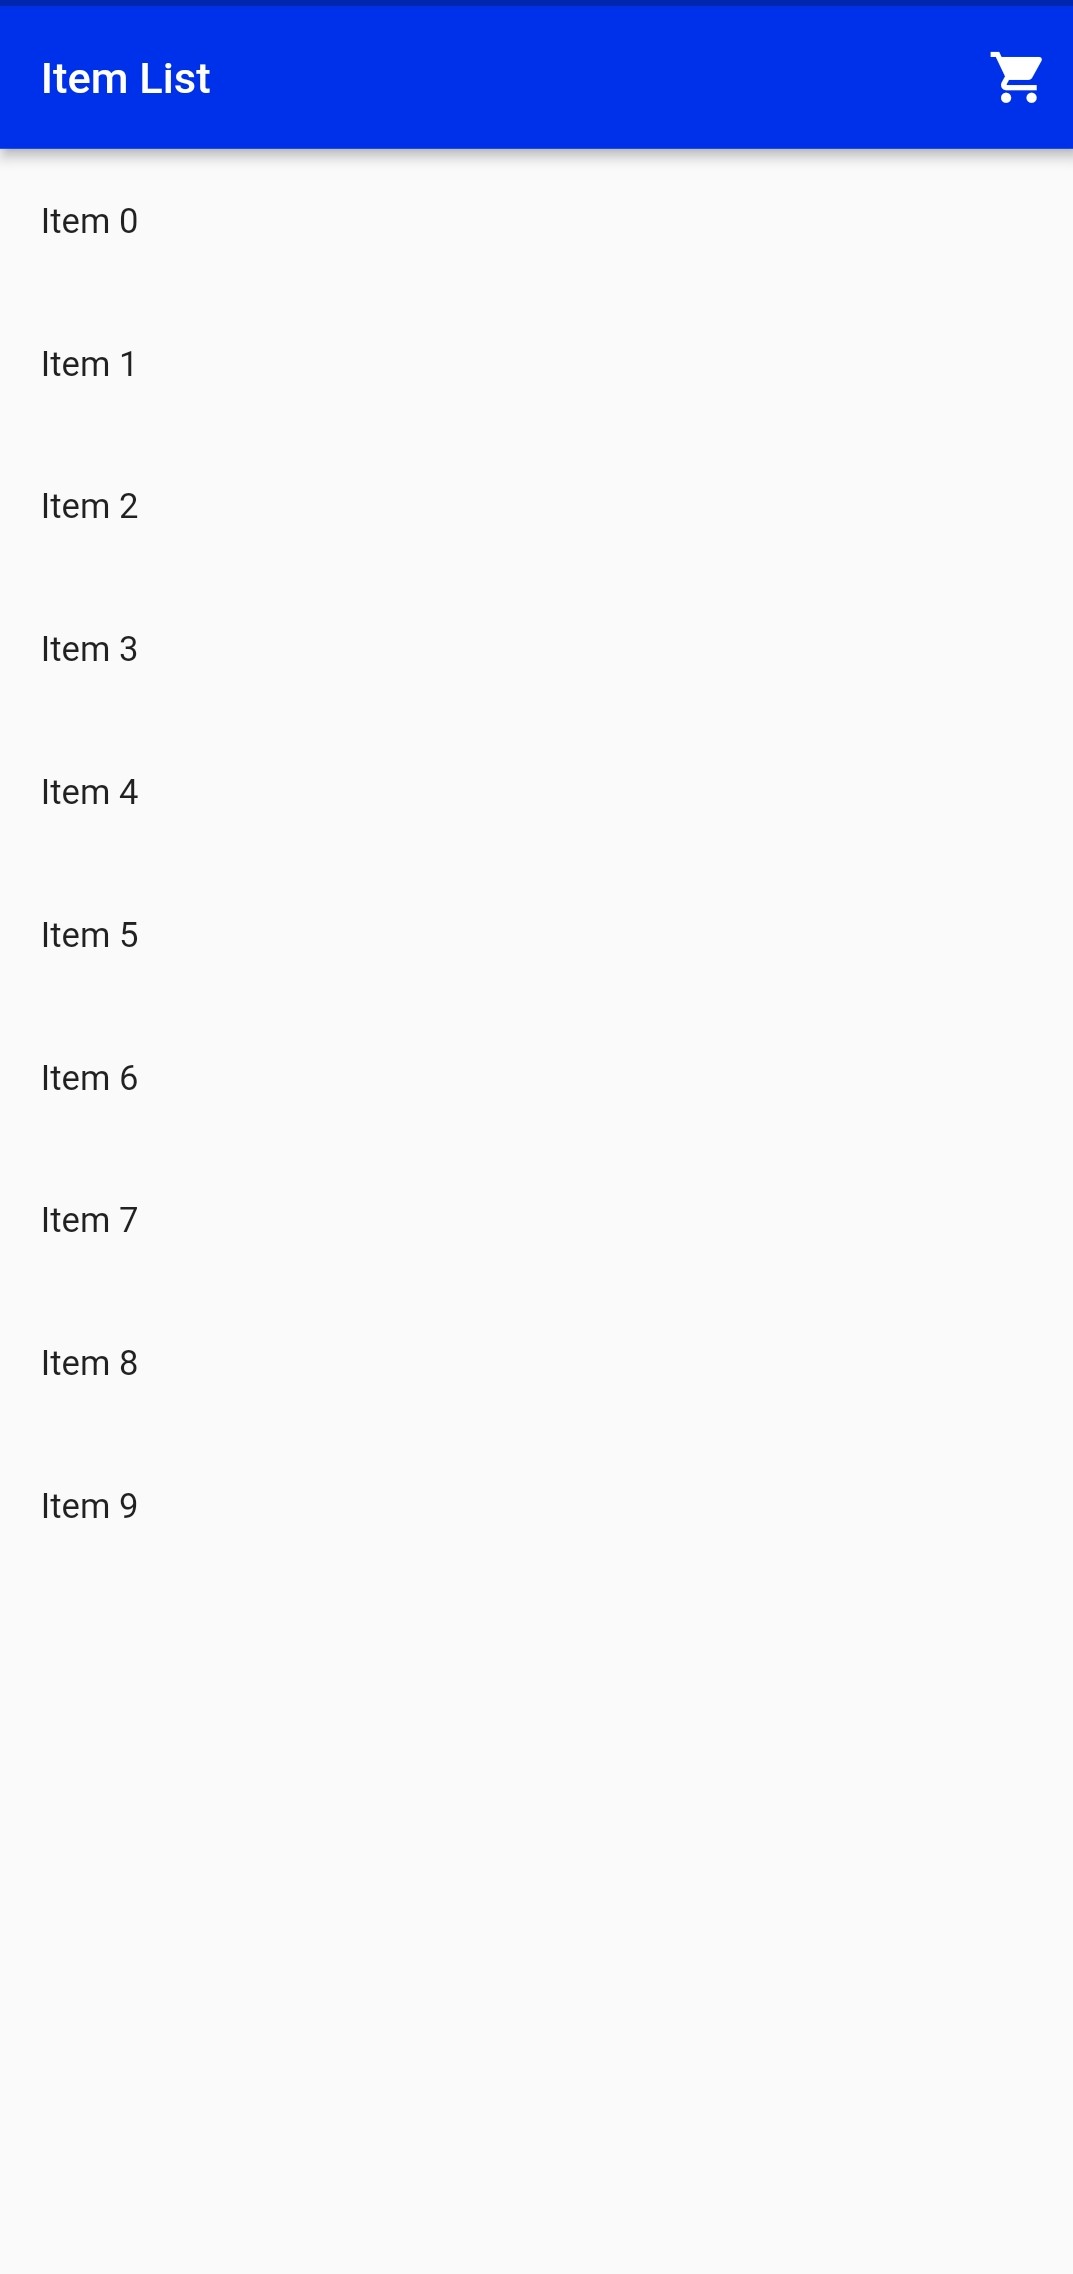
Running your app displays the ItemListScreen, as shown below:
Add the app state
You will then add the state to your application. You can add methods and flags to update the navigation stack as desired.
...
class _MyAppState extends State<MyApp> {
  String? _selectedItem;
  String? _selectedRoute;
  bool show404 = false;

  @override
  Widget build(BuildContext context) {
    return MaterialApp(
      ...
      home: Navigator(
        pages: [
          MaterialPage(
            key: const ValueKey('ItemListScreen'),
            child: ItemsListScreen(
              onItemTapped: _handleItemTapped,
              onRouteTapped: _handleRouteTapped,
            ),
          ),

        ],
        onPopPage: (route, result) => route.didPop(result),
      ),
    );
  }

  void _handleItemTapped(String item) {
    setState(() {
      _selectedItem = item;
    });
  }

  void _handleRouteTapped(String route) {
    setState(() {
      _selectedItem = null;
      _selectedRoute = route;
    });
  }
}
The code above does the following:
- Adds three flags to the app state:
_selectedItem,_selectedRoute, andshow404. - Adds a
_handleItemTappedmethod: This is called when a user taps on a single item in the list and updates the_selectedItemproperty. - Adds a
_handleRouteTappedmethod: This is called when a user navigates to a different screen that does not require item data and updates the_selectedItemand_selectedRouteproperties. - Modifies the
ItemListScreento take in two required methods:onItemTappedandonRouteTapped.
Add pages
Now that you have the required app state, you can handle the addition and removal of pages from the history stack, as shown below:
home: Navigator(
      pages: [
        MaterialPage(
          key: const ValueKey('ItemListScreen'),
          child: ItemsListScreen(
            onItemTapped: _handleItemTapped,
            onRouteTapped: _handleRouteTapped,
          ),
        ),
        if (show404)
          const MaterialPage(
            key: ValueKey('Error Page'),
            child: Center(
              child: Text('404'),
            ),
          )
        else if (_selectedItem != null)
          MaterialPage(
            key: ValueKey(_selectedItem!),
            child: ItemDetailsScreen(
              item: _selectedItem!,
            ),
          )
        else if (_selectedRoute != null && _selectedRoute == cartRoute)
          MaterialPage(
            key: ValueKey(_selectedRoute!),
            child: CartScreen(
              onItemTapped: _handleItemTapped,
            ),
          )
      ],
      onPopPage: (route, result) {
        if (!route.didPop(result)) {
          return false;
        }

        if(_selectedItem != null && _selectedRoute != null){
          setState(() {
            _selectedItem = null;
          });
          return true;
        }

        setState(() {
          _selectedRoute = null;
          _selectedItem = null;
        });

        return true;
      },
  )
The code snippet above conditionally adds and removes Page objects from the history stack based on the value of the _selectedRoute, _selectedItem, and show404 properties.
The onPopPage callback updates the app’s state, updating the navigation stack. It returns true when the pop request is successful.
With that, you can navigate the three screens as shown here:
Working with Router
The Router widget is a dispatcher for opening and closing application pages. It wraps a Navigator and configures its current list of Pages based on the current app state. It also listens to events from the operating system.
To work with the Router widget, you need to understand the following concepts:
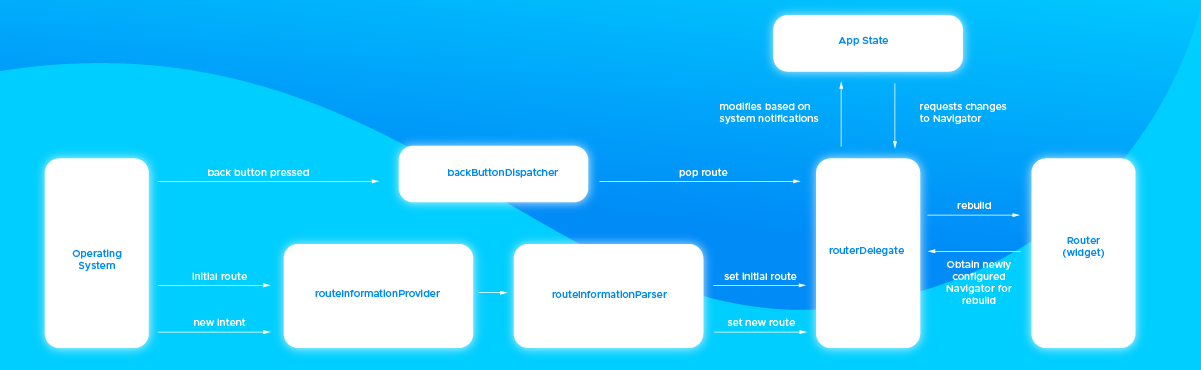
RouteInformationProvider: determines how theRouterlearns aboutStringroutes that the operating system wants to show.RouteInformationParser: translates route information fromRouteInformationProviderinto a user-defined data type and translates the user-defined data type into route information.RouterDelegate: listens toRouteInformationParserand the app state to build an appropriately configured Navigator.BackButtonDispatcher: reports to theRouterwhen the user taps the back button.
Below is an illustration of the concepts mentioned above from the Flutter team:
We won’t be handling the BackButtonDispatcher in this tutorial.
Let’s try it out!
Add user-defined data types
Since the RouteInformationParser works with a user-defined data type, you must define it first.
class ShopListRouteConfig {
  final int? id;
  final String? selectedItem;
  final String? selectedRoute;
  final bool show404;

// Add initializers for your routes
// Sample initializer is:

  ShopListRouteConfig.list()
      : selectedRoute = null,
        selectedItem = null,
        show404 = false,
        id = null;

// Add getter for your routes
// Sample getter is:

  bool get isListPage => selectedItem == null && selectedRoute == null;
}
When defining your user-defined data type, you need to define your routes by creating their initializers and getters.
You can find the fully implemented configuration in this GitHub gist.
Add the router delegate
Next, you’ll implement the RouterDelegate, as shown below:
class ShopListRouterDelegate extends RouterDelegate<ShopListRouteConfig>
    with ChangeNotifier, PopNavigatorRouterDelegateMixin<ShopListRouteConfig> {
  @override
  final GlobalKey<NavigatorState> navigatorKey;

  ShopListRouterDelegate() : navigatorKey = GlobalKey<NavigatorState>();

 // Add state flags here
// Sample from Working with Pages

  @override
  ShopListRouteConfig get currentConfiguration {
// Configure routes based on app state here
   }

  @override
  Widget build(BuildContext context) {
    return Navigator(
      key: navigatorKey,
      pages: [
        // Add list of pages here
        // Sample from Working with Pages
      ],
      onPopPage: (route, result) {
        // Handle removal of pages here
      },
    );
  }

  @override
  Future<void> setNewRoutePath(ShopListRouteConfig configuration) async {
    // Update the app state to set a new route based on the configuration settings
  }

// Add methods that modify state here
// Sample from Working with Pages
}
The RouterDelegate needs you to add the navigatorKey and implement the build, currentConfiguration, and setNewRoutePath methods.
You can find the fully implemented delegate in this GitHub gist.
Add the route information parser
Next, implement the RouteInformationParser as follows:
class ShopListRouterInformationParser
    extends RouteInformationParser<ShopListRouteConfig> {
  @override
  Future<ShopListRouteConfig> parseRouteInformation(
      RouteInformation routeInformation) async {
// Handle the various routes here
  }

  @override
  RouteInformation? restoreRouteInformation(ShopListRouteConfig configuration) {
 // Restore routes here
}
The RouteInformationParser requires you to implement the parseRouteInformation and restoreRouteInformation methods.
You can find the fully implemented parser in this GitHub gist.
Update the app to use Router
Finally, you’ll update your app to use the Router widget, as shown below:
...
class _MyAppState extends State<MyApp> {
  ShopListRouterDelegate routerDelegate = ShopListRouterDelegate();
  ShopListRouterInformationParser routerInformationParser = ShopListRouterInformationParser();

  @override
  Widget build(BuildContext context) {
    return MaterialApp.router(
     ...
      routerDelegate: routerDelegate,
      routeInformationParser: routerInformationParser,
    );
  }
}
With that, you’ve successfully handled the navigation history stack in a declarative way. Your app now navigates to a target route on system request. You can test this for both mobile and web.
You should now understand how Flutter Navigator 2.0 works and how to use it!
Now, let’s learn how to use the Codemagic CI/CD tool to build and distribute the app.
Build and distribute the app with Codemagic
Codemagic provides you with a CI/CD tool for your Flutter apps. You can use it to build and publish your Flutter app for testing. If you’re not a user yet, sign up for free here.
To build your app on Codemagic, you need to:
-
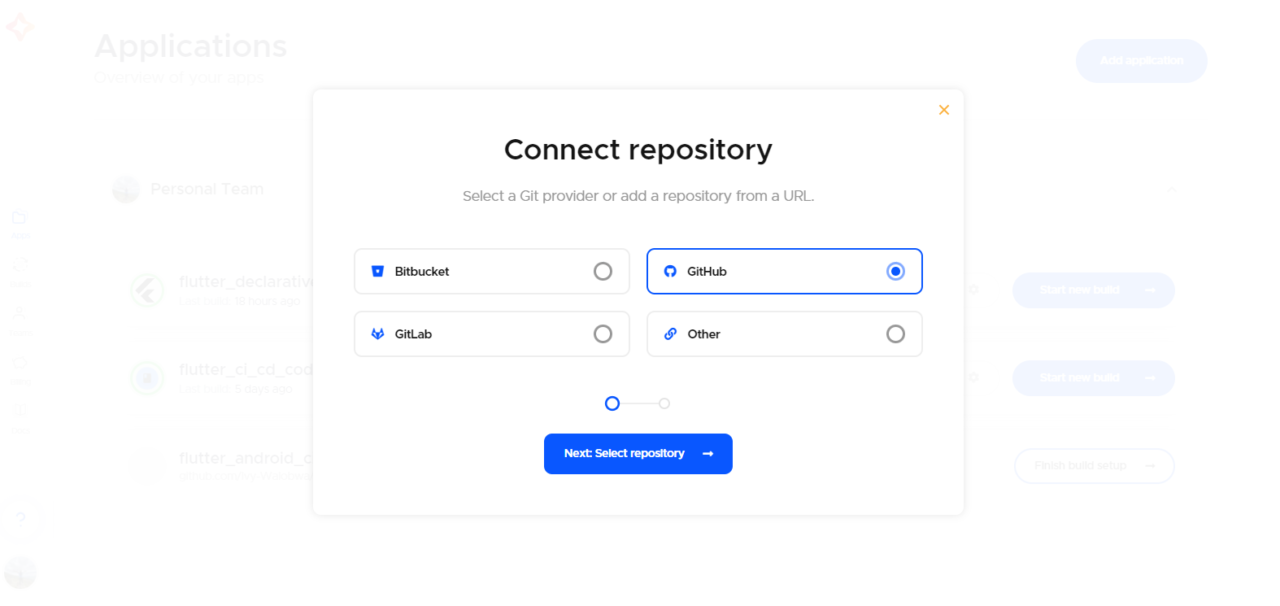
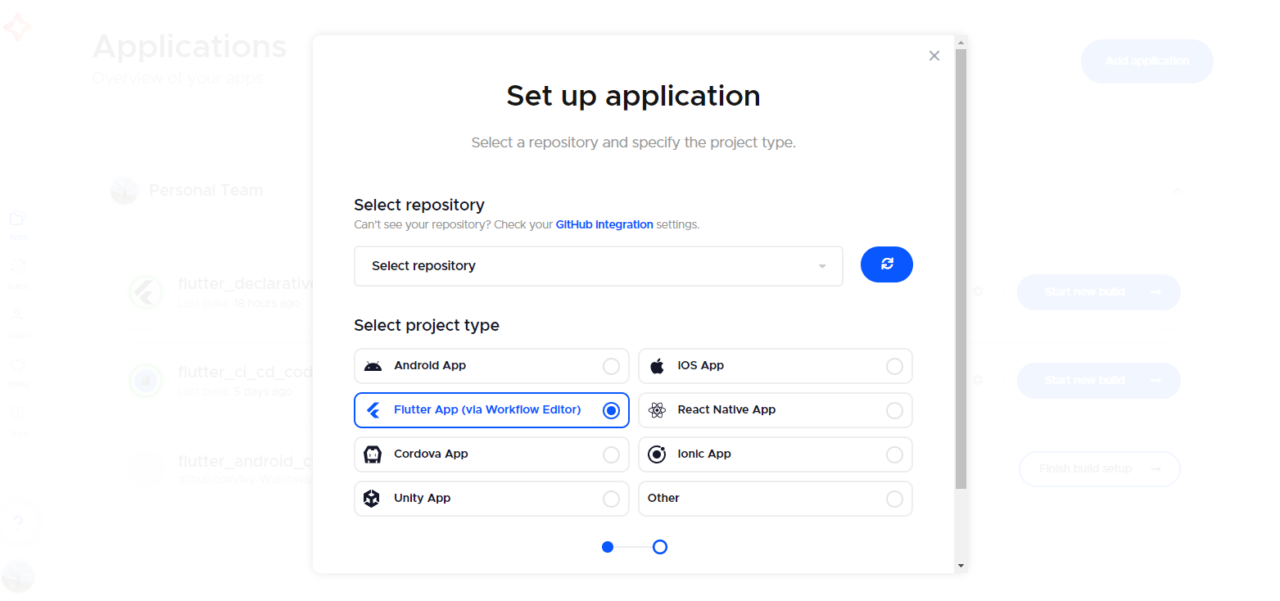
Create an application and connect a repository from your Git provider.
-
Select your project repository and type. In this case, the project type is Flutter App (via Workflow Editor).
-
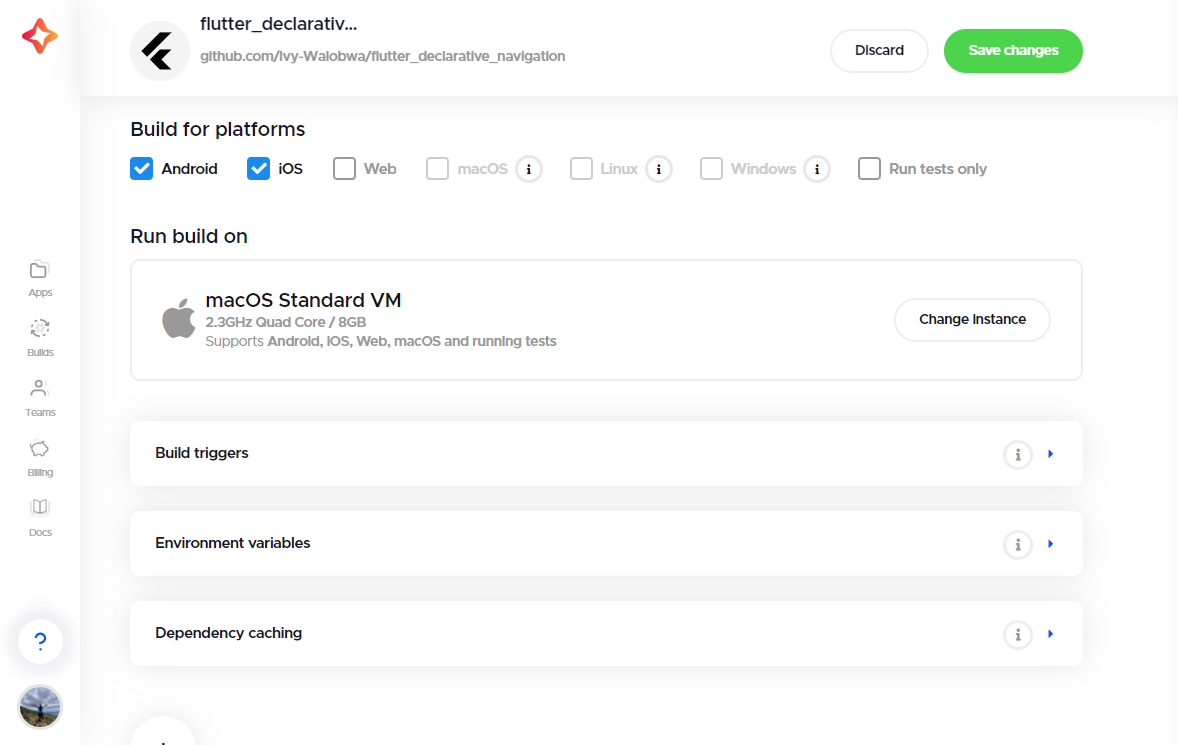
Click on “Finish build setup” for a first-time application. For an existing app, click on the settings icon. This will open the Workflow Editor page.
-
Select your build platform.
-
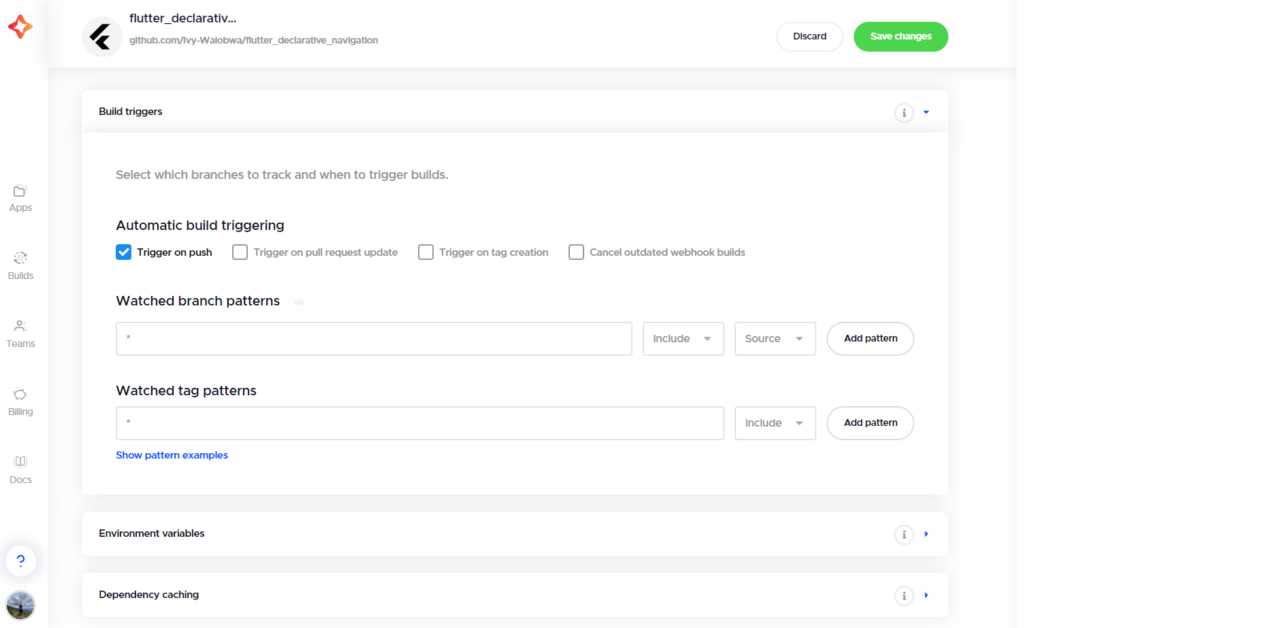
Expand the “Build triggers” section and select a build trigger.
-
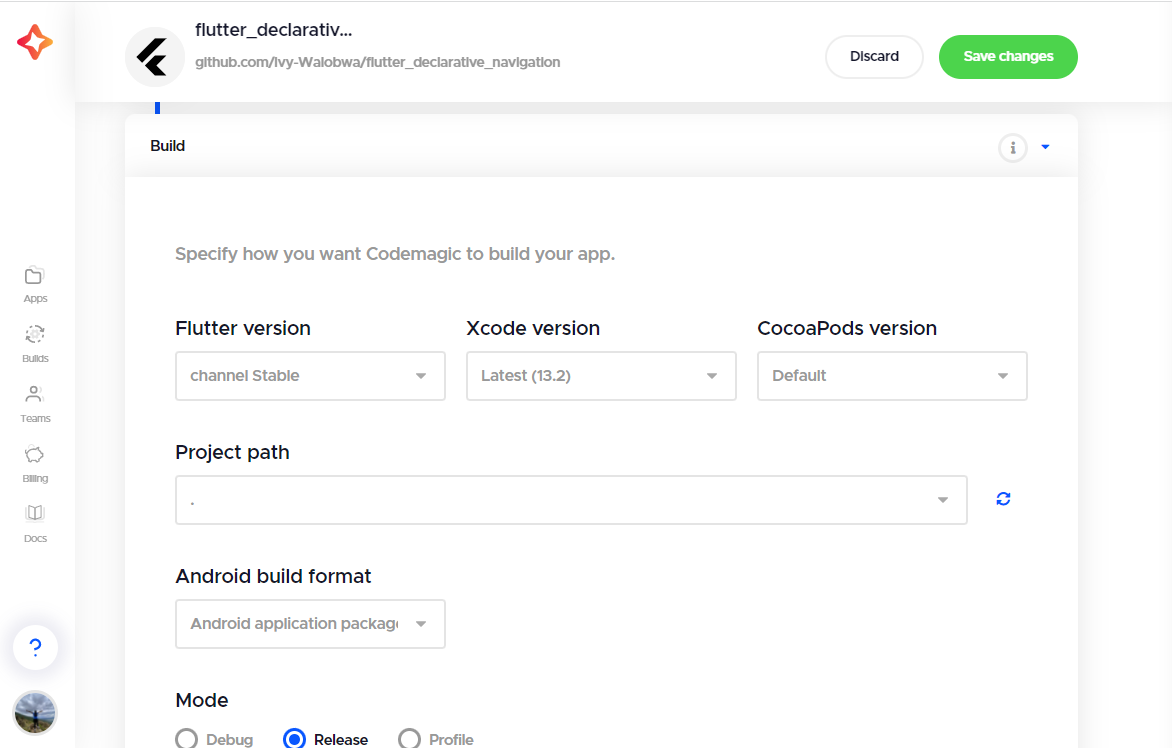
Expand the “Distribution” section, and select your app’s build format and mode.
-
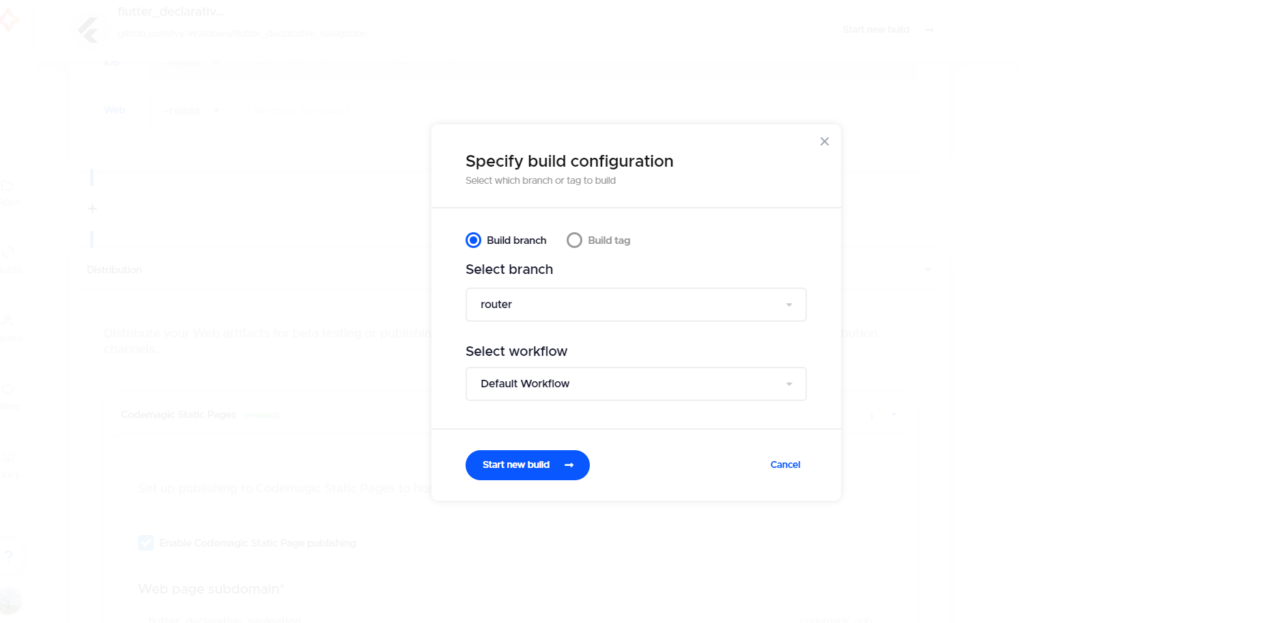
Save the changes and start a new build. Specify your build configurations.
-
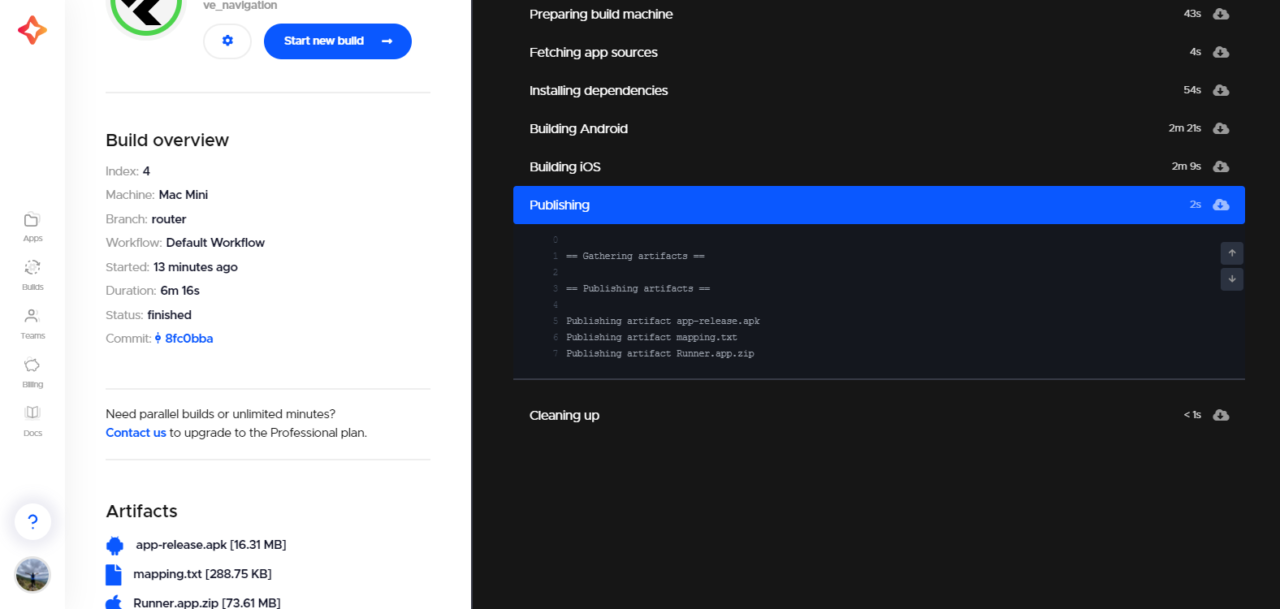
Start your build. Codemagic will add a green checkmark beside your app name if your app builds successfully. Downloadable artifacts are added as well.
-
Access your app via the artifacts and share it for testing.
Conclusion
In this article, you learned how to handle navigation in Flutter declaratively. You also learned how to build and release your Flutter app with Codemagic. All of the code in this article is available on GitHub. We hope you enjoyed this tutorial!

More flutter tutorials:
This article is written by Ivy Walobwa, a Flutter Developer and Technical Author. She’s passionate about communities and always willing to help facilitate students’ learning in the tech space. If she’s not building communities or creating content, she’s probably hiking on a random trail. Check out her profile.


Discussion about this post